Band Side Lying Leg Lift
How to Do the Band Side Lying Leg Extension - Glute Exercise | In-Depth Guide [VISUAL LEARNERS] Beginner
Proper Form, Common Mistakes, & Variations | Home Resistance Training
Related Posts
-
 Side Mini Band Monster WalksGlutes
 -
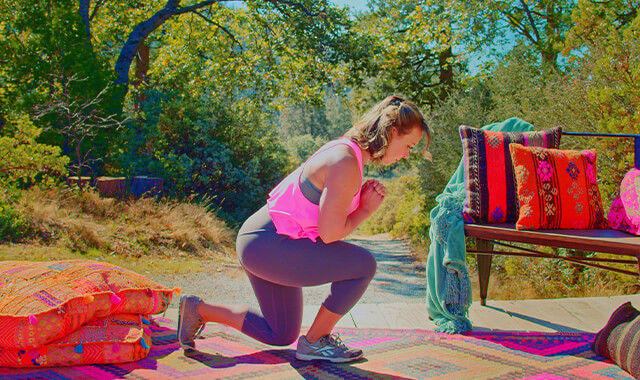
Donkey Kick to Fire Hydrant ExerciseGlutes
-
Single Leg Reach with SupportGlutes
-
Side-Lying Leg Lifts – Straight LegGlutes
-
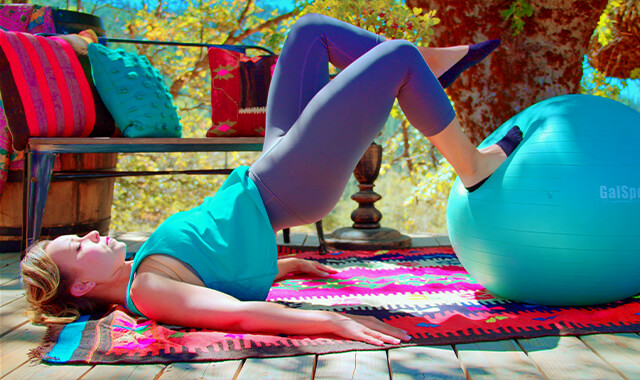
Single Leg Yoga Ball Glute BridgeGlutes
-
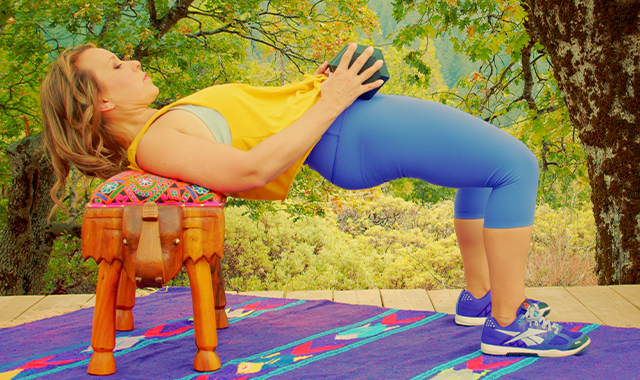
Dumbbell Bench Hip ThrustGlutes
-
Reverse Lunge – Glute Max FocusGlutes
-
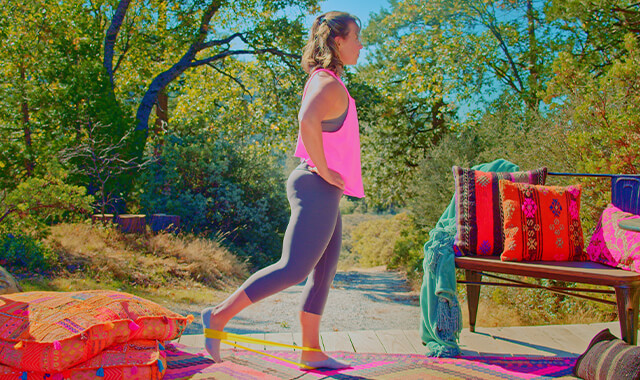
Mini Band Standing Glute KickbacksGlutes
WHAT DO YOU WANT TO SEE?
QUICK DEMO
QUICK DEMO
MUSCLES THIS WORKS
MUSCLES
MAIN MUSCLES WORKED IN Band Side Lying Leg Lifts
GLUTEUS MEDIUS & GLUTEUS MINIMUS
These are the smaller glute muscles on the sides of our hips.
OTHER MUSCLES WORKED:
- Internal and external obliques
- Quadratus lumborum
- Iliopsoas
- Rectus abdominis
- Erector spinae
- Multifidi
- Transverse abdominis
STARTING POINTERS
Starting Pointers
WHAT WE'RE DOING TODAY
ALL WE'RE DOING:
Lying on your side, you'll lift one leg a few inches into the air, then back down. Done.
This progression of the side lying leg lift movement adds a mini band for resistance. This not only increases the challenge of the lifting leg, but will also increase the work done by the bottom leg. Cool right? You'd think that anything just laying on the floor wouldn't be doing all that much, but that's not the case here. As the top leg lifts up, the band will pull up on the bottom leg into adduction. The hip abductors of the bottom leg will need to hold the leg down against the pull of the band.
The band is put around the thighs. Putting the band around the ankles pulls the lower leg down, causing the knee to be pulled sideways. This can strain the ligament on the side of the knee.
HOW TO DO THE EXERCISE
LOOKS
HOW Band Side Lying Leg Lifts SHAPE OUR BODY
Firm and toned waist, flat abdomen, toned outer hips (firm saddlebag region), toned inner thighs.
PROPER FORM
PROPER FORM: Band Side Lying Leg Lift
EQUIPMENT, SETS & REPS
EQUIPMENT
Mini Band
The standard mini-bands are about a 12" loop- which is actually too big for a lot of exercises to be effective (I mean, they'll do, but if you can....)
These are better & you'll be less annoyed:
10" loop mini-bands
9" loop mini-bands
9" loop mini-bands
If you buy 1 set, get the 9" size. I honestly recommend getting both. They're affordable & give you a lot of versatility to find the right stretch & resistance for a variety of exercises.
If these aren't currently for sale, you will need to search specifically for 9-inch or 10-inch mini bands. If you just search mini bands all you'll ever see are the 12" ones.
Mat, optional small folded towel or pillow for the head.
SUGGESTED STARTING WEIGHT FOR WOMEN:
Moderate strength resistance band
SETS & REPS:
2 sets of 8-10, must fatigue the muscles.
PACE:
Slow and controlled up and down.
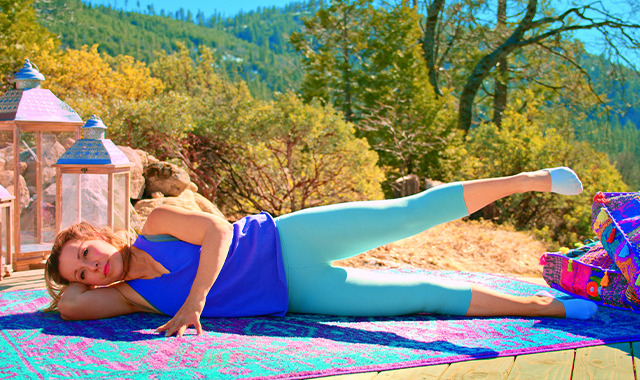
BODY POSITION
BODY POSITION FOR Band Side Lying Leg Lifts
BAND: The mini band should be small, or tie a band around your thighs when they are right together. This will add resistance throughout the whole movement. Place the band just above your knees.
BODY POSITION: Lying on your side. Neutral spine position - in this position your spine wants to curve (the middle section drops down to the floor). Keep your waist long, you should not allow the side of your waist that is on the bottom to drop. You should be able to slide a hand between your waist and the floor. This ensures that your spine is in neutral and not side bending.
Abdominals gently engaged. You should be able to draw a line down the side of your body through the earlobe, torso, hip, knees and foot.
LEGS: Straight down in line with your torso. Legs stacked. Toes are either pointed or flexed. You should feel energy down through your toes.
ARM: Bend your bottom arm, so you are lying on your shoulder, your elbow is pointing forward and your head is resting on your hand. Adjust the position as needed. You should be comfortable. The top arm: resting along your torso.
NECK: Neutral and relaxed, looking straight ahead. In line with the rest of your spine. You may want to use a small towel folded to support the neck or something under the head.
HOW TO DO
HOW TO DO Band Side Lying Leg Lifts
CUE: Try to isolate the movement to the hip joint.
Lift your top leg up a few inches so it is just higher than hip level. You should be able to feel where your hip movement ends and your pelvis begins to move. Only move your leg, your pelvis should not move.
Pause at the top and slowly lower it back down. Keep your top leg above your bottom leg, not touching your bottom leg in between reps. This will keep the tension on the band.
*If you are having difficulty feeling the correct muscles working: angle the entire torso forward - keep the torso together like a cylinder and slightly lean it forward; and rotate the leg so that the toes are angled down (this means the leg will rotate in the hip socket, internal rotation at the hip joint).
Repeat for the desired number of repetitions switch sides.
HOW TO SAFELY GET OUT OF THE EXERCISE
Lower your leg back to the other leg, slip the band off of your legs, bend your knees, and press up to sitting.


COMMON MISTAKES
COMMON MISTAKES
WHAT TO AVOID WITH Band Side Lying Leg Lifts
KEY TIP:
Guess what? Good news! Many avoids are the same for most movements. Once you learn the basics, there's really only a few extra avoids for each individual movement.
1. Avoid side bending waist
AVOID: Avoid letting the pelvis sag or move.
WHY NOT?
- This will pull your low back out of the neutral position.
- This indicates that you are moving from your spine - repetitive spinal movement under load (weight of leg) ) can cause soft tissue/joint irritation or damage over time; and defeats the purpose of the exercise.
WHAT TO DO:
- Maintain a neutral spine position to prevent injury or muscle strain.
- In a side-lying position, the sides of the torso should be equal - both lengthened.
- You can use your top hand to monitor the pelvis for movement.

2. Avoid rolling the hips and torso forward or back
AVOID: Avoid letting your shoulders or hips rotate forward or backward
WHY NOT?
- This results in using the quadriceps femoris to lift the leg instead of the gluteus medius and minimus.
WHAT TO DO:
- Roll your top hip forwards just a bit - this can help activate the gluteus medius and minimus during the leg lift.
- If you cannot feel the gluteal muscles working, it may help to point the toe down (a bit of internal rotation of the hip). This can help to prevent the muscles on the front of the thigh from helping.

3. Avoid bending at the hip
AVOID: Avoid bending at the hip or moving toe forward.
WHY NOT?
- This will end up using your hip flexor muscles more, rather than your hip muscles.
WHAT TO DO:
- Keep toe in line with the hip.
- No crease at the hip joint.

4. avoid losing energy down to toe
AVOID: Avoid losing the energy down your leg to the foot.
WHAT TO DO:
-
Energizing the leg helps with stability and will use more of the muscles of the hip and leg.

5. Avoid swinging the leg up
AVOID: Avoid swinging the leg up.
WHAT TO DO:
- The purpose of this exercise is to hold the torso still while controlling the movement of the leg.

6. Avoid lifting the leg too high
AVOID: Avoid lifting your leg too high. This is the most common error/cheat for this exercise.
WHY NOT?
- The goal of the exercise is to keep the pelvis still and isolate the movement to the hip joint while lifting the leg out into abduction.
- The most common error is moving the pelvis and low back to get the leg higher.
WHAT TO DO:
- Normal movement of the leg out to the side is halfway or less to being straight up.
- Lifting the leg higher is not the goal, the goal is to keep the pelvis still as you lift the leg.
- To use the correct muscles, the hip abductors must have a stable base to work off of.
- If the pelvis moves then the muscle cannot lift the leg, the quadratus lumborum and gravity (collapsing the spine into sidebending) would be causing the leg to rise up.
- The targeted muscles would not be working, and the spine would be moving. So no benefit, only risk.
- The muscles will be challenged the most when the leg is parallel to the floor, lifitng higher is easier.

VARIATIONS
VARIATIONS
VARIATIONS OF Resistance Band Side Lying Leg Lifts
combine pointed and flex foot
Point Or Flex Foot
Flex (dorsiflexion) the ankle so the toes are lifted up towards your head when you lift the top leg.
Point the toes down (plantar flexion) as you lower the leg back down.
You can repeat for 5 repetitions and reverse the pattern: point and lift and flex and lower.
This will engage the muscles that cross the ankle and knee joints.
When the toes are pointed down, the calf muscles are more active, when the foot is flexed - toes lifted up, the front shin muscles are more active.


arm placement
Arm Position Options For Side Lying Leg Lifts
Move the top arm on top of the torso (lying the upper arm on the side of the torso).
You can also hold the top arm up in the air - this challenges the stability more - core muscles will work harder.
The top arm can be held in any position of comfort.
Just lifting the arm off of the body will make you less stable and your core muscles will need to work harder.

WHAT WE'RE DOING TODAY
WHAT & WHY
BENEFITS OF TRAINING THE GLUTES
WHAT
This group of hip exercises is done lying down on your side and lifting the leg up against gravity. No equipment is needed because the weight of your leg is the resistance the muscles will be working against. The main muscles used are two of the gluteal muscles - the gluteus medius and minimus, these are the hip abductors - muscles that move the leg out to the side, away from the midline of the body. These muscles will lift the leg up when you hold your pelvis still.
This movement can be a bit tricky to get right, but when you do, you can feel the muscle work after just a few repetitions. Side lying leg lifts are probably one of the most common exercises that are done wrong.
You may have seen people in classes lifting their leg up so high that the foot points to the ceiling. The movement of the hip joint taking the leg out to the side is 30 - 50 degrees, which means that if you are lying on your side, most people will be able to lift the leg less than halfway between parallel to the floor and pointing straight up in the air - that is normal motion.
When the leg lifts higher than halfway* - that means the movement is coming from your pelvis and low back, or it means that you have rolled back or rotated the leg, and are actually lifting the leg to the front.
This will not work the muscles on the side of the hip - do not make the mistake of thinking that higher is better. In fact, the muscles will be working the most when the leg is parallel to the floor, lifting the leg higher will be easier.
*Some people do have very lax ligaments and excessive movement in their joints.
Even though the side lying hip exercises focus on moving the leg, they are working the muscles that keep the pelvis stable. The focus of this exercise will be on holding the pelvis and low back very still and in a neutral position as you lift the leg. The series of leg movements work the outside, front, back, and inside of the hips - all of the muscles that help move and stabilize the hip joints. The exercise strengthens the lower abdominal and pelvic floor muscles. It is frequently used to treat and prevent pain in the sacral joints (back of pelvis) and low back.
WHY BOTHER DOING IT?
WHY
WHY DO WE EVEN CARE?
IMPROVE TIGHT HIP ISSUES
The hip is the second least stable joint, a large ball and socket joint, that is designed for movement. This is in contrast to the very stable low back and pelvis, which are designed for support and stability, to carry the torso upright as the legs move the body through space. Unfortunately, it is pretty common to have tight hips, leading to moving less through the hips and more through the back. This is probably due to our sedentary lifestyle, we don’t need to squat, climb, run, and walk on uneven surfaces as much. The days of having to squat to go to the bathroom or to eat are gone.
STRENGTHEN OUR OUTER HIP MUSCLES
When the hip does not move enough, the muscles of the outer hip can get weaker. When the hips are weak and stiff it changes the way the leg is used. The knee can begin to collapse inward, causing knee pain, pronation (ankle rolling in), bunions, hip pain and back pain.
Strengthening the hip muscles and learning to move the leg in the hip socket while keeping the back and pelvis still can improve your balance, stability, posture, and can prevent back, hip, knee, ankle, and foot problems. Weak hip muscles have been associated with increased fall risk and poor balance.
LEARN HOW TO MOVE THE LEG & NOT THE PELVIS
This leg series is unique in that it targets all of the muscles surrounding the hip joint. The exercise is used to teach awareness of the concept of moving the hip while keeping the pelvis and low back still. The movements are carried out slowly and are very deliberate - teaching the body to control the movement.
The series version also moves the hip in all directions which trains the core muscles to stabilize against changing movement of the leg in all directions. This is consistent with how we use our bodies, as we move around throughout the day we are changing directions, pivoting, bending. The core muscles must be able to stabilize the spine during these movements in order to prevent injury or long-term damage due to wear and tear on the joints.
EVERYDAY LIFE
EVERYDAY LIFE &
MUSCLE FUNCTION
HOW WE USE OUR Glutes MUSCLES IN EVERYDAY LIFE
1. MOVES THE LEG OUT TO THE SIDE WHEN THE PELVIS IS HELD STILL
- Stepping sideways
- Lifting the leg to the side to get into a car
2. IN STANDING, THE MAIN FUNCTION OF THE HIP ABDUCTORS IS TO HOLD THE PELVIS HORIZONTAL (PREVENT IT FROM SAGGING) DURING GAIT/MOVEMENT
- Walking
- Running
- Balance and stability when walking or standing
- Weak hip muscles have been associated with increased risk for falls and poor balance
- Especially on uneven surfaces, or across a slope
- Climbing stairs
3. THE HIP ABDUCTION EXERCISES FOCUS ON STRAIGHT ABDUCTION BUT IT IS IMPORTANT TO NOTE:
- The gluteus medius can contribute to flexion and internal rotation (anterior fibers) and extension and external rotation (posterior fibers) [this is similar to the actions of the different parts of the deltoid muscle]
- The gluteus minimus can help with flexion and internal rotation
HOW TO FEEL WHAT MUSCLE IS WORKING
How to Feel What Muscle is Working
This can be a tricky muscle group to feel because most of the gluteus medius is underneath the large gluteus maximus, and the gluteus minimus is underneath the gluteus medius.
Lying on your side with the legs stacked and straight down in line with your torso. Feel the top of your pelvis with the palm of your hand on the side of the hip. Slide the hand back so the palm of the hand is about where it would be if you were putting your hand in your back pocket. Keep your pelvis still and lift your top leg up.
You should feel the muscles deep, around the back side of the hip joint. Try to keep the gluteus maximus relaxed and soft.
SCIENCY STUFF
SCIENCY STUFF
SPIFFILICIOUS FACTS ABOUT MUSCLES & MOVES
The muscles that surround the hip joint work together in a coordinated pattern of muscle activation to stabilize and move the leg in the socket. The muscle and joint function and structure are very similar to the shoulder joint. The pelvic bone is analogous to the shoulder blade and the small deep muscles are analogous to the rotator cuff muscles of the shoulder. Establishing good control over the muscles of the hip joint will prevent injury and degenerative changes over time.
The function of the core muscles is to stabilize the torso against forces: rotation, flexion (forward bending) and lateral flexion (side bending), movement of the torso, and compression of the abdomen (pulling the belly button in towards the spine). They can help in moving the pelvis and ribs.
The gluteus medius and minimus muscles move the hip out to the side, away from the body (abduction). The two muscles lie on the side of the pelvis, slightly towards the back. The gluteus medius muscle originates from the top of the pelvis, most of the bulk of the muscle is under the gluteus maximus (towards the side of the pelvis). The gluteus minimus lies deep to the gluteus medius. The two muscles attach to the trochanter (bony prominence) on the femur (thigh bone). If you slide your hand down the side of your pelvis to the top of the thigh you should be able to feel a round bony protrusion, this is the trochanter - where the muscles attach. When the pelvis is held still and the muscles contract, the leg will lift out to the side. When the leg is held still (as in weight bearing - standing on one leg) the pelvis on the other side will sag down. This is the same as the support leg adducting, or moving towards midline. The gluteus medius and minimis will contract to abduct the leg to straighten the pelvis.
ALL MUSCLES & WHEN
ALL MUSCLES WORKING & WHEN DURING THE Band Side Lying Leg Lift
The core muscles (internal and external obliques, quadratus lumborum, iliopsoas, rectus abdominis, erector spinae, multifidi, transverse abdominis) are active to maintain a stable spine and pelvis. The core muscles are working to keep the trunk and pelvis in good alignment as you lift your leg.
Active/engaged core muscles do not mean: gripping, stiff, rigid, tight muscles. It is a gentle stabilization, the muscle activity will be constantly changing to stabilize against the movement, this means that while some of the muscles are contracting, others are relaxing - if you hold your torso rigid and guarded the muscles will not be able to relax when they need to. You should feel controlled but relaxed, you should be able to breathe comfortably - you should not be holding your breath. The diaphragm helps to stabilize the core and the pelvic floor forms the bottom of the core. Thinking of gently lifting the pelvic floor will help to stabilize the pelvis and will strengthen the pelvic floor muscles.
The gluteus medius and minimus are working concentrically to lift the leg and eccentrically to lower the leg. When the top leg is lifted, the band will pull on the bottom leg. The gluteus medius and minimis will have to work a little bit harder to hold the bottom leg down and stable.
PIN IT FOR LATER!


