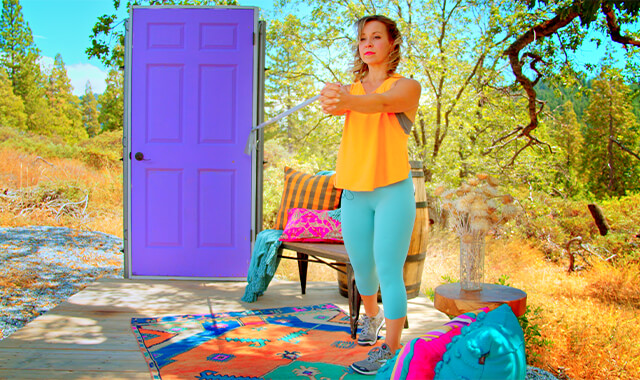
Standing Band wood chopper
How to Do the Band Wood Chopper - Standing Obliques Exercise | In-Depth Guide [VISUAL LEARNERS] Beginner
Proper Form, Common Mistakes, Variations + Easier & Harder | Home Resistance Training
WHAT DO YOU WANT TO SEE?
QUICK DEMO
QUICK DEMO
MUSCLES THIS WORKS
MUSCLES
MAIN MUSCLES WORKED IN BAND WOOD CHOPPERS
SIDE CORE: Obliques, Quadratus Lumborum, Transverse Abdominis
OTHER MUSCLES WORKED:
- Multifidi
- Rectus Abdominis
- Erector Spinae
WHAT WE'RE DOING TODAY
WHAT & WHY
BENEFITS OF TRAINING THE SIDES OF YOUR CORE
WHAT
WHAT WE'RE DOING TODAY
ALL WE'RE DOING:
Pretend you're chopping wood. Except with 1 arm. And don't bend over. So basically, it's not really like we're chopping wood.
Can you imagine being so cool that you chould chop firewood with 1 hand? Ha!
A strong core is essential for daily activities and the wood chop exercise is a great way to work your core muscles. This movement also challenges your balance and coordination.
WOOD CHOPPERS ARE USED TO TRAIN THE CORE MUSCLES TO HOLD THE SPINE
Wood choppers are used to train the core muscles to hold the spine in a neutral position.
So no bending forward, backward, sideways, or rotating, during movements of the arms.
This is one of those movements that seems simple, which can make us think it's not worth doing. But let me tell ya - Wood choppers are a GREAT core exercise.
Holding the ends of a resistance band and moving the arm diagonally across the body puts a rotational force on the spine - meaning the band will be pulling the hand back towards the band anchor as the hand is pulling the band down across the body. The core muscles will have to work to keep the torso still - no rotation or side bending.
WHY BOTHER DOING IT?
WHY
WHY DO WE EVEN CARE?
STRENGTHENS MUSCLES ON THE SIDES OF OUR CORE
But really, who cares? What's the big deal? Why do we want to strengthen the sides of our core?
The main function of the spine is to keep us upright and to provide a stable base of support for the arms and legs to work off of. I did not used to know this. And once I did, I still didn't really get what that meant. A stable base of support? This was still a bit like reading greek to me. Or really I should say like reading geek. 😉 Here's what I learned:
The basic idea is that the core should have the ability to not move too much, while the arms and legs go wild. This is what allows us to do things in life capably without hurting ourselves.
All of the core muscles need to work together to keep the spine in a neutral position, but this movement really focuses on the muscles of the SIDES of our core. So the obliques, quadratus lumborum, and transverse abdominis muscles to prevent side-bending and rotating.
It's not that we're trying to avoid ever bending at our sides or rotating our spine, we'll certainly do those things sometimes, but we should both be able to do this in a controlled way, or resist it completely, depending on what the activity or thing we're trying to do is.
BUT, we often aren't very capable of this because of our modern lifestyle. Doing this exercise will really help train these side core muscles to be still and stable.
SO. THIS INCREASES OUR ABILITY TO MOVE OUR ARMS WITHOUT GETTING HURT
What this means is that to strengthen our core, we want to do exercises that do exactly that - where we work to keep the torso STILL, while moving our arms and/or legs. This helps us develop the strength and stability to do that very same thing in everyday life.
THE CASE OF THE DOG FOOD FROM COSTCO
When you reach to get a heavy bag of Costco dog food out of the cart, and then turn to put it into the trunk of your car, you want you arms to move without your spine just going with it uncontrollably - falling over/totally bending with the weight of the dog food. That's a spinal owie waiting to happen that a bandaid ain't gonna help with.
THE CASE OF THE BOX OF FALL DECOR FROM THE BACK OF YOUR CLOSET
Or if you are trying to pull a heavy box of fall decor out from the back of a deep shelf, you want your arms to reach forward and then pull the box backwards towards your body, without your torso getting pulled into the closet instead. You want your torso to be fairly still and stable while your arms do that movement or you'll be experiencing a mishap and/or the box won't be coming out of the back of the closet anytime soon and you'll be stuck with spring decor all autumn.
Doing this sort of core exercise is going to make you feel a lot more capable and safe with these sorts of things.
HELPS THE CONNECTION BETWEEN OUR BRAIN & MUSCLES.
You've heard of the mind-muscle connection right?
Wood choppers are part of a group of exercises that use diagonal movement patterns to reinforce the connection between the brain and the muscles.
This is especially important for working the core muscles. The core muscles need to work at a low level for nearly the entire day - to keep us upright.
The muscles need to be working in coordination, making continuous changes in how much force they are producing in order to control the movement of the spine. Whenever we move our arms or legs the core muscles need to work together to keep us balanced and to protect the spine from injury.
If the core muscles are not properly trained, the spine will move too much during lifting heavy objects and/or twist our bodies quickly or repetitively. This can cause an immediate injury or more commonly, small amounts of damage (called microtrauma) that add up over time. It is not uncommon to hear about people who “threw their backs out” bending over to lift up a small item like a sock. (Carol the physical therapist wrote that. True story Carol: my husband who was only 40 at the time, threw his back out at least twice simply turning in the shower).
This is a case of the straw that broke the camel’s back. Training your body to stabilize your spine will help to prevent damage to spine and keep your spine healthy.
WORKS OUR ARM MUSCLES TOO
The Wood choppers exercise will also work the muscles of the arms, not only to stabilize the wrists and elbows but to pull the arm down diagonally and across the body.
So we are getting lots of bang for our buck here, even though the movement seems small. Core & arms goin' on here.
EVERYDAY LIFE
EVERYDAY LIFE &
MUSCLE FUNCTION
HOW WE USE OUR SIDE CORE MUSCLES IN EVERYDAY LIFE
1. INTERNAL AND EXTERNAL OBLIQUES
These are muscles on the front sides of your torso.
- Rotation of the torso - both to achieve rotation and to resist rotation
- Pulling the belly button closer to the spine (called compression of the abdomen)
- Forward bending of our spine (called flexion)
- Side bending of our torso (called lateral flexion)
- Also can help in moving the pelvis and ribs
2. QUADRATUS LUMBORUM (QL for short)
This is a muscle on the back sides of your lower torso.
- Side bending (lateral flexion) of the spine.
3. THE OBLIQUES, QUADRATUS LUMBORUM AND TRANSVERSE ABDOMINIS WORK TOGETHER TO
- Maintain upright posture and spinal stabilization (good core strength)
- Prevents injury to the joints of the spine; this is especially the case when lifting and moving heavy objects.
- Rotation and sidebending
- Golf
- Tennis
- Unloading dishes out of a dishwasher
- Clothes out of the dryer
- Pulling our seat belt across.
STARTING POINTERS
Starting Pointers
This is the standard version of the wood chopper. The goal of the exercise is to keep your torso as still as possible while you pull the band diagonally down across the front of your body.
This movement is a foundational exercise - it helps to train the muscles of the core for both everyday life and also for weight training movements. Having the ability to keep your spine neutral while you are moving heavy loads will improve the performance and endurance of the muscles of the core.
Mastering this exercise will allow you to lift more weight with less risk for injury.
HOW TO FEEL WHAT MUSCLE IS WORKING
How to Feel What Muscle is Working
Quadratus Lumborum: Put your hands on your low back, on either side of your spine. If you are sitting, lift one Sitz bone up without leaning or shifting your weight. You should be able to feel the quadratus lumborum activate under your hand on the side that you are lifting.
Obliques: This muscle can be harder to feel since it is deeper. Put your hand on the front of your torso, off to one side, between your ribs and your pelvis. Pull the ribs down toward the opposite side. You should be able to feel the muscle under your hands. You will only be able to feel the external obliques. The internal obliques lie under the external obliques.
Transverse abdominis: This is a challenging muscle to feel with your hand. It is an important muscle to gain control over. Lying on your back with knees bent, slip your hand under your low back. Imagine someone dropping a small soft ball on your stomach. You should be able to pull your belly button in to engage the muscles of the abdomen gently without changing the position of your low back.
HOW TO DO THE EXERCISE
LOOKS
HOW BANDED WOOD CHOPPERS SHAPE OUR BODY
The exercise will tone the waist and help achieve a flat abdomen. Personal note from me Rayzel here - I know they say abs are really made in the kitchen, but I have noticed a very distinct "smallifying" of my waist (like my new word?) since regularly doing core exercises that specifically work the SIDES of my core, like this one.
PROPER FORM
PROPER FORM: BAND WOOD CHOPPERS
EQUIPMENT, SETS & REPS
EQUIPMENT
Main set (3: Light/Med/Heavy)
X-Heavy Band (I recommend getting this too if you plan to use resistance bands frequently).
SUGGESTED STARTING WEIGHT FOR WOMEN:
Light to moderate resistance bands
SETS & REPS:
10-15 reps on each side
PACE:
Controlled movement - these muscles are postural endurance muscles - they need to work at a low level for long periods of time.
WAYS TO ADJUST RESISTANCE FOR BANDS:
Shorten or lengthen the band (standing closer or further from the band anchor).
Double the band.
BODY POSITION
BODY POSITION FOR THE BAND WOOD CHOPPER
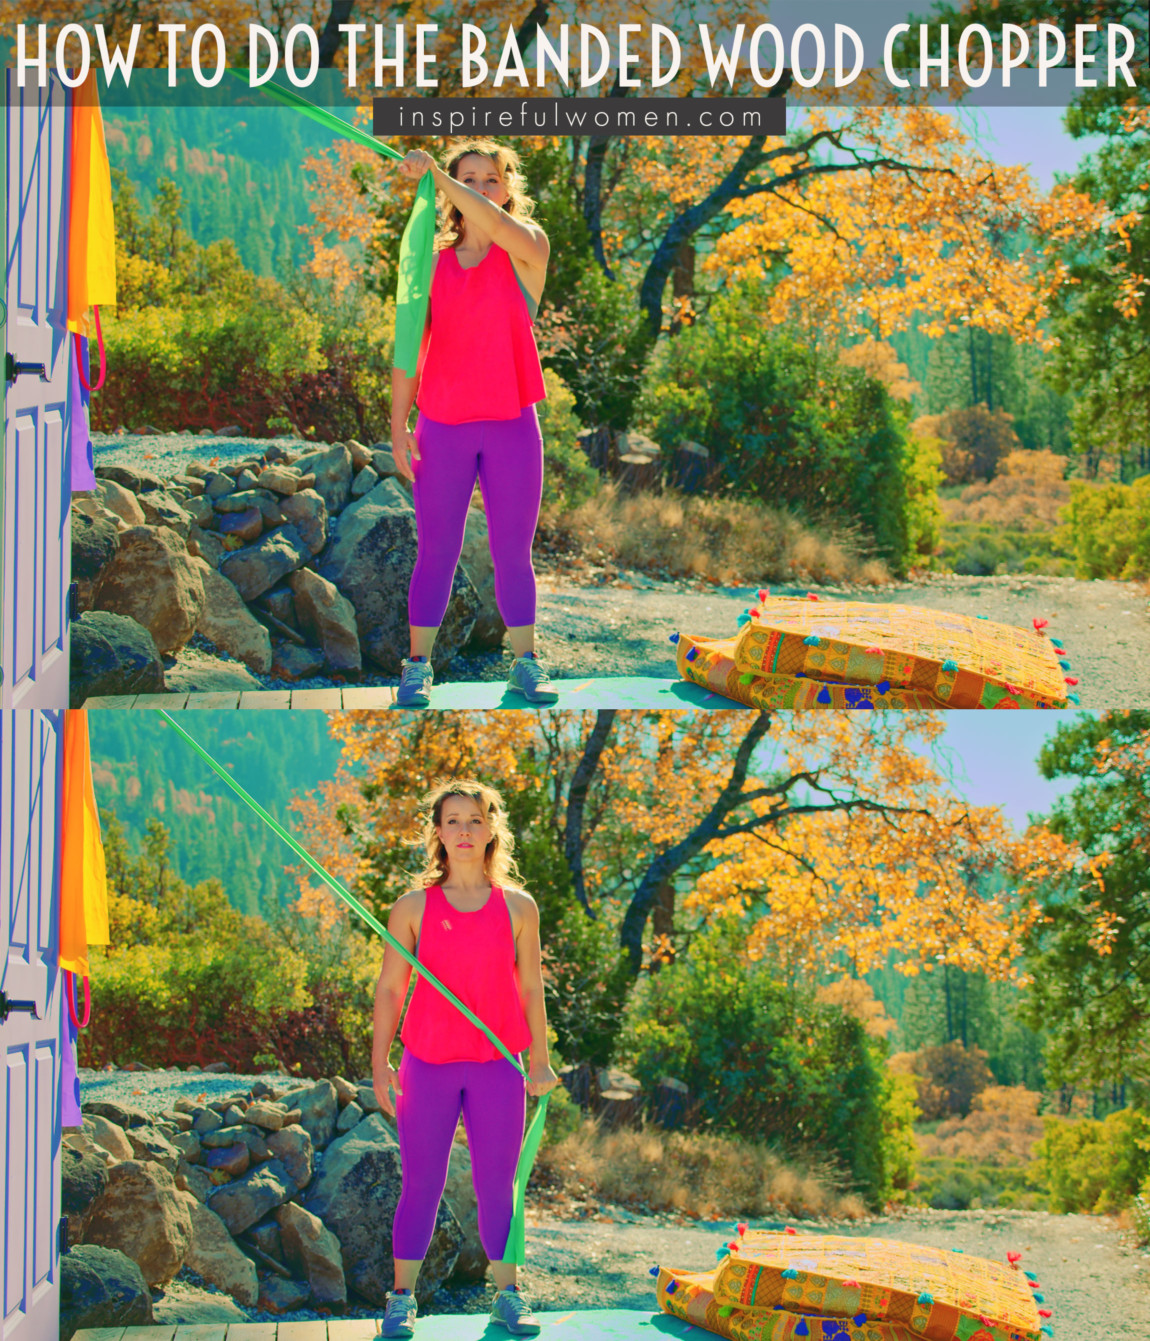
NOTE! While I think most movements will be better learned through watching the video or looking at pics, this one is especially hard to learn through the written word, so please watch the vid! 🙂
BAND PLACEMENT: Band is anchored above head level.
BODY STANCE: Standing sideways to the band anchor. Stand so that the band is in line with the shoulders or a few inches in front of your shoulder (depending on strength of band and length of arms. The goal is a diagonal pattern pull, where you pull from out in front of you, down the other side to your hip.
Neutral spine position, knees slightly bent, sternum lifted, shoulder blades in and down the back, space between the top of the shoulders and the ear lobe. Chest wide - this is important to avoid rounding the shoulders in.
FEET: Feet shoulder width apart, toes pointed forward.
ARM: Working arm and elbow are relatively straight. The starting position is: The arm is lifted out to the front of you (called flexion of shoulder), pulled towards the midline of the body kind of in-line with the chest (called adduction of shoulder), and the soft side of you forearm is turned up to the sky (called external rotation of shoulder joint) This part is optional - see hand grip options next. This is really hard to write so please just look at the video & pics!
HAND/GRIP: Options are palm facing up, palm facing down or palm facing sideways. Whatever feels more comfortable to you. You can wrap the band to help support the wrist.
NECK: Neutral and relaxed, chin parallel to the ground, looking straight ahead, not turned towards band anchor.
HOW TO DO
HOW TO DO BAND WOOD CHOPPERS
CUE: Focus on using the abdominal muscles keeping the shoulders and hips squared to the front of you and in one plane. All of the movement is coming from the arm.
Keeping the arm relatively straight during the movement (a soft elbow), pull the band down, diagonally across the body towards the side of the hip (on the side of the working arm). Pull the shoulder blade down as you pull the arm down for each rep.
For science geeks what's going on here when you do this is: the arm moves to extension, abduction, and internal rotation (the abduction and extension are minimal).
Reverse the movement with control to return to the starting position. Begin the next rep.
HOW TO SAFELY GET OUT OF THE EXERCISE
From the beginning position, release the band.
COMMON MISTAKES
COMMON MISTAKES
WHAT TO AVOID WITH THE BAND WOOD CHOPPER
KEY TIP:
Guess what? Good news! Many avoids are the same for most movements. Once you learn the basics, there's really only a few extra avoids for each individual movement.
Woodchopper Mistakes Note:
You will notice that almost all these things to avoid are about keeping the torso totally still, not moving, while only the arm moves. That's the basic gist of most of these!
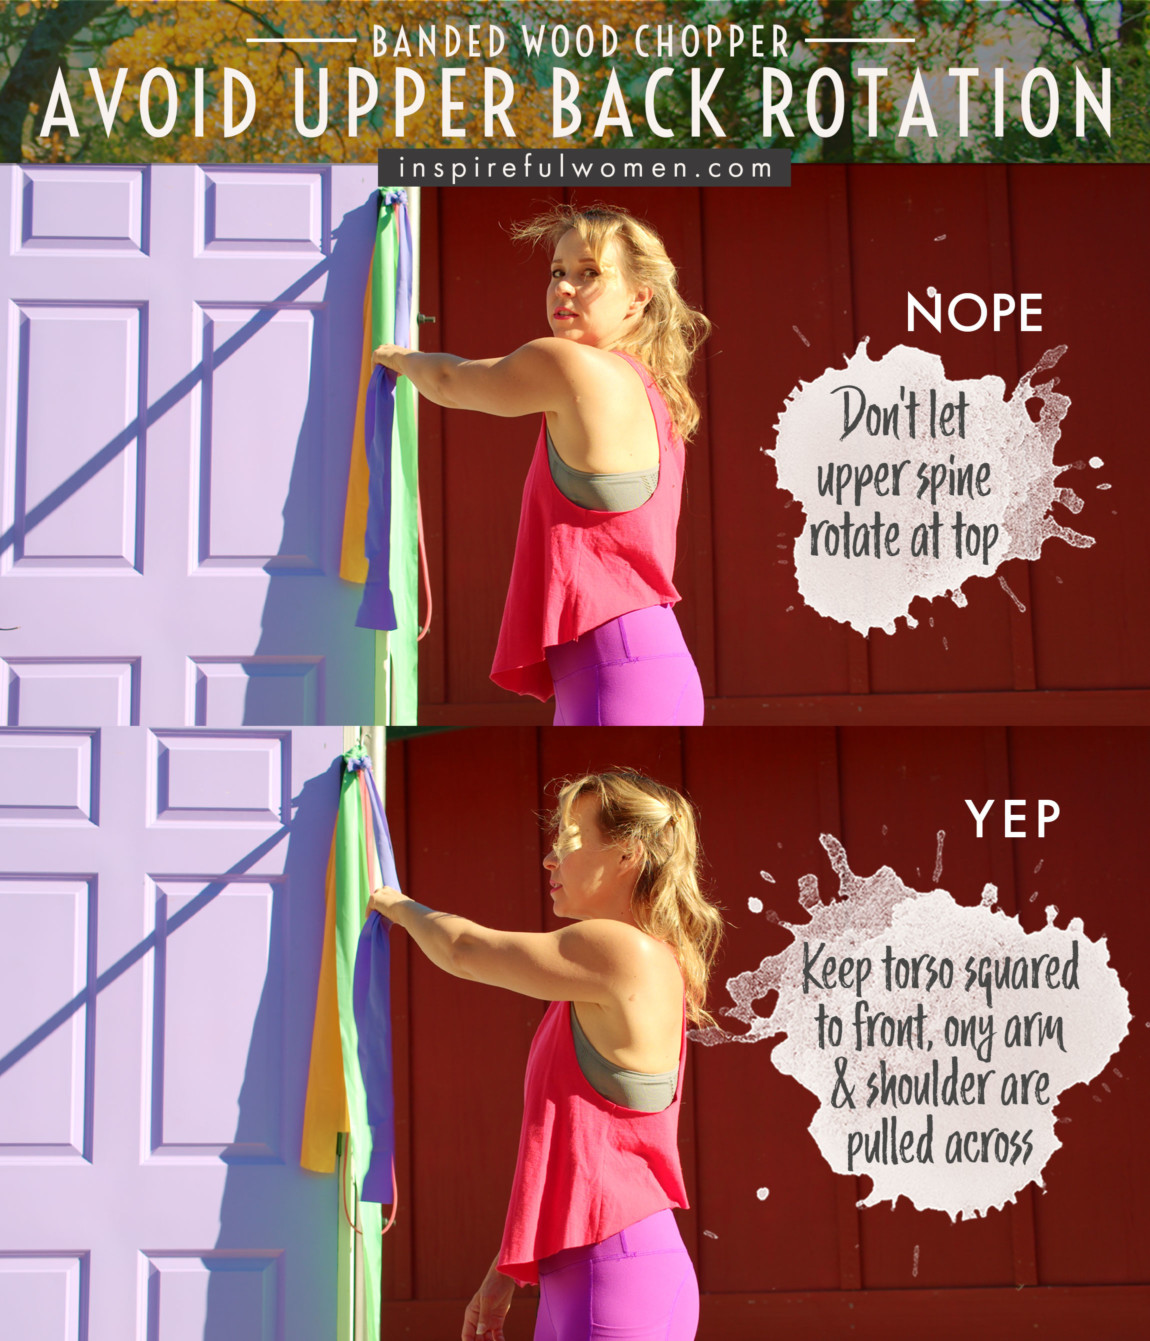
1. Avoid letting your spine rotate with the arm
AVOID: Avoid letting your upper back/spine rotate with the pull of the band as the arm goes back up.
WHY NOT?
- Repetitive spinal rotation under load (resistance of band) can cause soft tissue/joint irritation or damage over time.
WHAT TO DO:
- Your chest should be squared to the front, with no rounding or rotation of the upper back.
- The shoulder blades do rotate during the movement but the thoracic spine and ribcage do not.
- The hips stay squared to the front.
2. Avoid letting your lumbar spine rotate
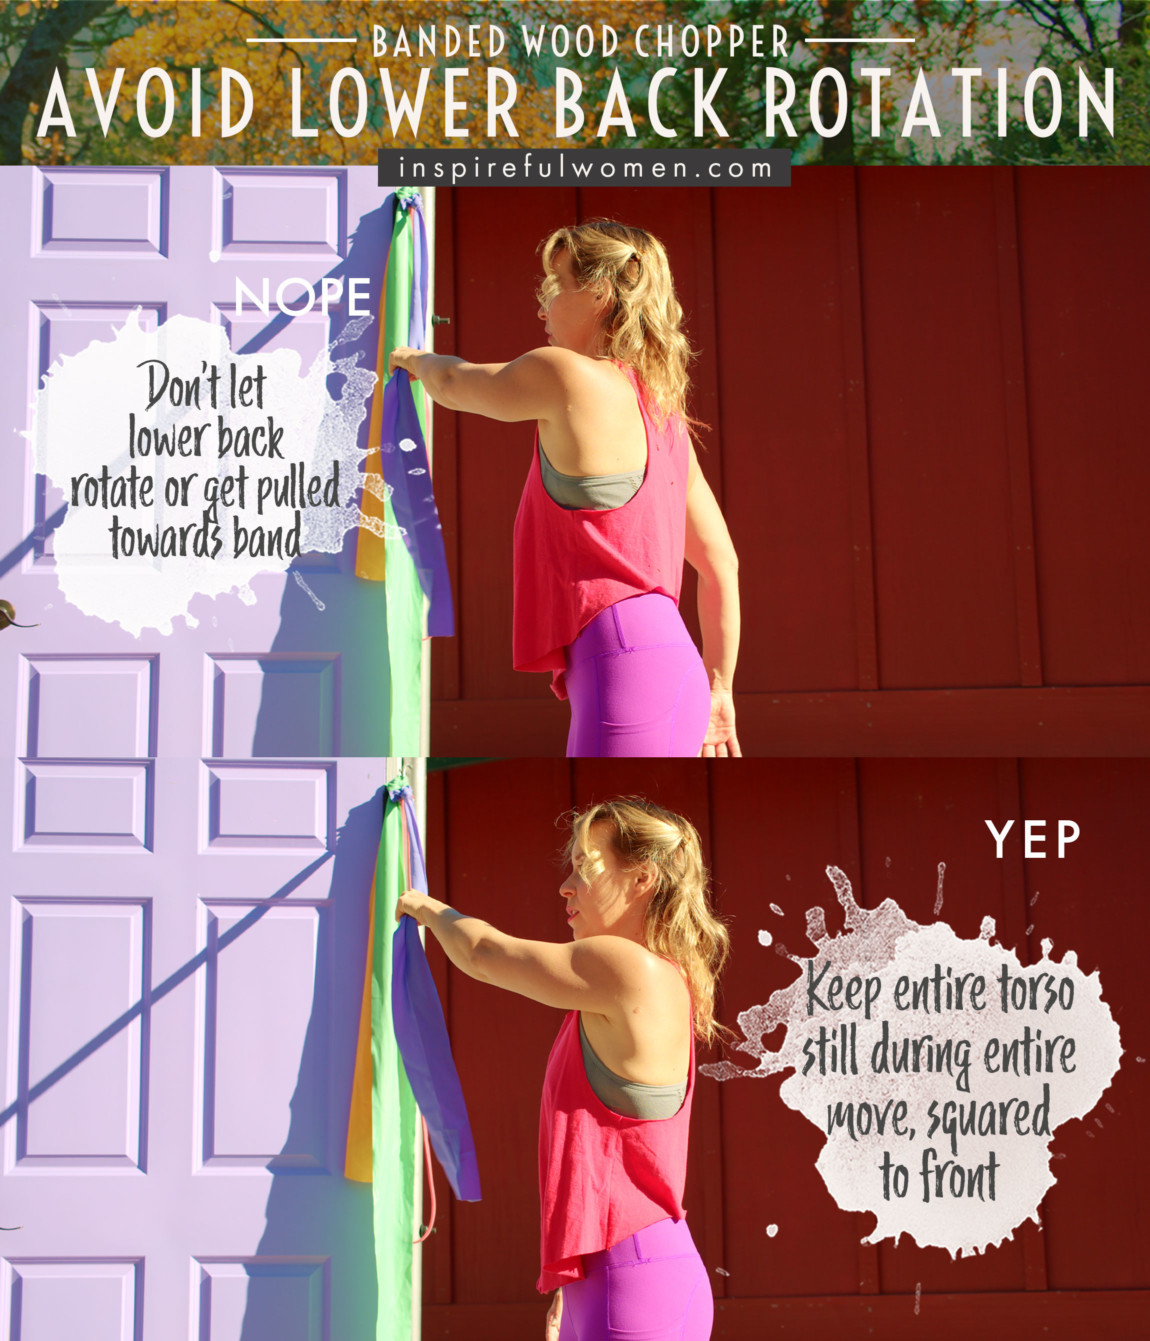
AVOID: Avoid letting your lower back rotate with the pull of the band as the arm goes back up (are we seeing a theme here? Keep the spine still folks)
WHY NOT?
- Repetitive spinal rotation under load (resistance of band) can cause soft tissue/joint irritation or damage over time.
WHAT TO DO:
- For this exercise, the hips stay square to the front.
3. Avoid moving through the wrists
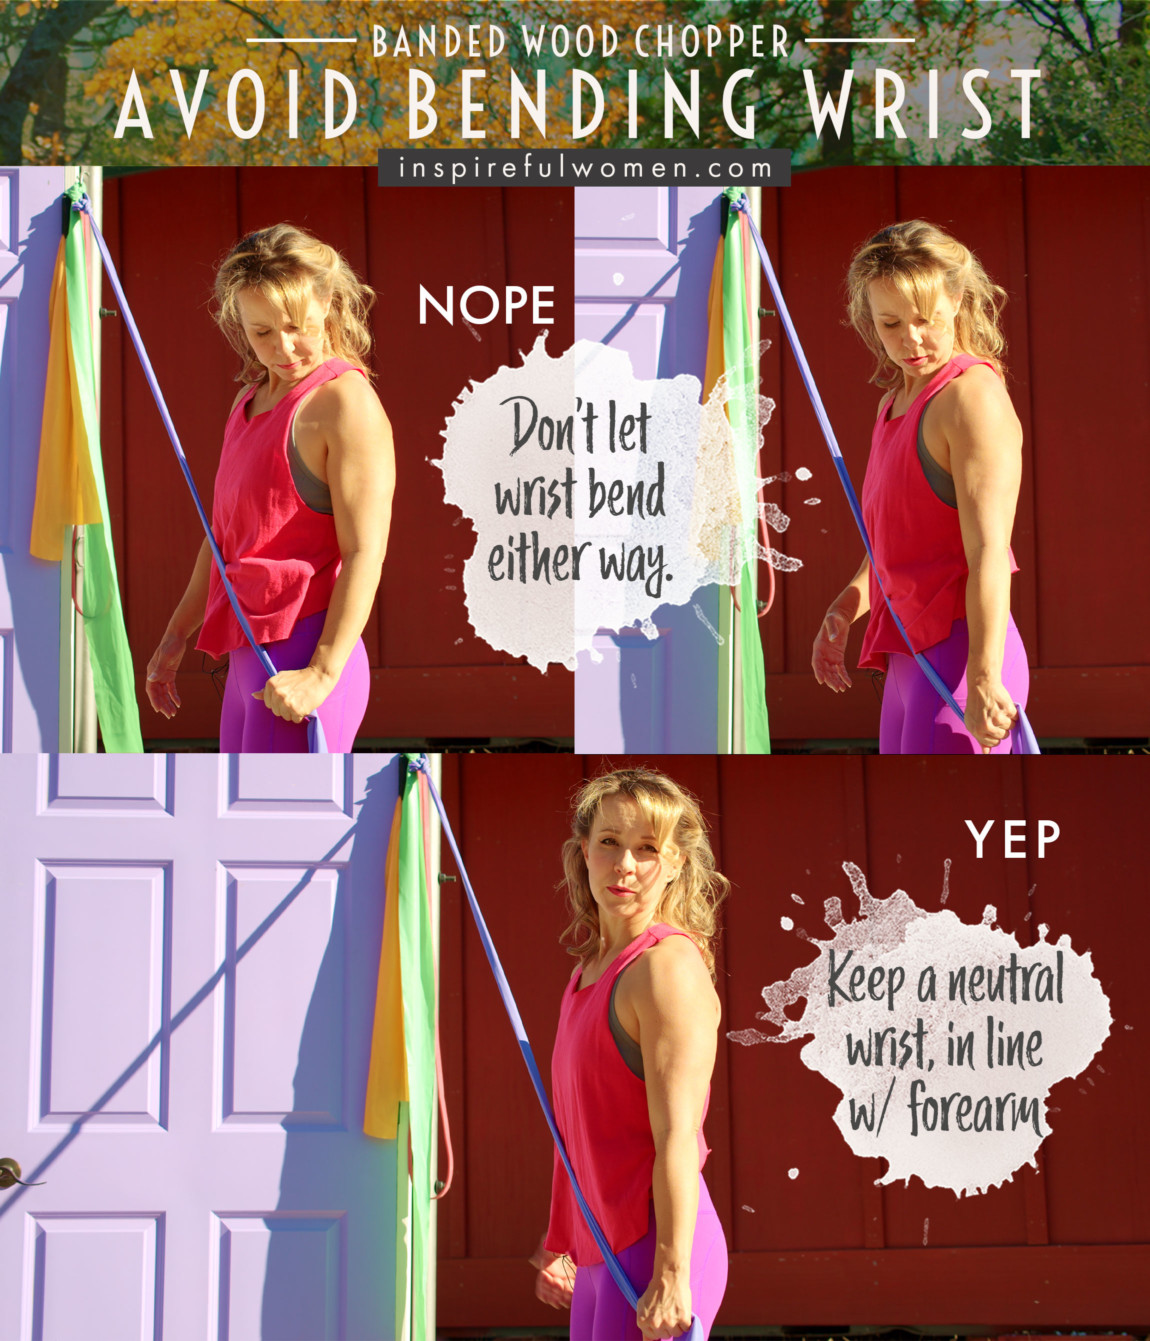
AVOID: Avoid bending at the wrists.
WHY NOT?
- This can lead to tissue/joint irritation or damage over time.
WHAT TO DO:
- Keep the wrist in alignment with the forearm, as one piece. The movement is coming only from the shoulder.
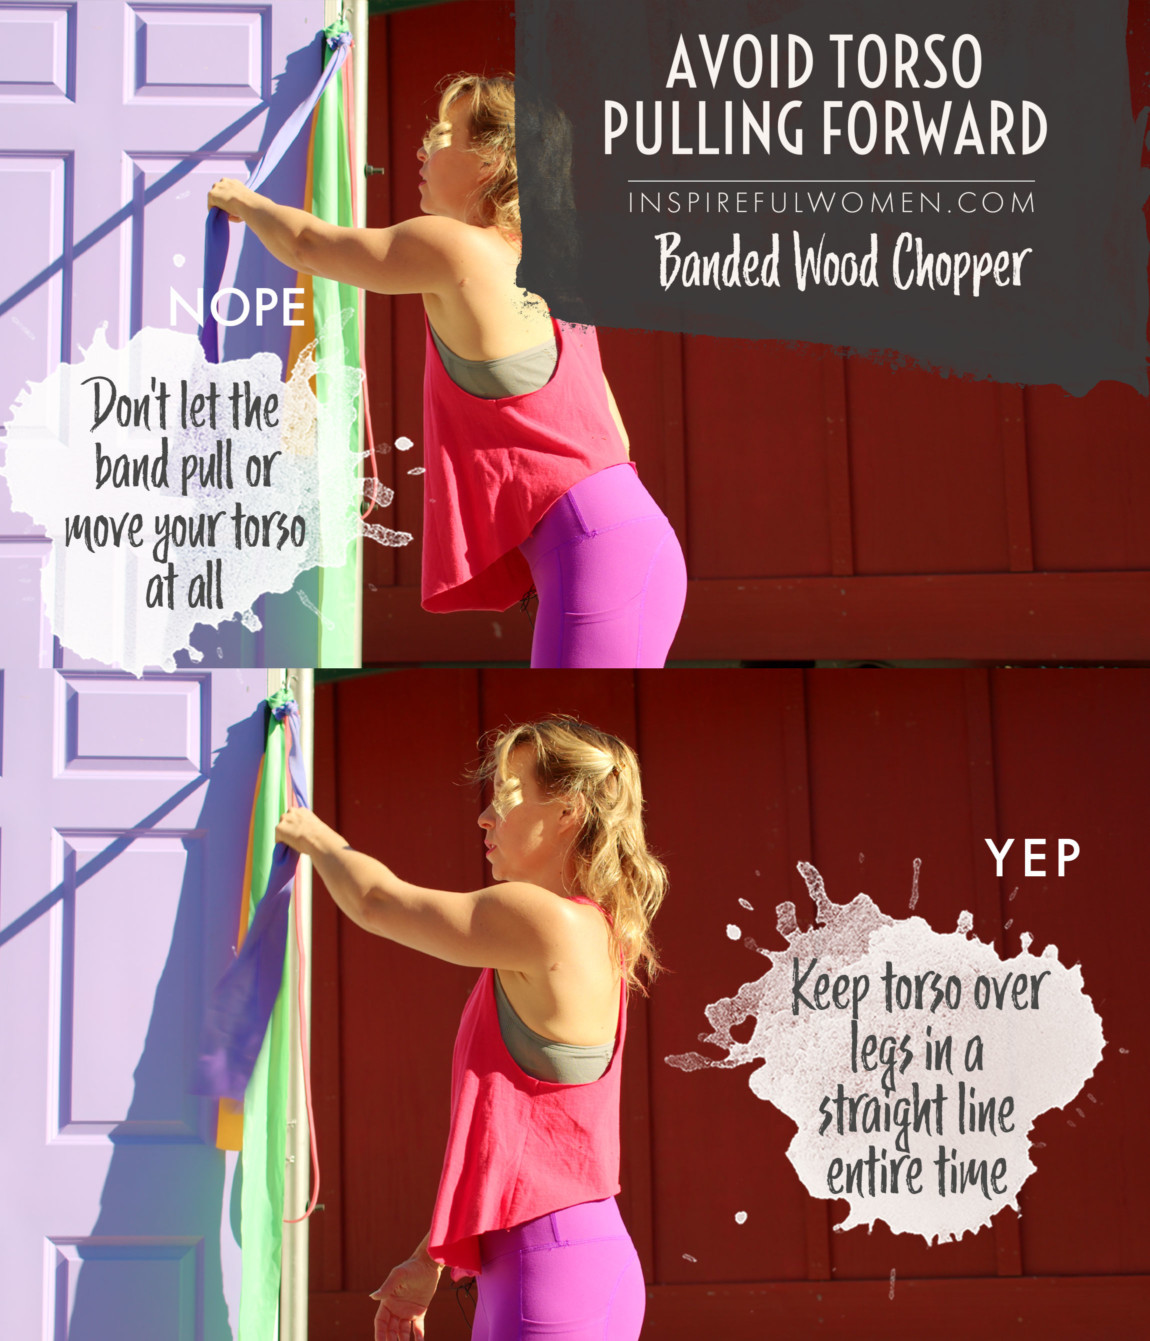
4. Avoid letting your spine get pulled forward at the top of the movement
AVOID: When your arm goes back up & across your body, don't let your spine/upper back get pulled forward with it.
WHAT TO DO:
- While the arms are moving outward/forward as they go up, the spine remains in neutral, in line with your lower half.
- The torso does not move forward.
5. Avoid bending your elbow arm so much
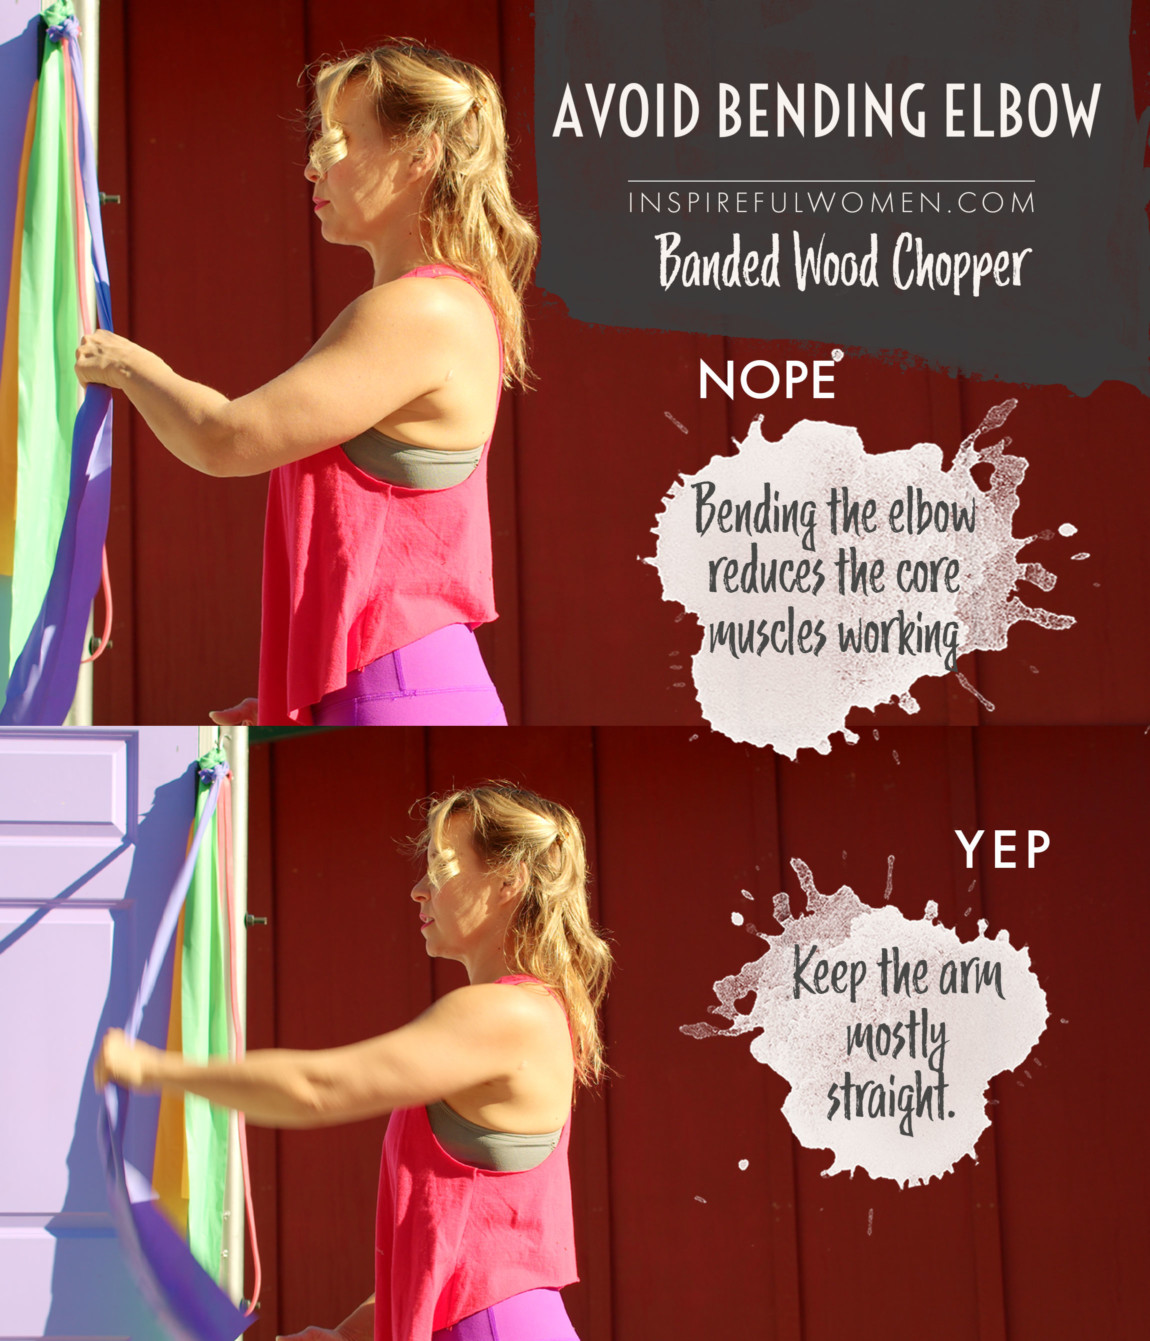
AVOID: Avoid bending your elbow so much that it is too close to your body when you get to your midline during the movement.
WHY NOT?
- This will decrease the amount of resistance from the band and the core muscles will not need to work as hard. We want them to work hard!
WHAT TO DO:
- The arm should be near straight, only a slight bend in it, so that the arms are a fair distance away from your torso out front for most of the movement.
6. Avoid side-bending of your torso
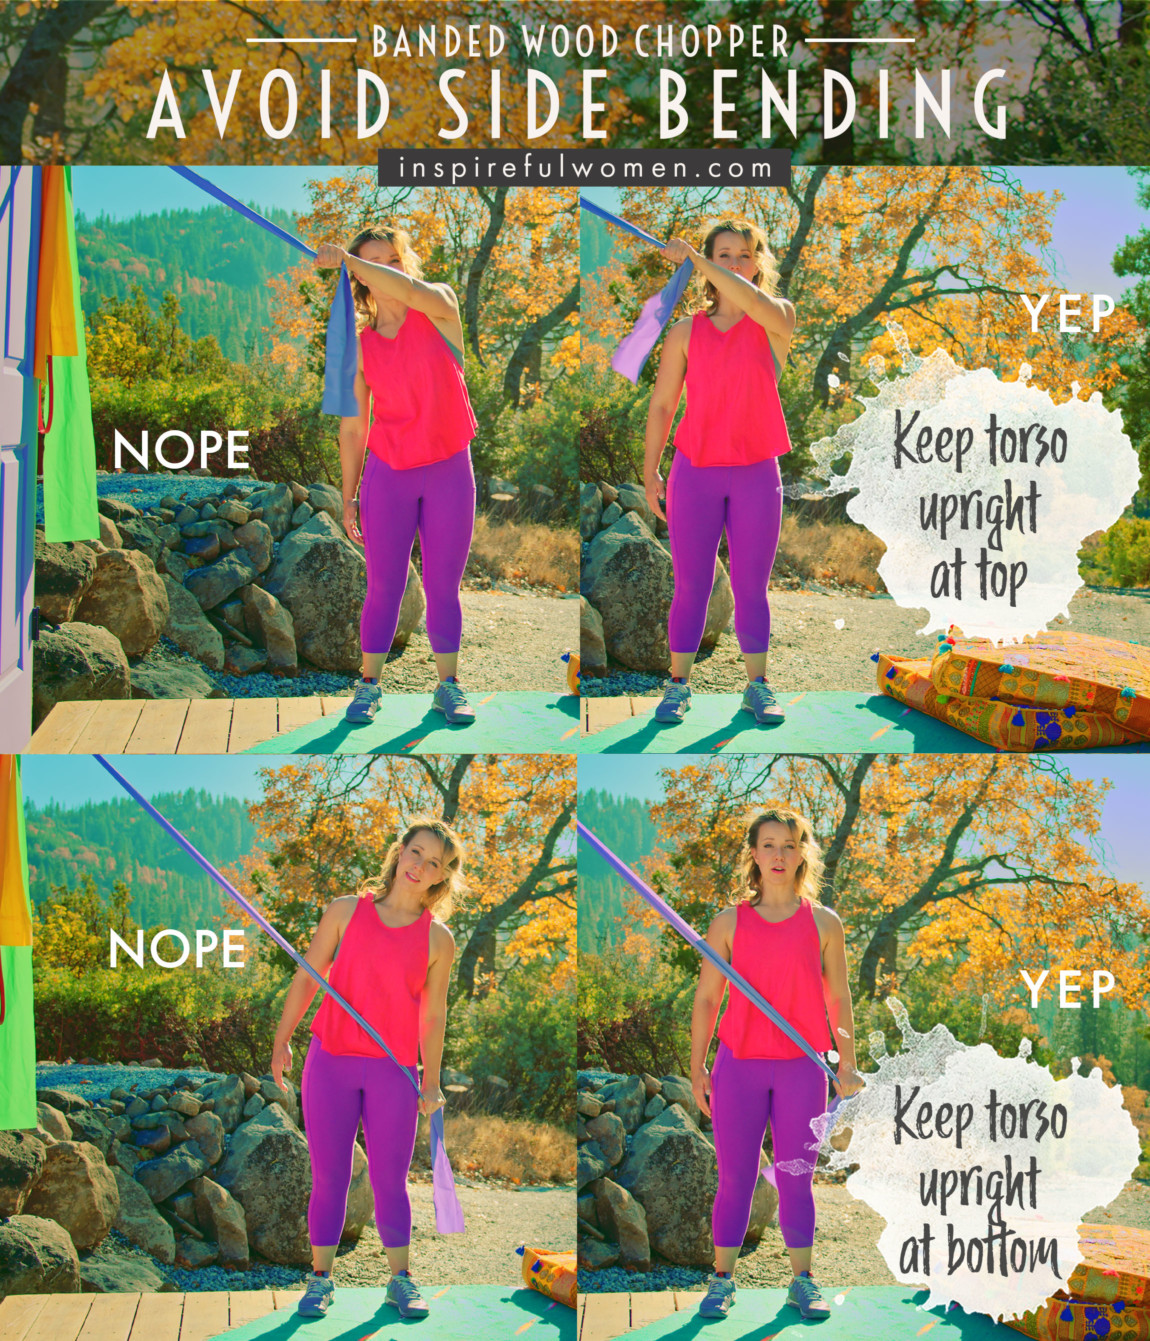
AVOID: Bending at the sides of the torso
WHY NOT?
- Repetitive spinal rotation under load (resistance of band) can cause soft tissue/joint irritation or damage over time.
WHAT TO DO:
- Keep the torso upright, not moving, only moving from the shoulder joint.
7. Avoid straightening the knees
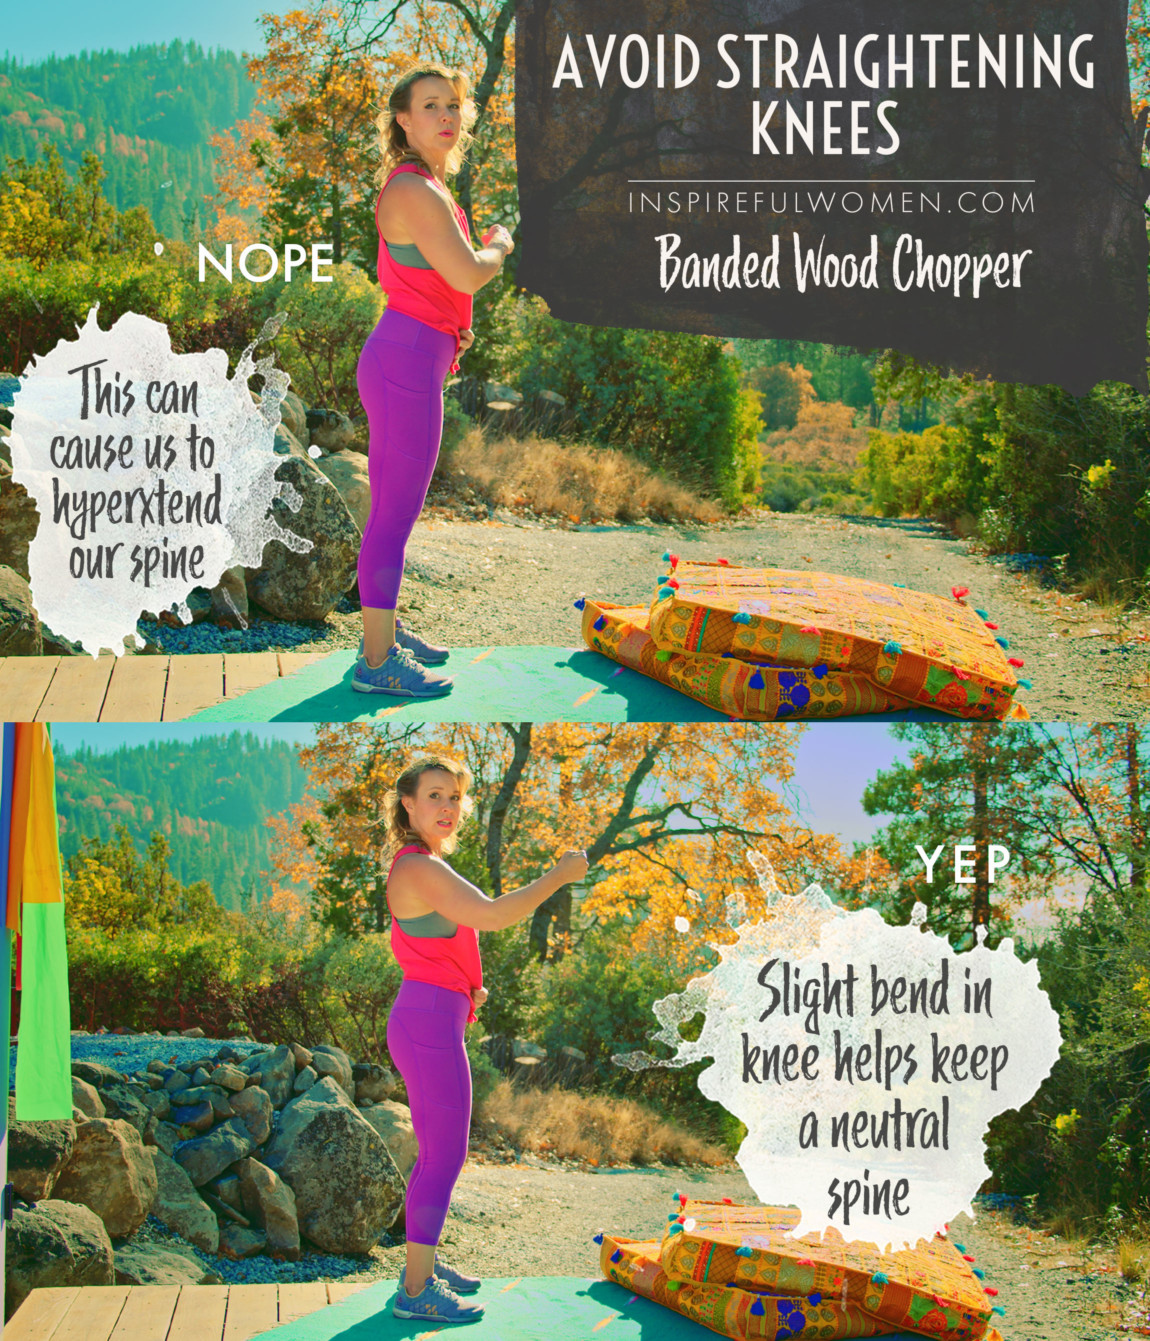
AVOID: Straightening the knees
WHY NOT?
- Straightening the knees can make it difficult to keep your spine in neutral.
- Not maintaining a neutral spine position can lead to injury or muscle strain.
WHAT TO DO:
- Keep a soft bend in the knees
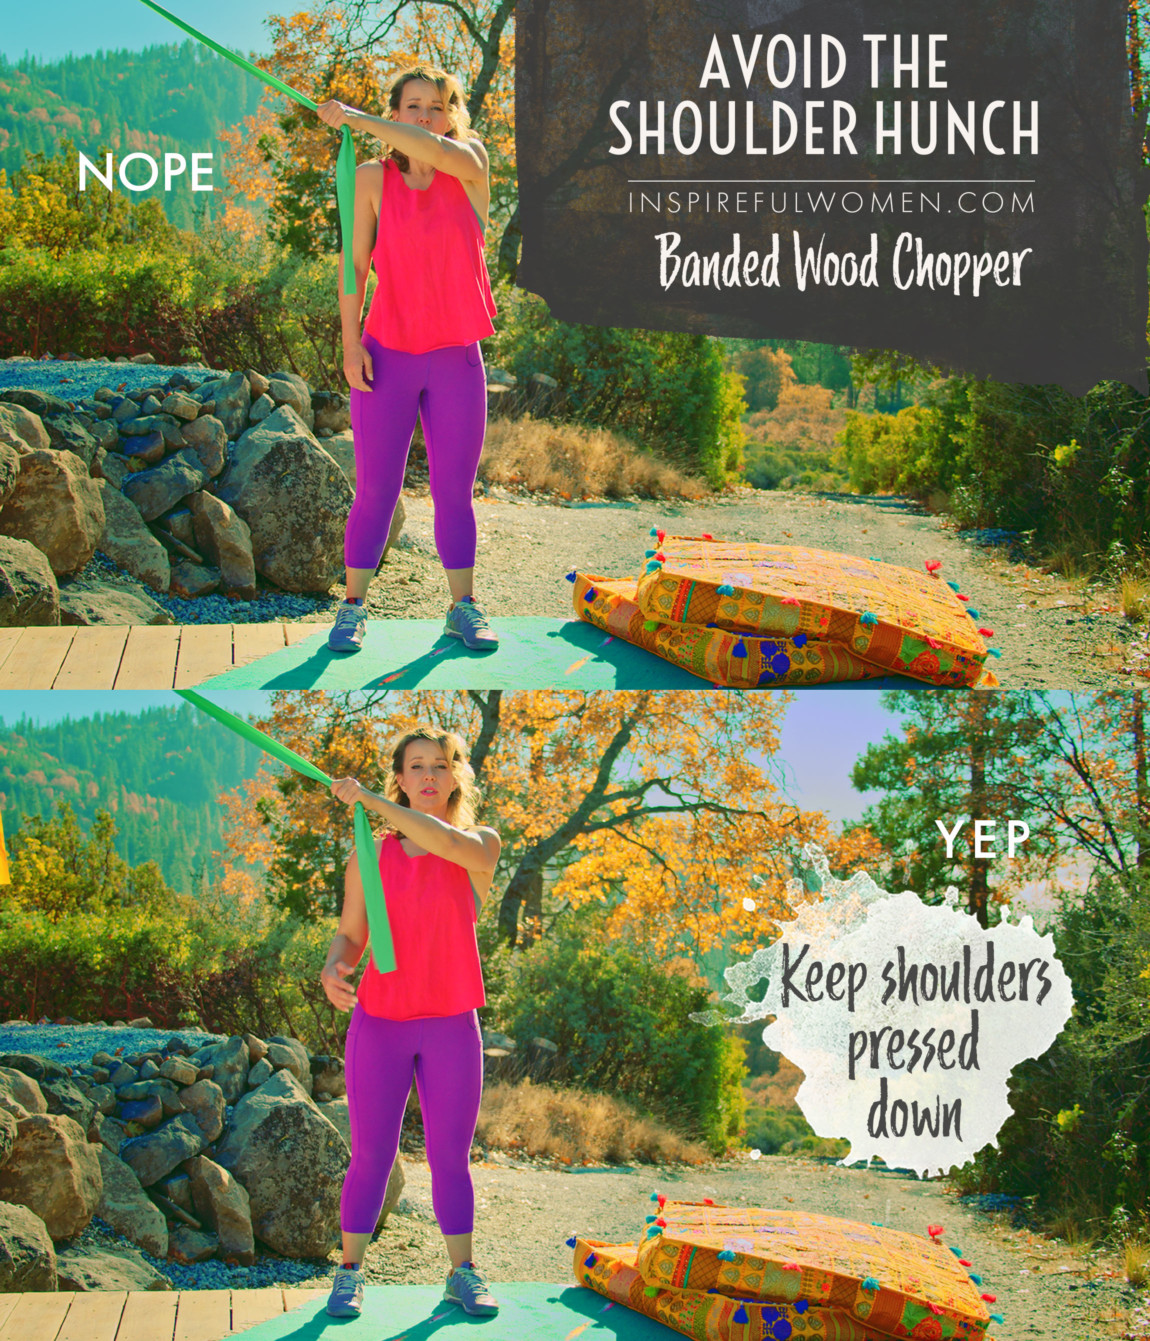
8. Avoid letting the shoulder of the working arm rise up towards the ear
AVOID: Letting the shoulders hunch up
WHY NOT?
- This will decrease the activation of the postural muscles (mid and lower back, and core), which are the muscles we want to be doing the work in this exercise.
WHAT TO DO:
- Pull the shoulder blades down with each rep as the arm comes down.
VARIATIONS
VARIATIONS
VARIATIONS OF BAND WOOD CHOPPERS
2-HANDED
TWO HANDED wOOD CHOPS
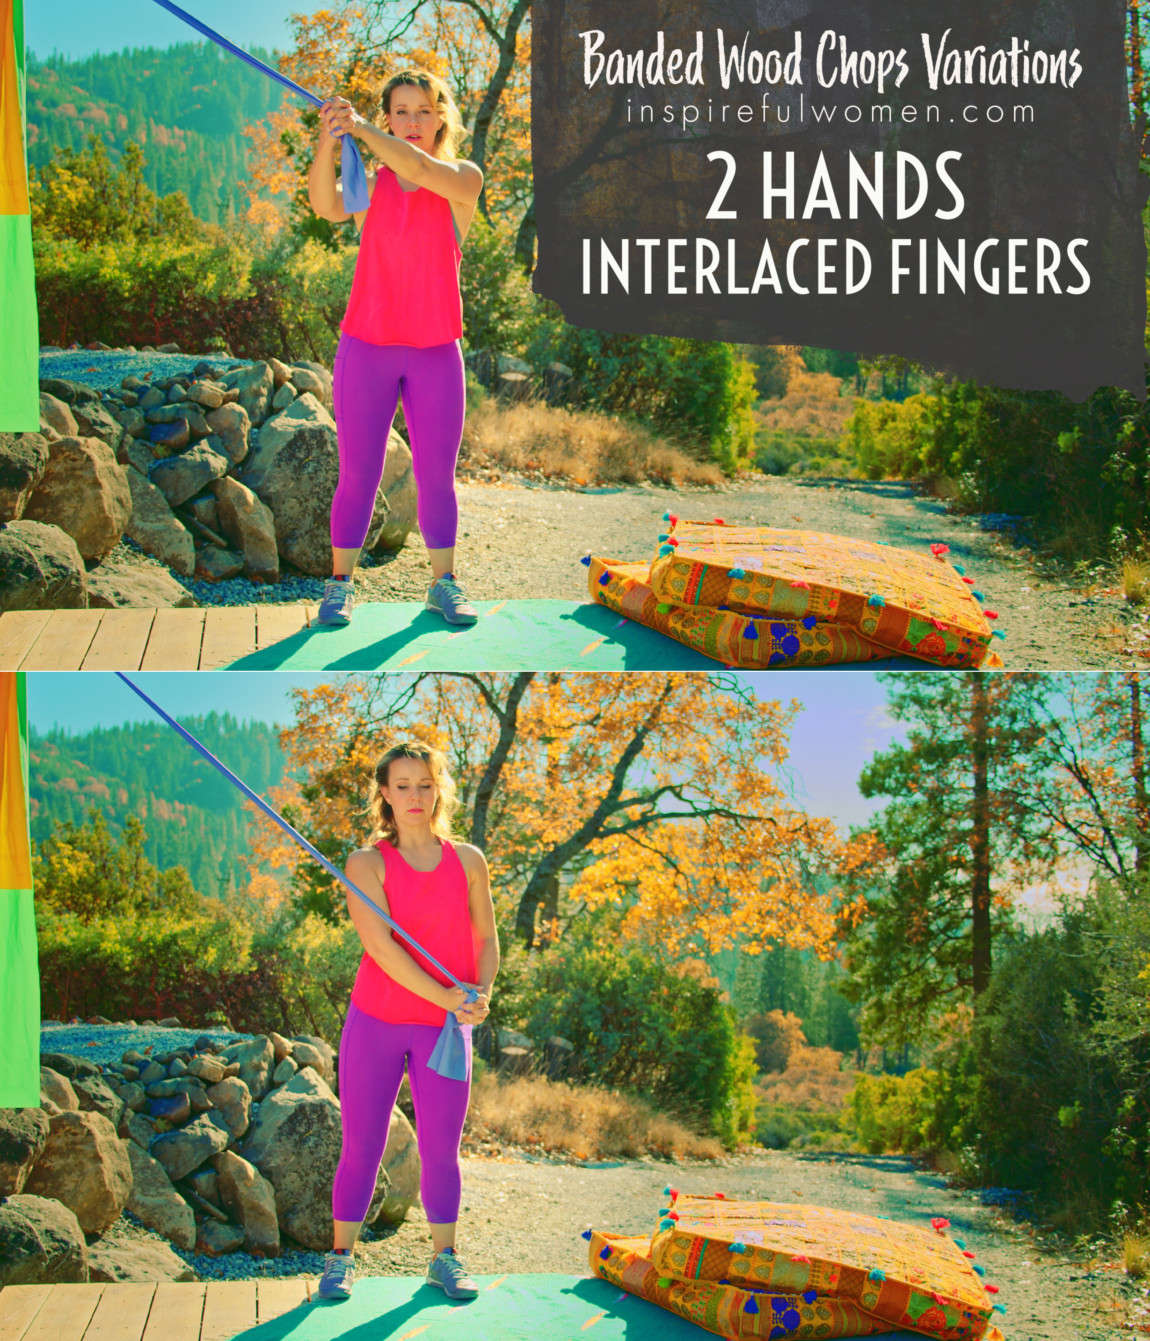
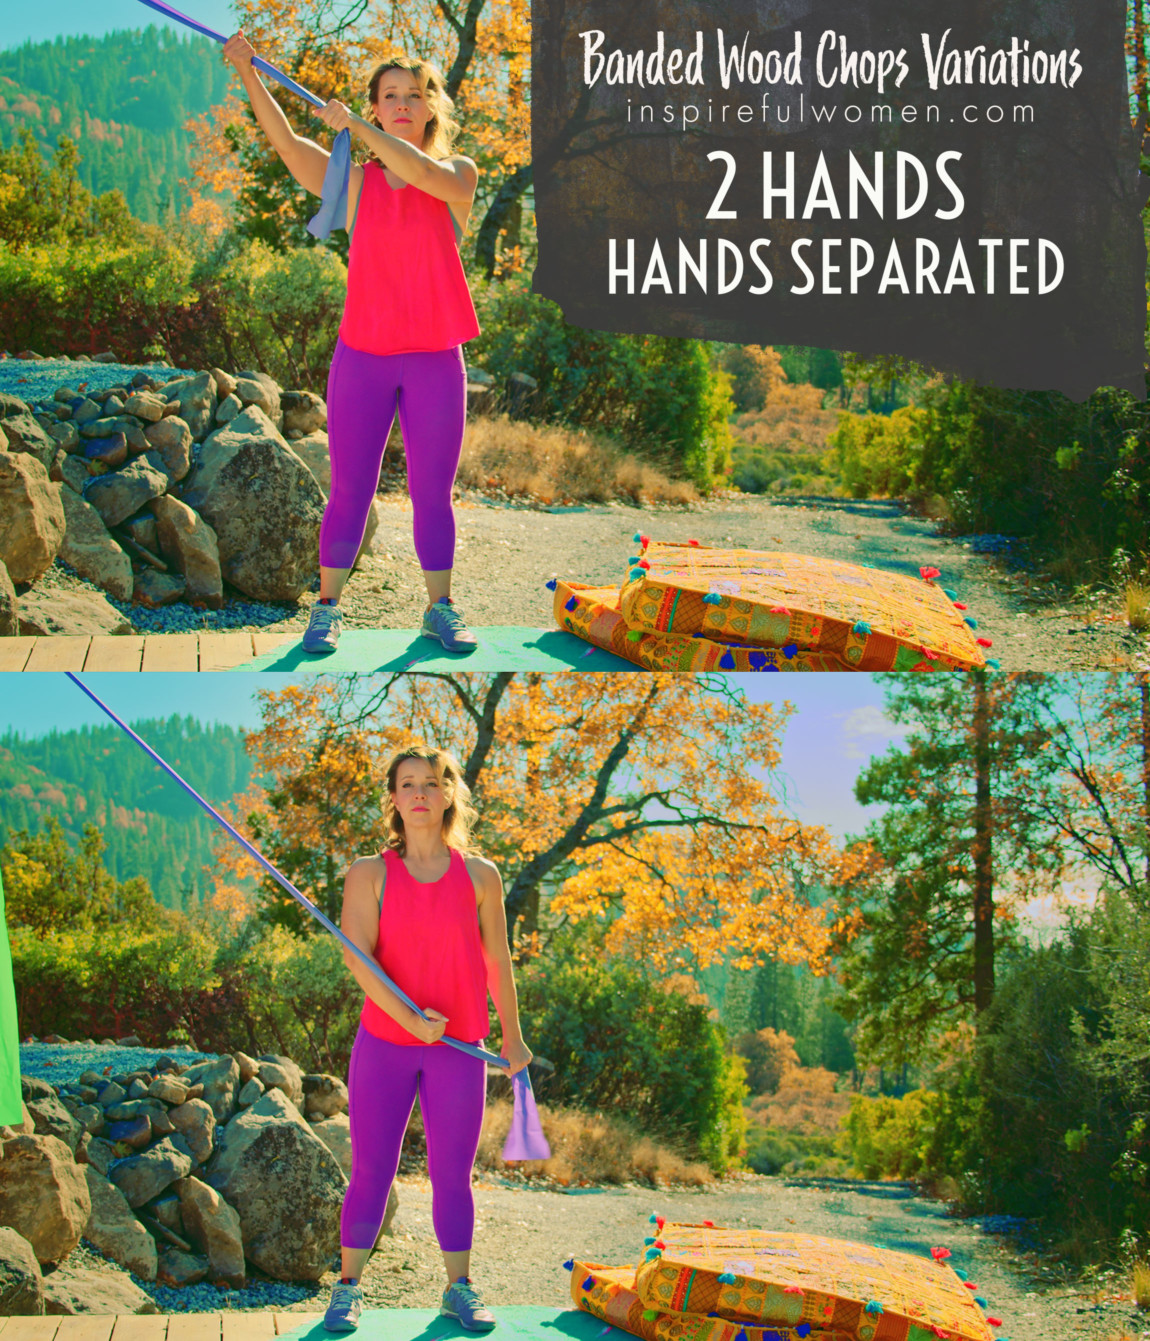
2 HANDS: Both hands hold the band one of 2 ways:
- with interlaced fingers or
- with the hands separated at a comfortable distance for an elastic loop. Separating the hands is a good option if you are having difficulty holding your shoulders squared, or if you have any restrictions in shoulder or thoracic spine mobility.
Hold the band with a neutral grip if the ends are held separately. Arm position: Both arms are reaching up to hold the band. Both elbows are straight. This will work both arms during the movement and will introduce a bit of thoracic rotation and scapular protraction. The lumbar spine should not rotate - and only a small amount of thoracic rotation.
For science geeks, the starting position is this in fitness terms: The shoulder blade of the arm closest to the band will be retracted, the arm is abducted and externally rotated; the shoulder blade of the arm that is on the side furthest from the band anchor will be protracted, the arm is adducted, internally rotated and flexed to reach up to hold the band.
Since this is a core exercise and not an arm exercise, this version could actually be harder. If you can pull more weight - heavier resistance band, because you are using two arms then it will be harder for the core to stabilize against the greater resistance. Remember the goal of this exercise is to hold the torso squared to the front. Using both hands as opposed to just the hand furthest from the anchor can be harder to keep the sternum lifted and the shoulders back.
MAKE IT HARDER
HARDER
MAKING THE BAND WOOD CHOPPER MORE CHALLENGING
NARROWER STANCE
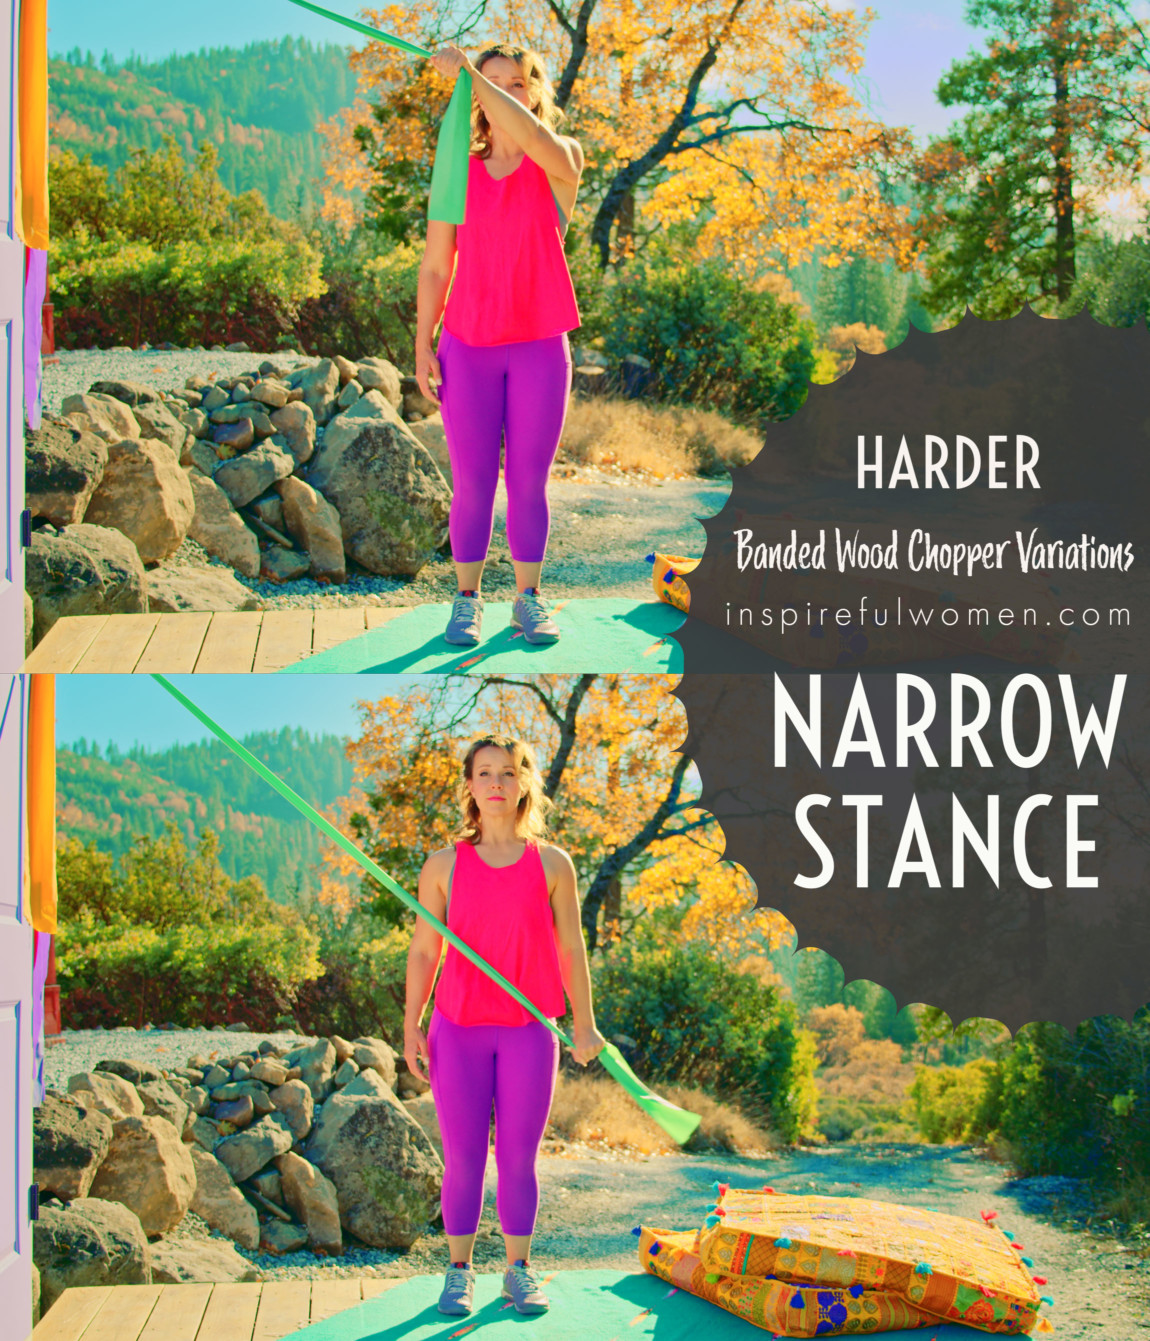
Narrow Stance Chops
Bring your feet closer together - this will decreases stability because the base of support under you is smaller.
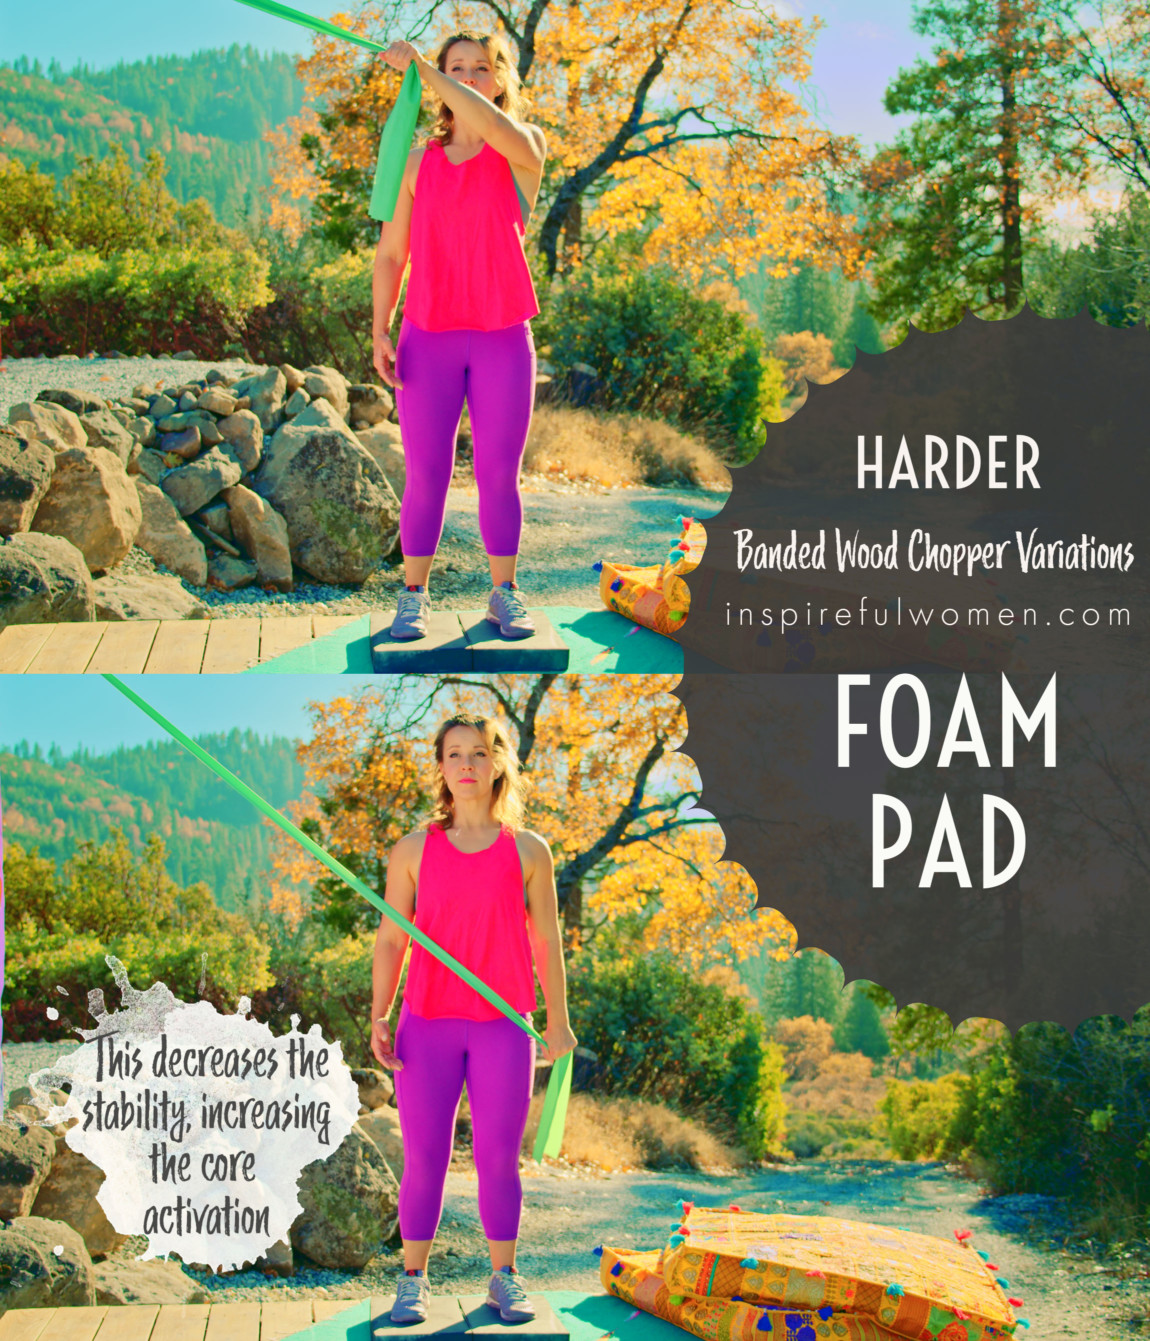
Standing on foam pad
Standing on Foam Pad
This decreases stability - you can imagine why! The "cush" of the pad will make your foot, leg muscles, and core, work harder to keep your balance.
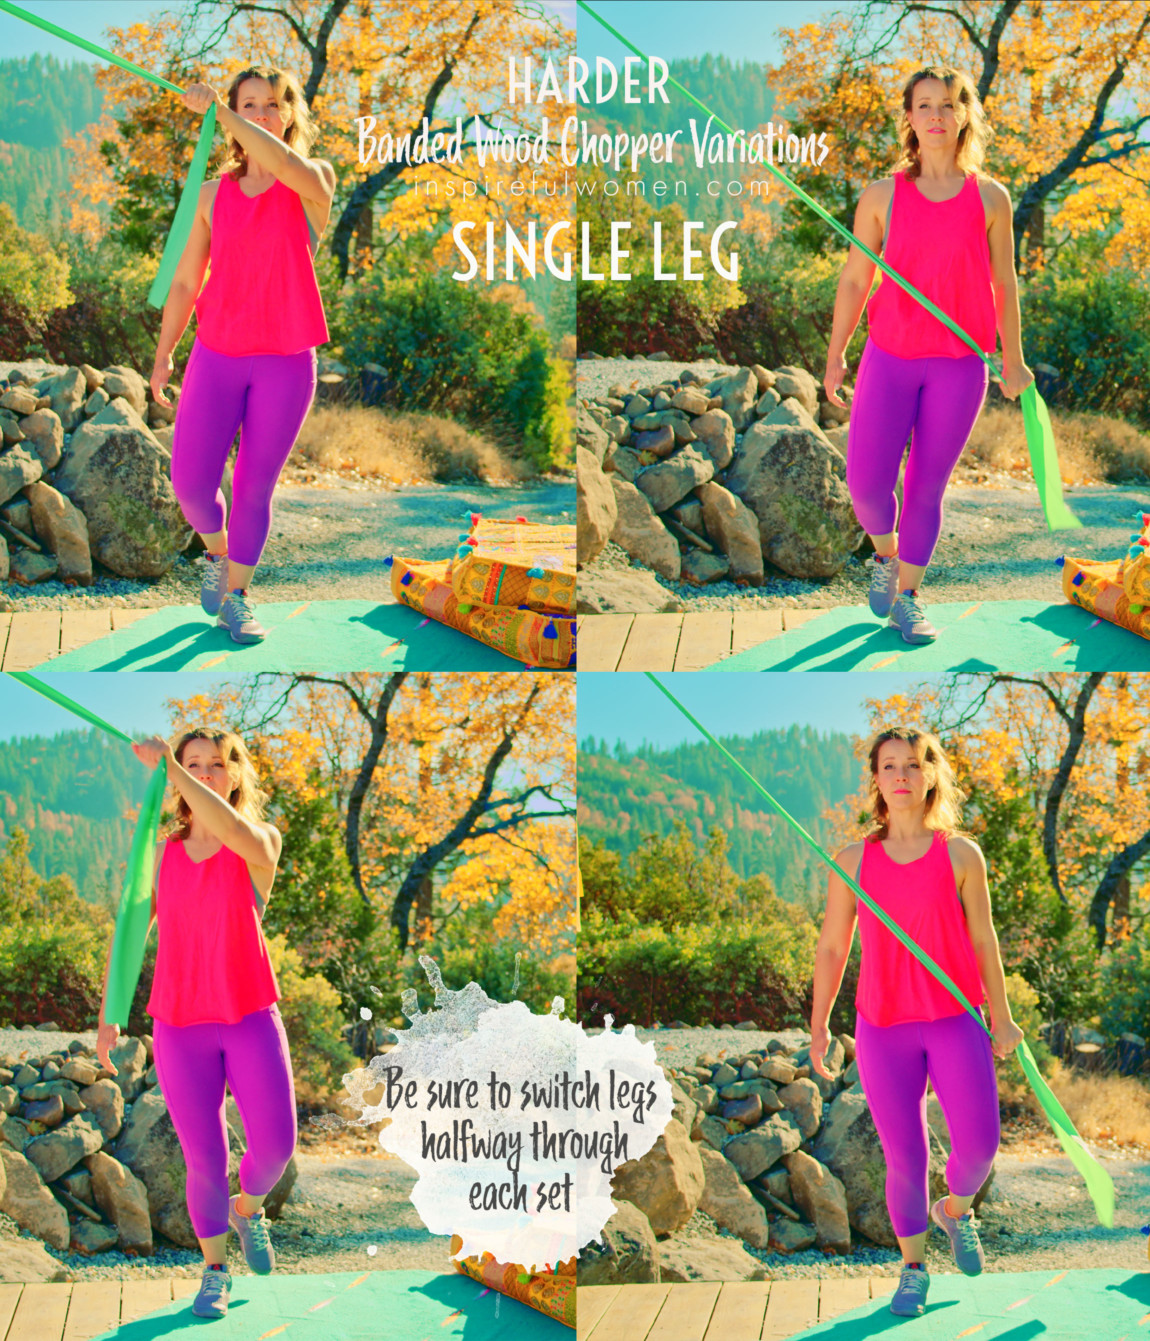
Standing on one leg
One-Legged Wood Chops
This decreases stability. It is important to switch legs halfway through the total number of reps to work both legs.
Different muscles will be worked on each leg. When the band is anchored on the left side of the body and you stand on the right leg, the band will be pulling you to the left, the muscles on the outside of the leg (hip to ankle) will need to work to maintain balance.
When you switch to standing on the left leg the muscles on the inside of the left leg will need to work to maintain balance.
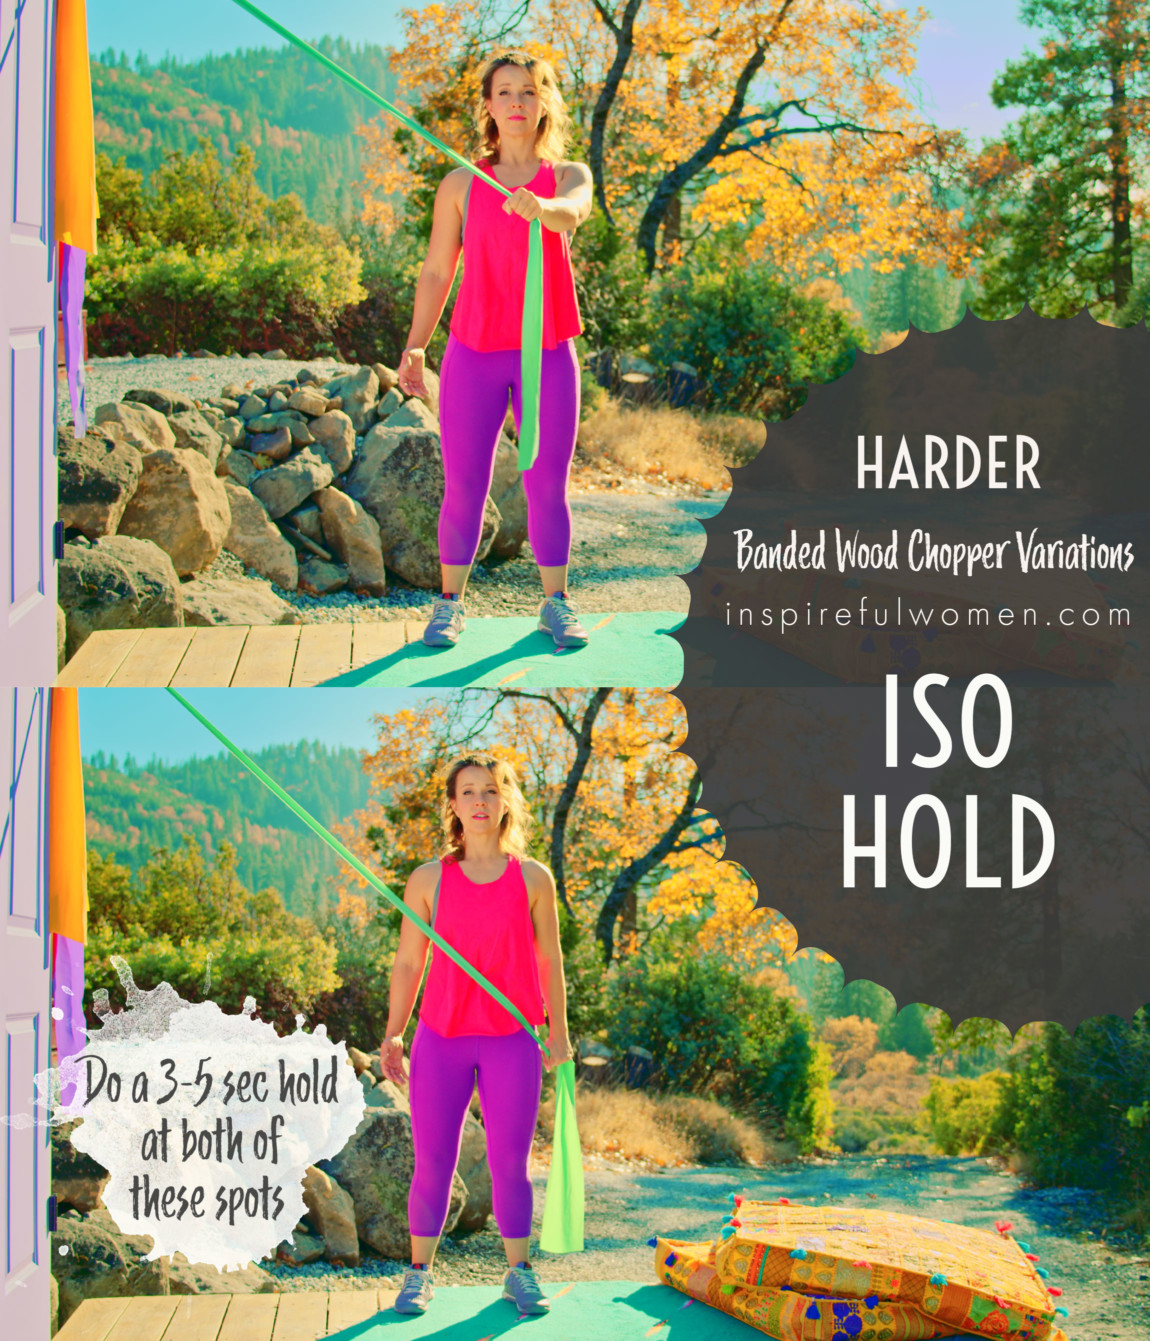
ISO Hold Wood CHops
Isometric Hold
Isometric hold mid-way 3-5 seconds, which will be when the hand is in front of your body (chest level and straight in front) and then also at the end of the movement - both on the way up and the way down.
Rotation Wood Chops
Rotation Wood Chops
We'll go over this in more detail in it's own post, but for now, the idea is to rotate FROM THE HIPS towards the side you are pulling the band too.
MAKE IT EASIER
EASIER
MAKE THE BAND WOOD CHOPPER MORE DOABLE
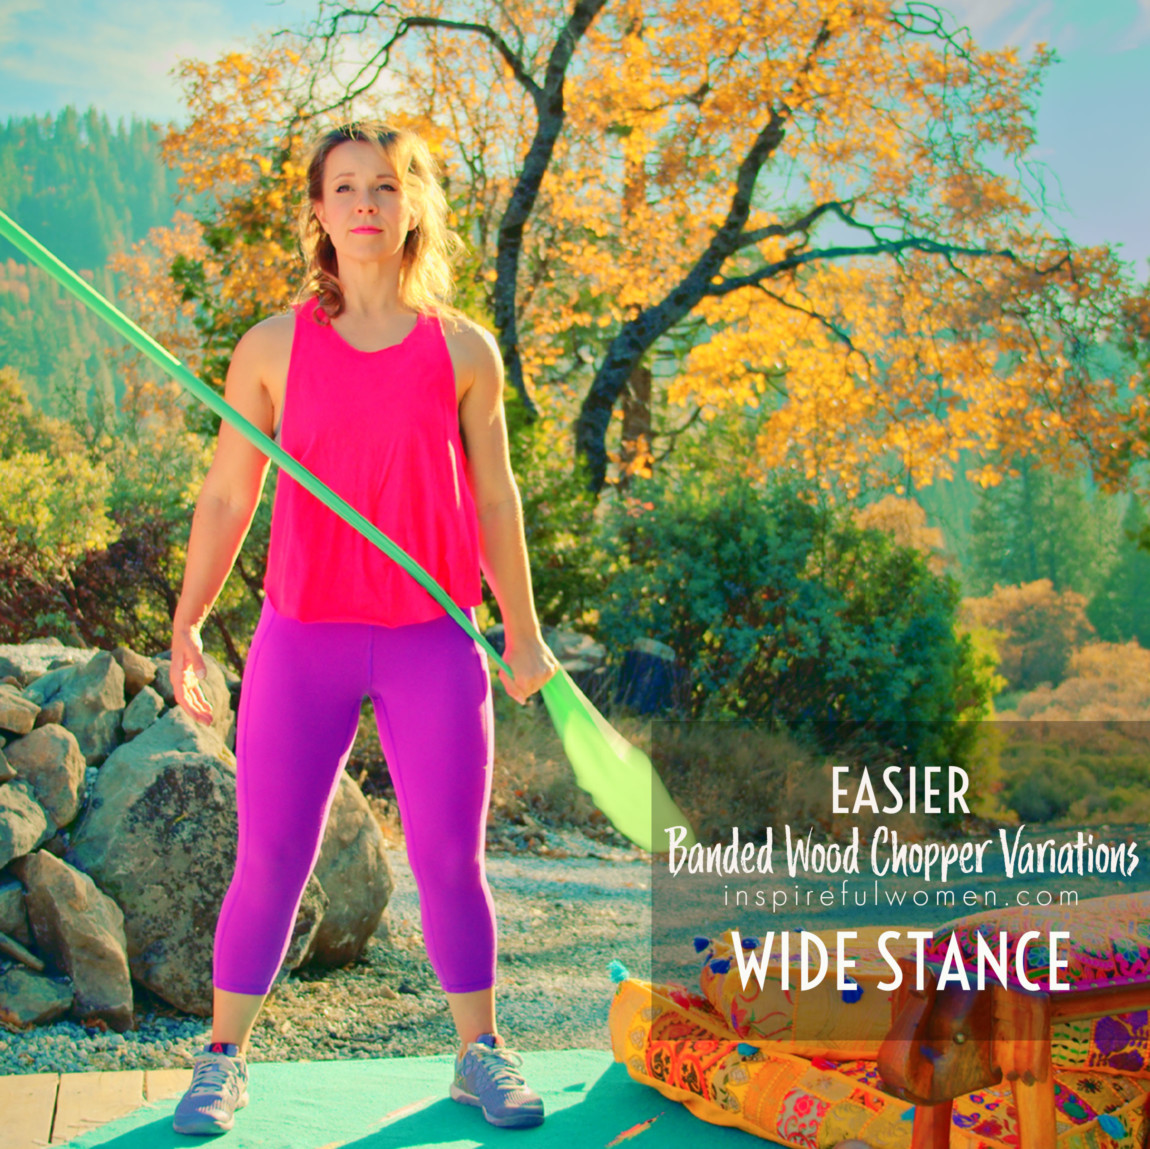
Wide stance wood chops
Wider Stance
Stepping out into a wider stance will give you a more stable base to work off of. Your core muscles will not need to work as hard to stabilize.
Use lighter band
Use Lighter Band
This is probably obvious, but I like to show you as much as I can!
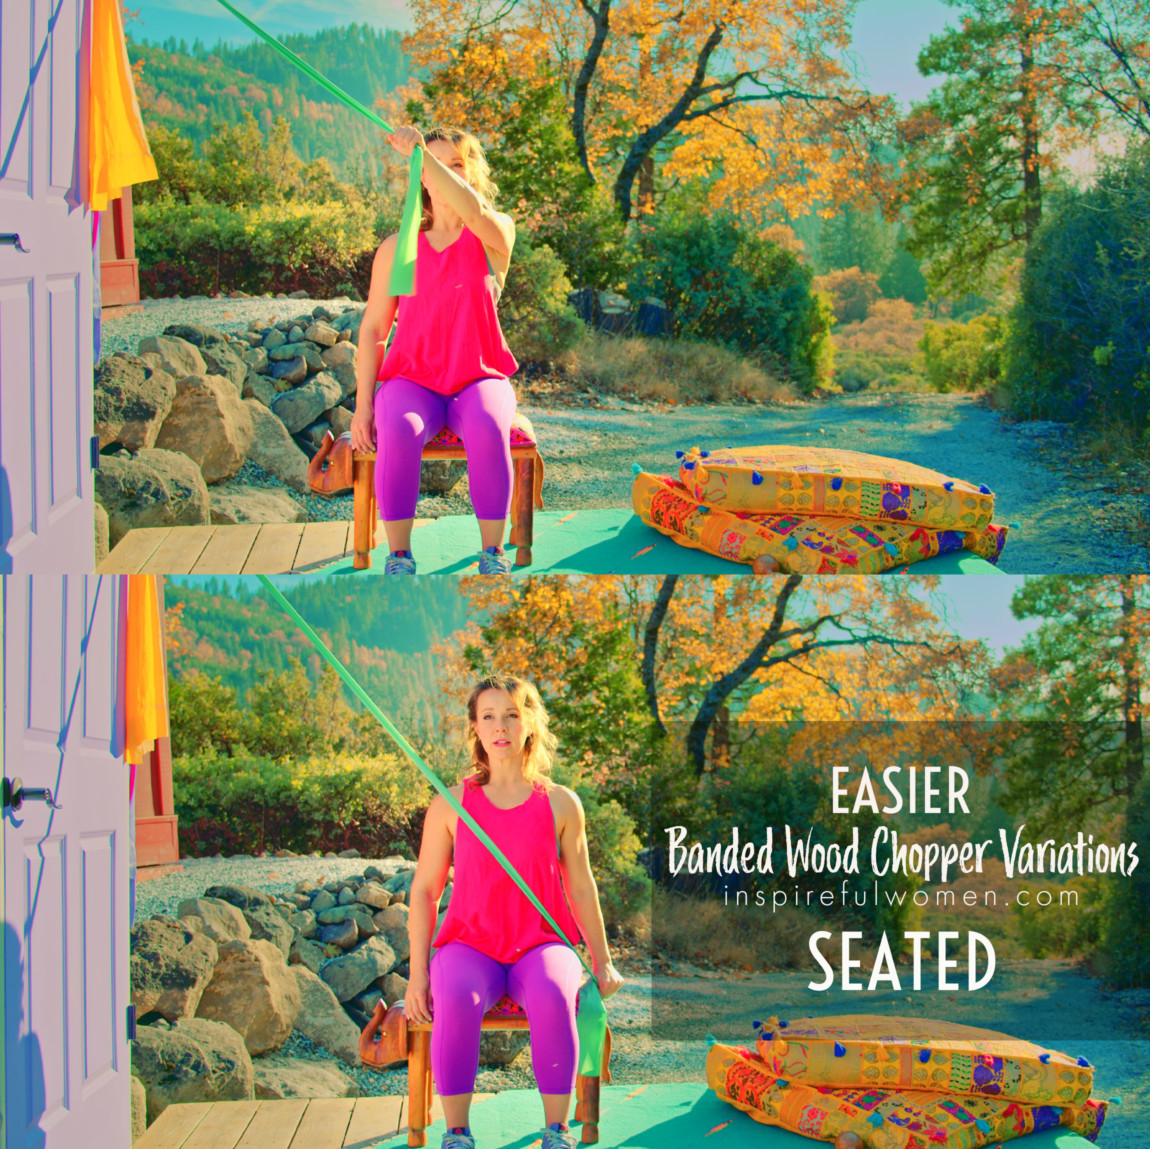
Seated on a chair
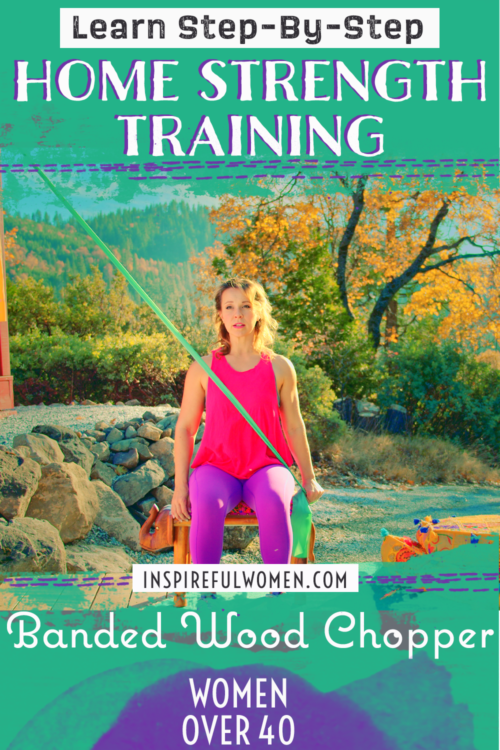
Seated on a chair
Sitting on a chair provides a more stable base. Do not lean back on the chair back, sit up tall with good posture. Your core muscles will not have to work as hard to stabilize.
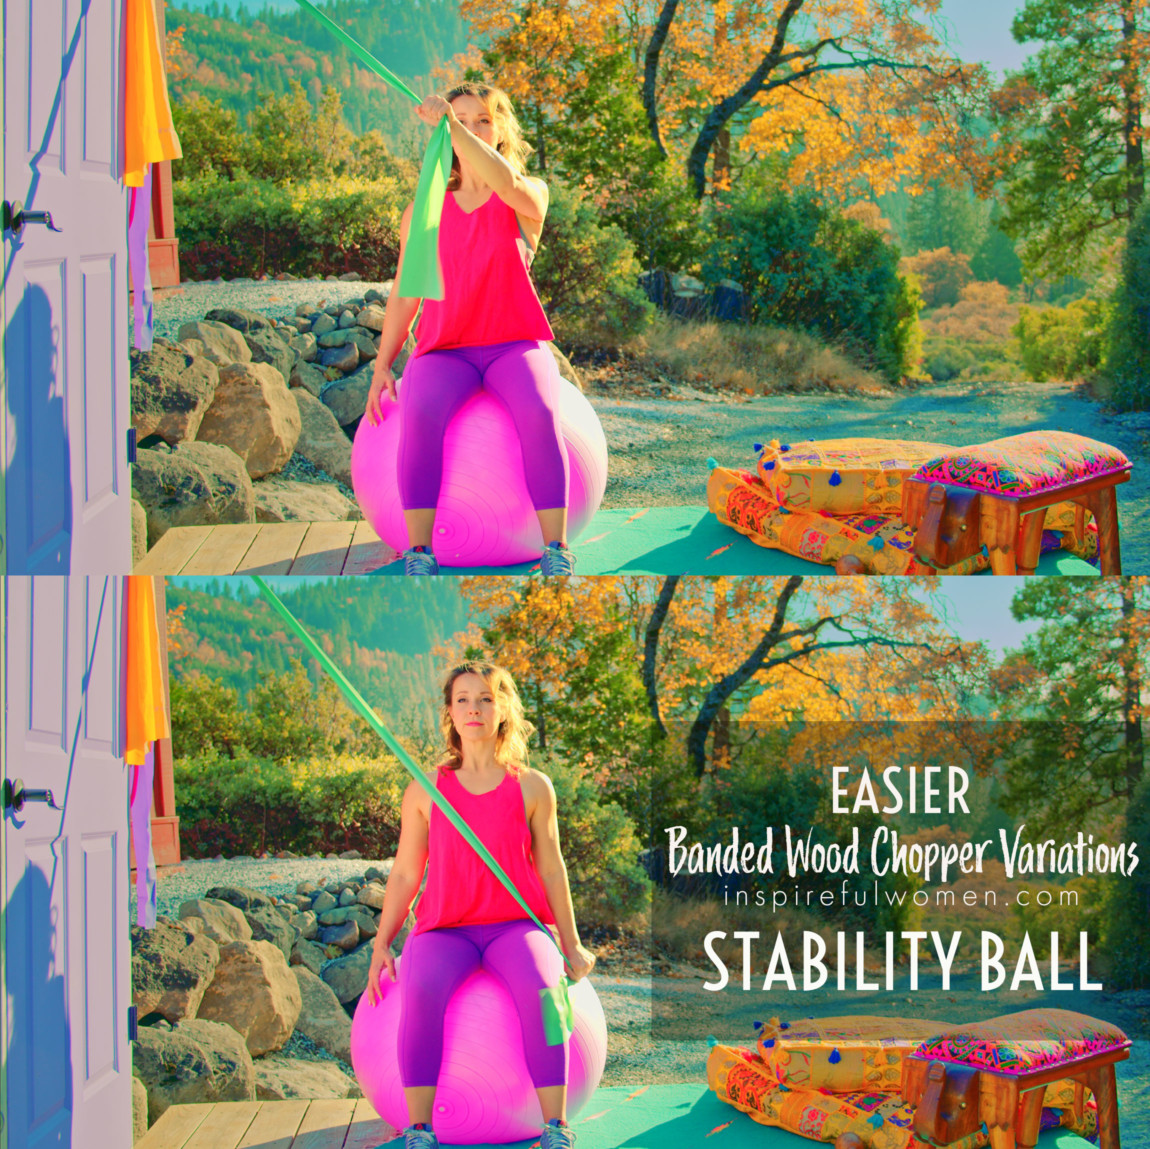
Stability ball seated
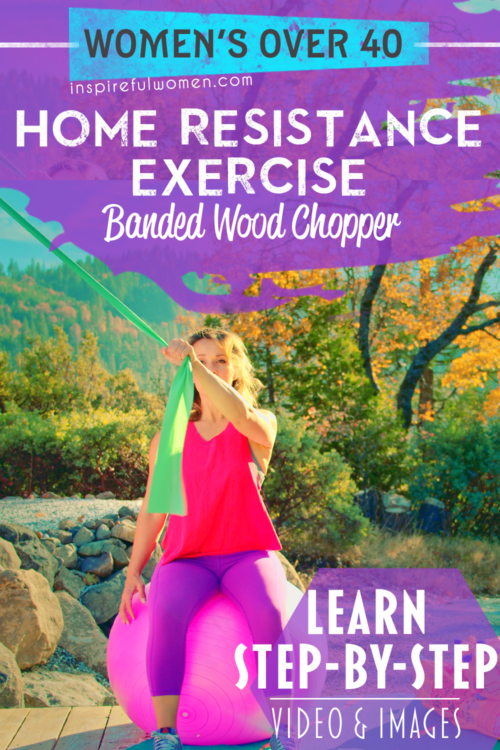
Seated on Stability Ball
Sitting on a ball will be less stable than a chair but more stable than standing.
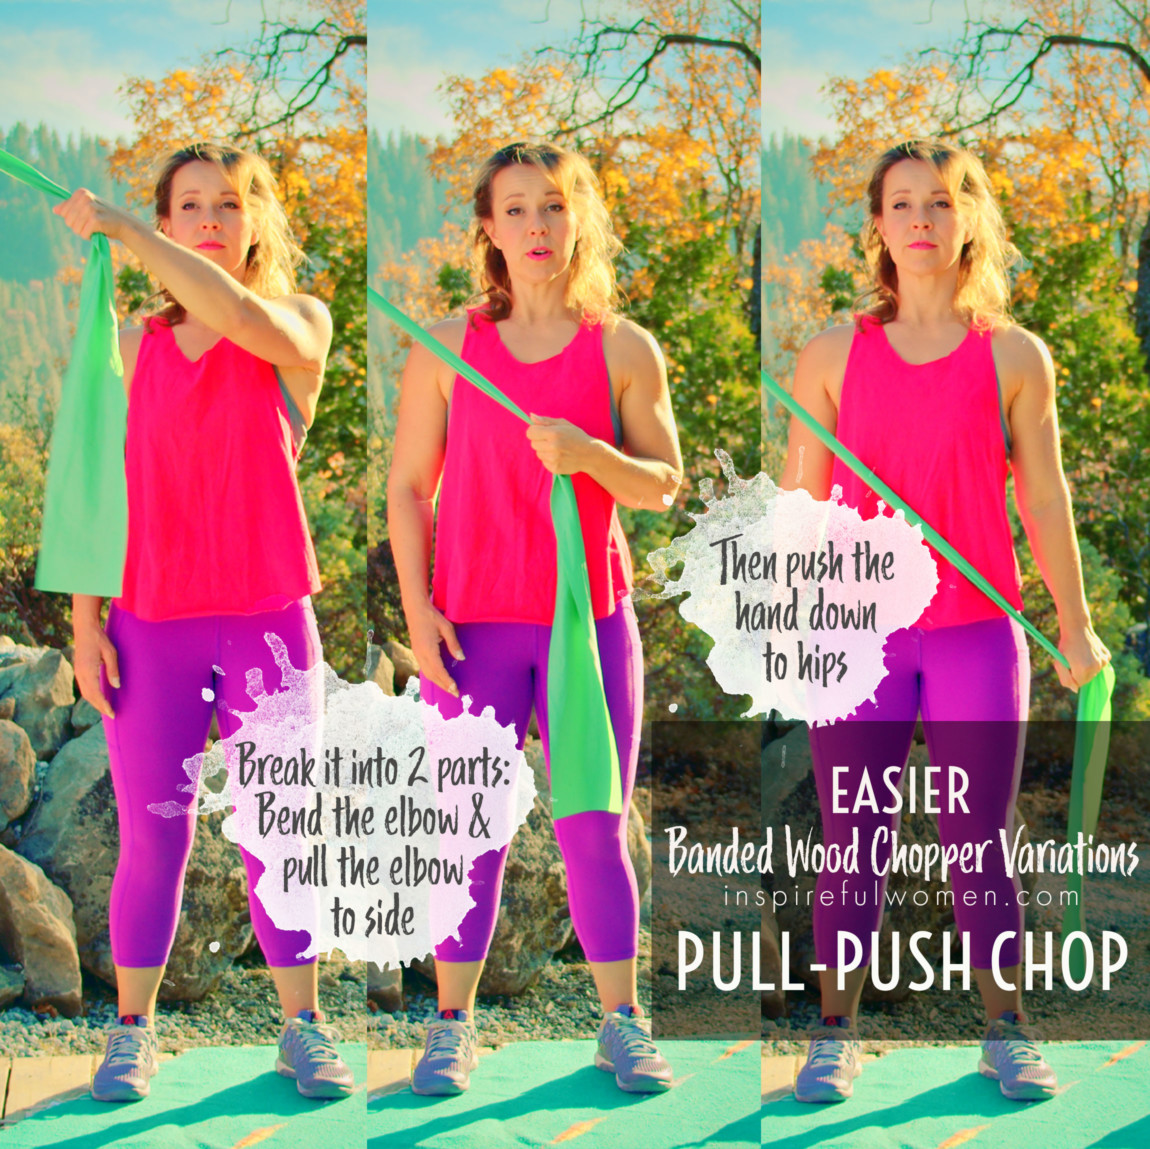
2-part Wood chop
Pull-Push Chops
I feel like the movement pattern of this exercise is just a bit tricky to get and understand. At least it took me awhile to get!
What you can do to help is break the arm movement down into two parts.
A pull - bend your elbow and pull your hand down to your chest;
and a push - straighten your elbow as you push your hand down to your other hip.
The diagonal path is the same but bend the elbow and pull and push. Your hand that is holding the band is closer to the body so the lever arm is shorted - it is easier to stabilize with the core muscles.
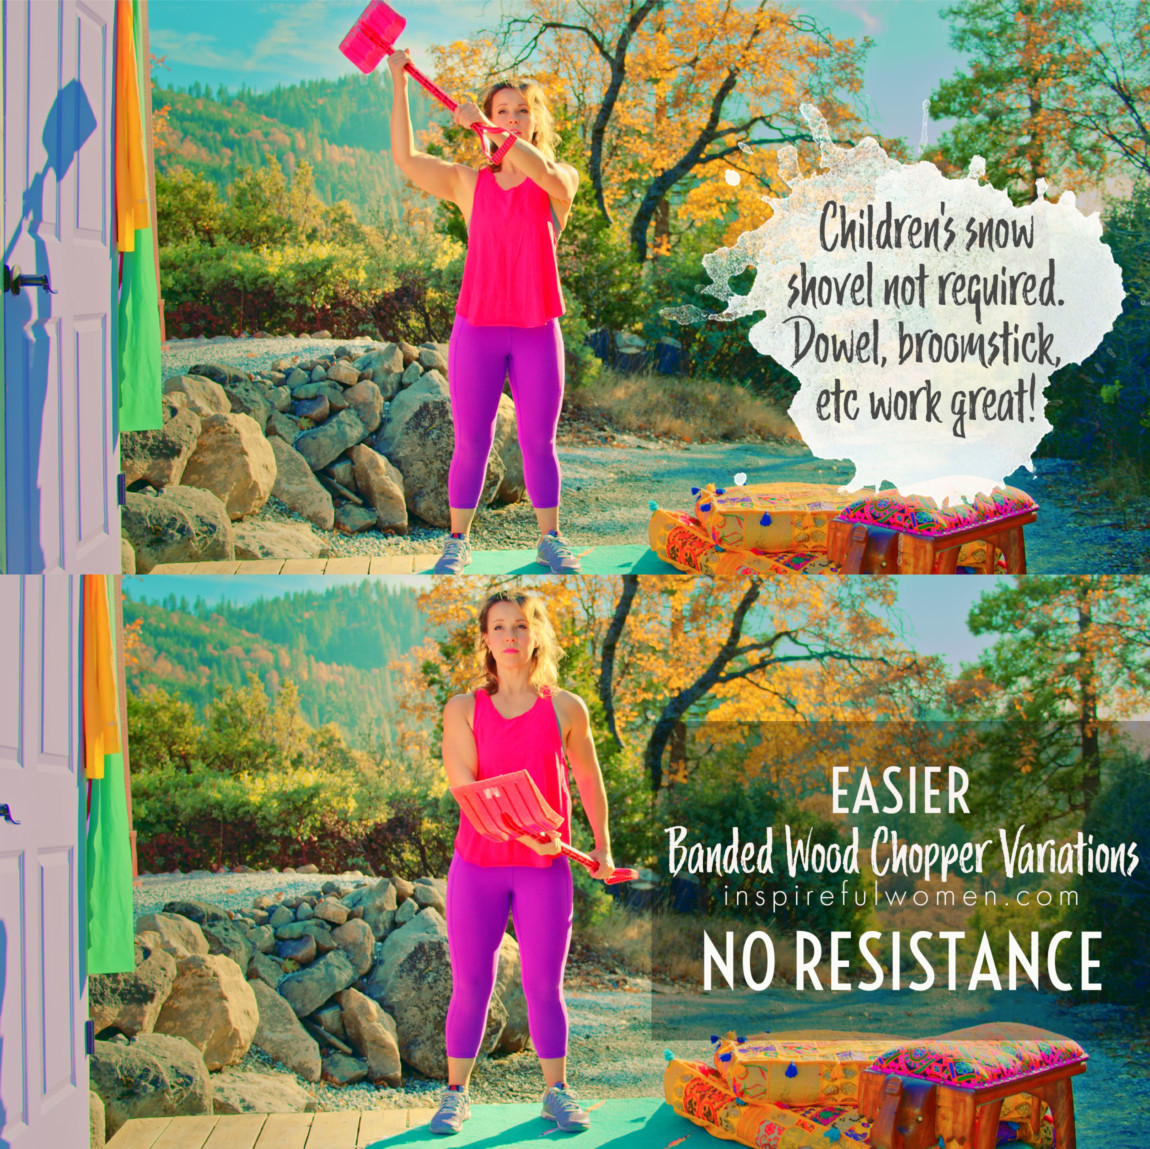
No-resistance Wood Chops
No Resistance / Use a Dowel or Broomstick
Most of us have not done diagonal movement patterns very often in exercise, even if we have a history of regularly working out.
Simply learning the diagonal pattern of how to move the arm across and down the body can be a good way to begin this exercise, without using resistance at all - just hold a broomstick or dowel (or your kids/grandkids snow shovel will do!) :)-
Start w/ other core workout
Start with other core workout
If it is too difficult start with pallof exercise or core stabilization with horizontal abduction of the arms to learn to stabilize against a rotational force.
Also just holding a weight at shoulder height (or slightly lower, mid chest - whatever is comfortable), keep the arms straight, and move the weight left to right. You can add in up and down, and diagonals, figure eights, basically any pattern.
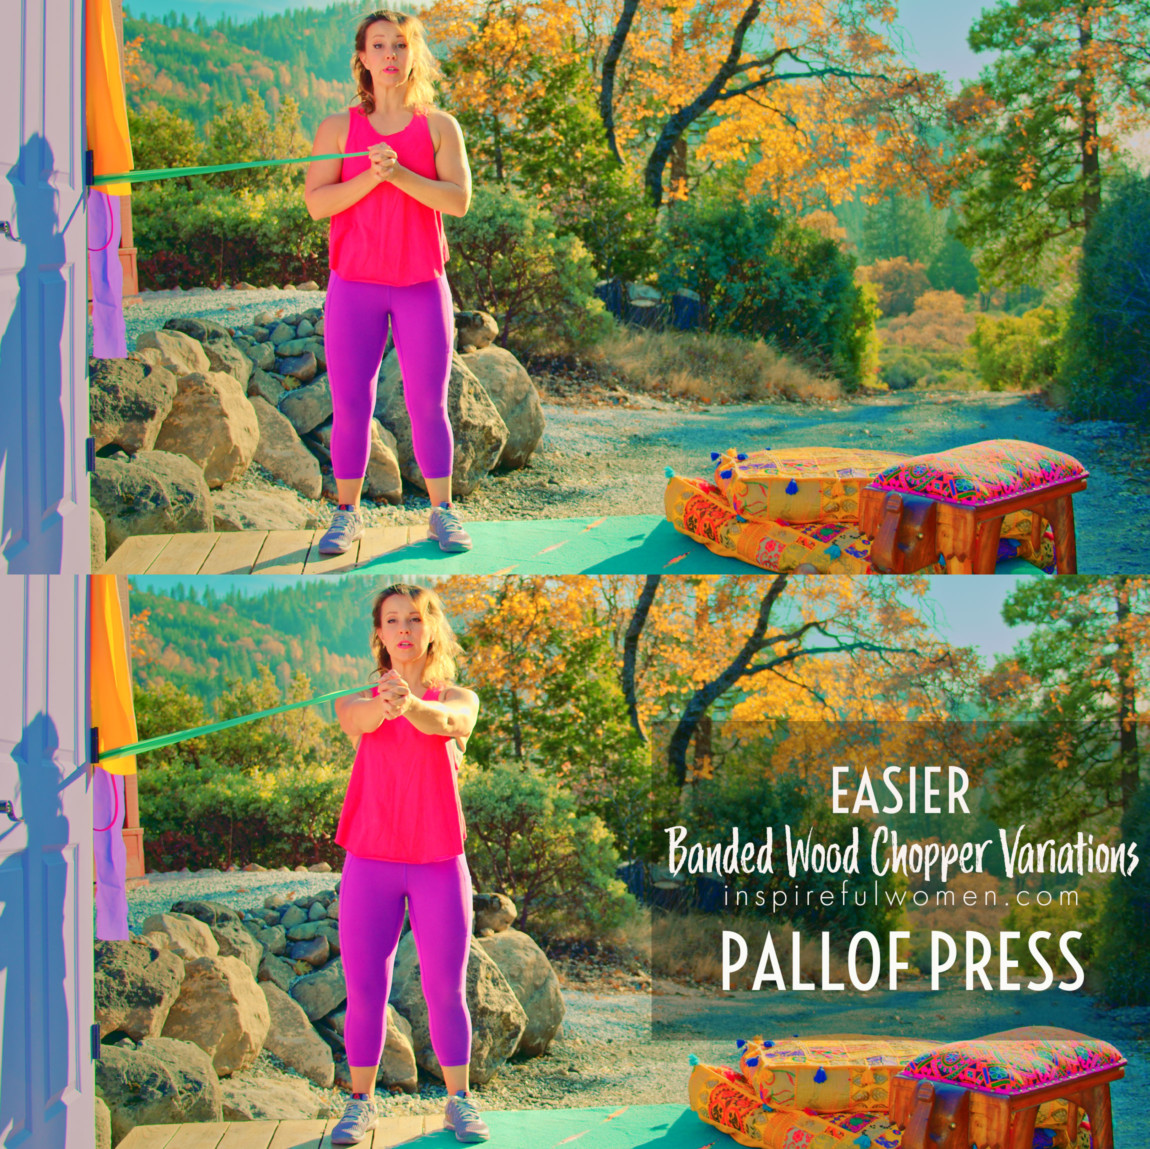
Pallof press
Pallof press
The Pallof Press is my favorite core exercise. It REALLY is. We'll have it's own movement tutorial in the future.
It's a very simple movement to learn, which I like, easier than the Wood Chops to get, and it has greatly increased my core strength and stability.
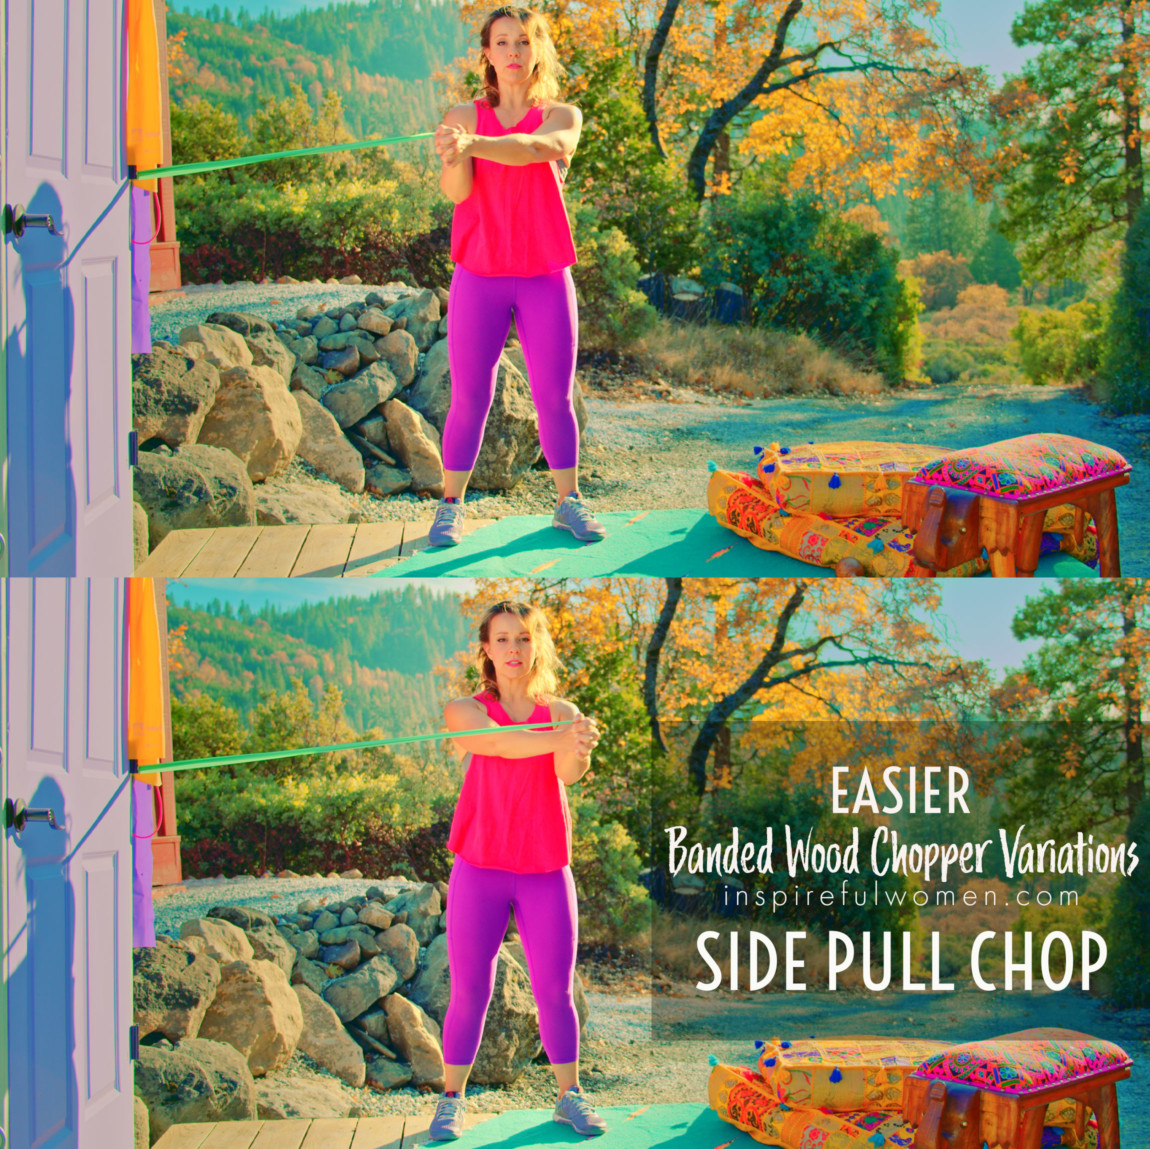
Side pull wood chops
Side pull wood chops
This is a simpler version without any diagonal movement patter- the aspect of the woodchopper that can feel a bit hard at first. In this case you are mounting the band at chest height instead, and keeping the arms parallel to the ground the whole time, moving the arms from one side to the other.
We are still keeping our torso still & squared to the front though!
Dumbbell Core Moves
Dumbbell Core Moves
START WITH SIMPLE CORE STABILIZATION MOVES:
If it is too difficult start with pallof exercise or core stabilization with horizontal abduction of the arms to learn to stabilize against a rotational force.
You can add in up and down, and diagonals, figure eights, basically any pattern.
SCIENCY STUFF
SCIENCY STUFF
SPIFFILICIOUS FACTS ABOUT MUSCLES & MOVES
The chops and lifts are based off of diagonal movements patterns called PNF - proprioceptive neuromuscular facilitation. The pattern is thought to facilitate the connection between the brain and the muscles. They are unique in that they incorporate diagonal muscle patterns to help correct muscle imbalances that affect posture - this is one example:
https://www.omegachiro.com/lower-cross-syndrome/
The quadratus lumborum muscle (or QL for short) is a muscle that lies on the backside of the abdomen, in the low back region. The muscle originates on the upper part of the pelvis and attaches to the last rib and the lower lumbar vertebrae. The main job of the quadratus lumborum is to side bend the spine. It also works to hold the 12th rib still to provide a stable base for the diaphragm to work off of during inhalation. If the legs are fixed the quadratus lumborum will bend the spine down to the side. If the upper body is fixed, the quadratus lumborum will pull the side of the pelvis up. There are two quadratus lumborum muscles, one on each side of the spine.
The obliques are muscles that lie on the front and sides of the abdomen. There are two distinct layers. The internal obliques are deep and run diagonally from the abdominal fascia, ligaments, and the top of the pelvis and attach to the connective tissues on the front of the abdomen (linea alba) and the lower ribs. The external obliques lie on top of the internal obliques and run in the opposite direction. They originate on the lower six ribs and insert on the front of the top of the pelvis, the pubic bone, and the connective tissue on the front of the abdomen (linea alba).
The quadratus lumborum, obliques, along with the transverse abdominis - which is the 3rd and deepest layer of muscles of the abdomen work together to maintain an upright posture, protect the spine and support the contents of the abdomen. The transverse abdominis runs horizontally across the abdomen and around the torso - attaching into the fascia (connective tissue) in the back. It is somewhat like a corset. It originates from the lower 6 ribs, the front top of the pelvis and ligaments and fascia of the lower abdomen. It attaches to the thick connective tissue that runs down the front of the abdomen (linea alba). The function of the transverse abdominis is to compress the abdomen to support the organs and stabilize the spine.
ALLLL MUSCLES & WHEN
ALL MUSCLES WORKING & WHEN DURING THE BAND WOOD CHOPPER
The core stabilizers (obliques, transverse abdominis, quadratus lumborum, rectus abdominis, erector spinae, multifidi) work to hold the spine in a neutral position throughout the exercise. The goal of the exercise is to keep the core still as the arm moves. The scapular muscles will work to move and stabilize the shoulder blade throughout the movement - the shoulder blades will mostly stay back (retraction) and down (depression) but will move with the arm - mostly upward rotation and some protraction as the arm moves up and downward rotation and retraction as the arm comes back. The rotator cuff muscles will work to stabilize the head of the humerus (upper arm bone) in the center of the socket.
The movement begins with the upper arm flexed, adducted, and externally rotated. The arm is pulled down and across the body using the latissimus dorsi, teres major, posterior deltoid, triceps, scapular muscles to pull the shoulder blade in and down the back (retractors and depressors) and rotator cuff muscles to stabilize the shoulder joint and to move from external rotation to internal rotation (subscapularis). The muscles of the forearm hold the wrist stable and elbow (along with the upper arm muscles) still against the pull of the band.
The obliques work to hold the torso still against the rotational forces when the arm begins to pull the band down - the resistance of the band will attempt to pull the side of the torso (same side as working arm) forwards and the opposite side backwards. The obliques and transverse abdominis will also be working to draw the abdomen inwards for general spinal stabilization.
If the right arm is being used then the right side of the torso will be pulled into rotation to the left. The left external obliques and the right internal obliques would need to prevent the movement. As the arm is pulled down and across, the opposite muscle activity would be needed to prevent right rotation of the torso. This description is very simplified - the internal and external layers run in opposite directions. When they are stabilizing the core the activation of the muscles will be changing with the amount of force and the direction of force as the arm pulls down and across.
In the beginning of the movement the right quadratus lumborum will contract to prevent left side bending, but as the pulls down and across the left side will contract to prevent right side bending.
At the end of the movement, the resistance will be the greatest, most of the core muscles (multifidi, quadratus lumborum, obliques, transverse abdominis, iliopsoas, serratus posterior, lats) will be working against the rotational force to stabilize the core.
The muscles of the upper body will work eccentrically along with the same core muscles to stabilize the core and control the movement of the arm as it returns to the starting position.
PIN IT FOR LATER!
