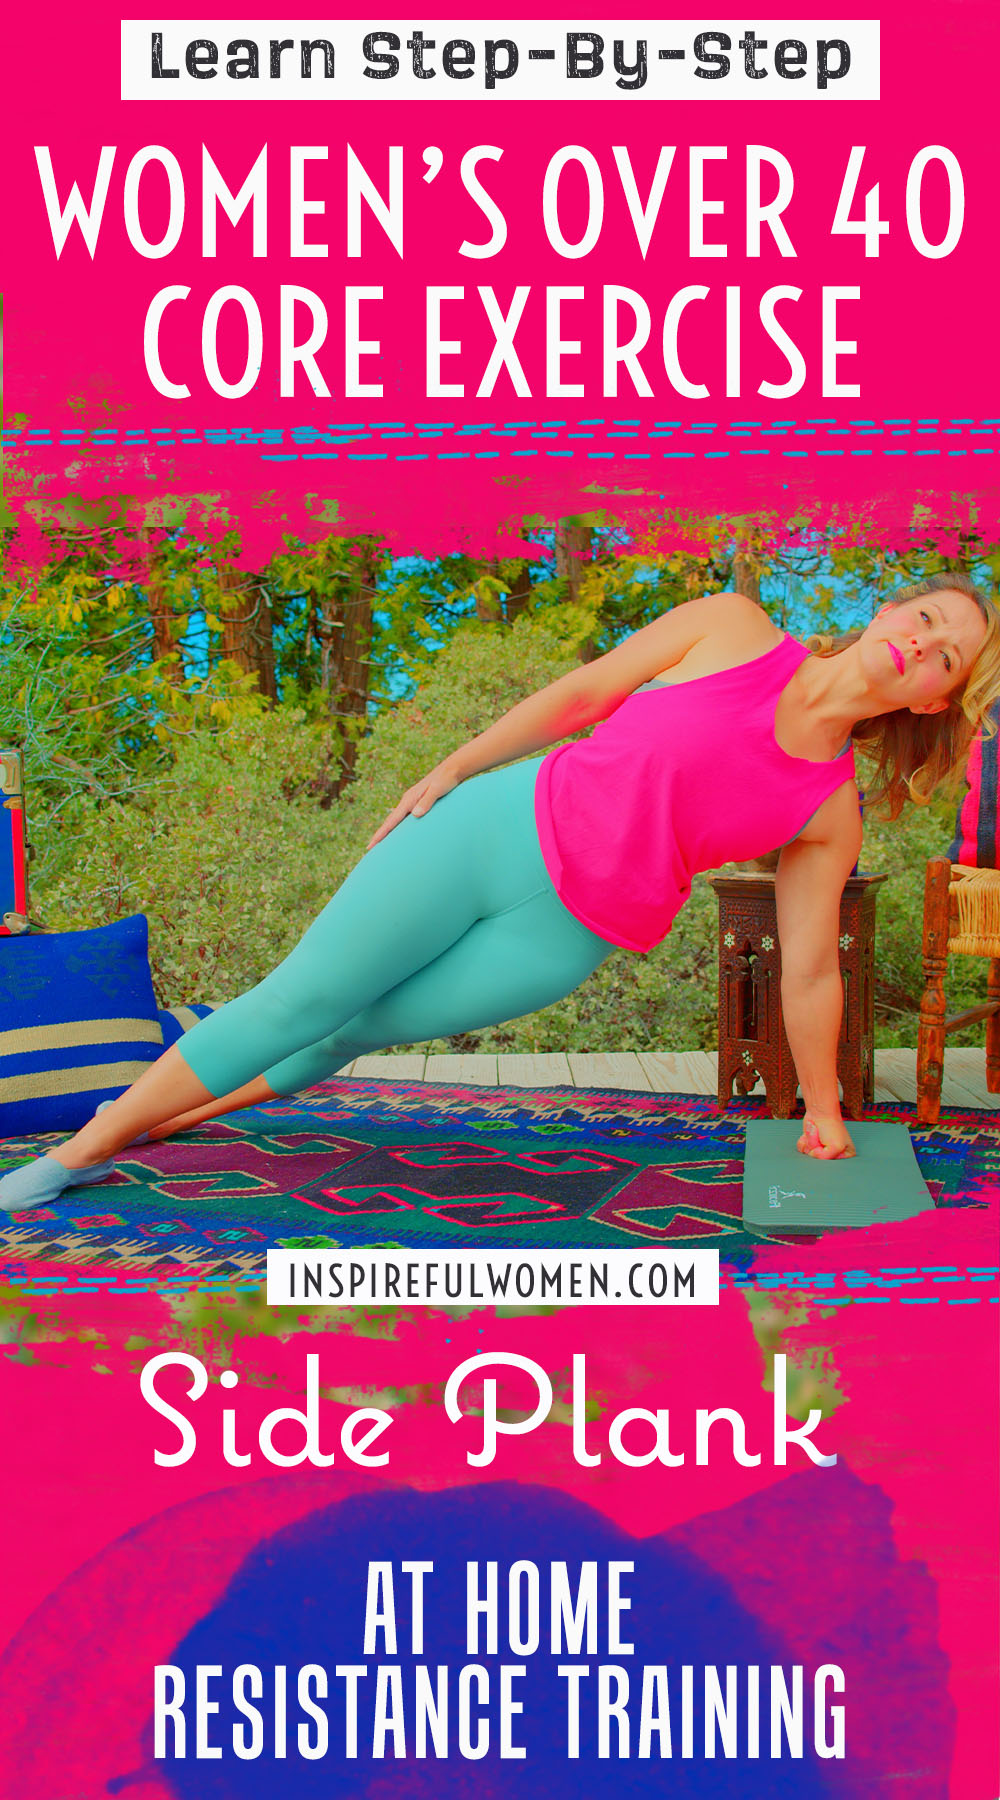
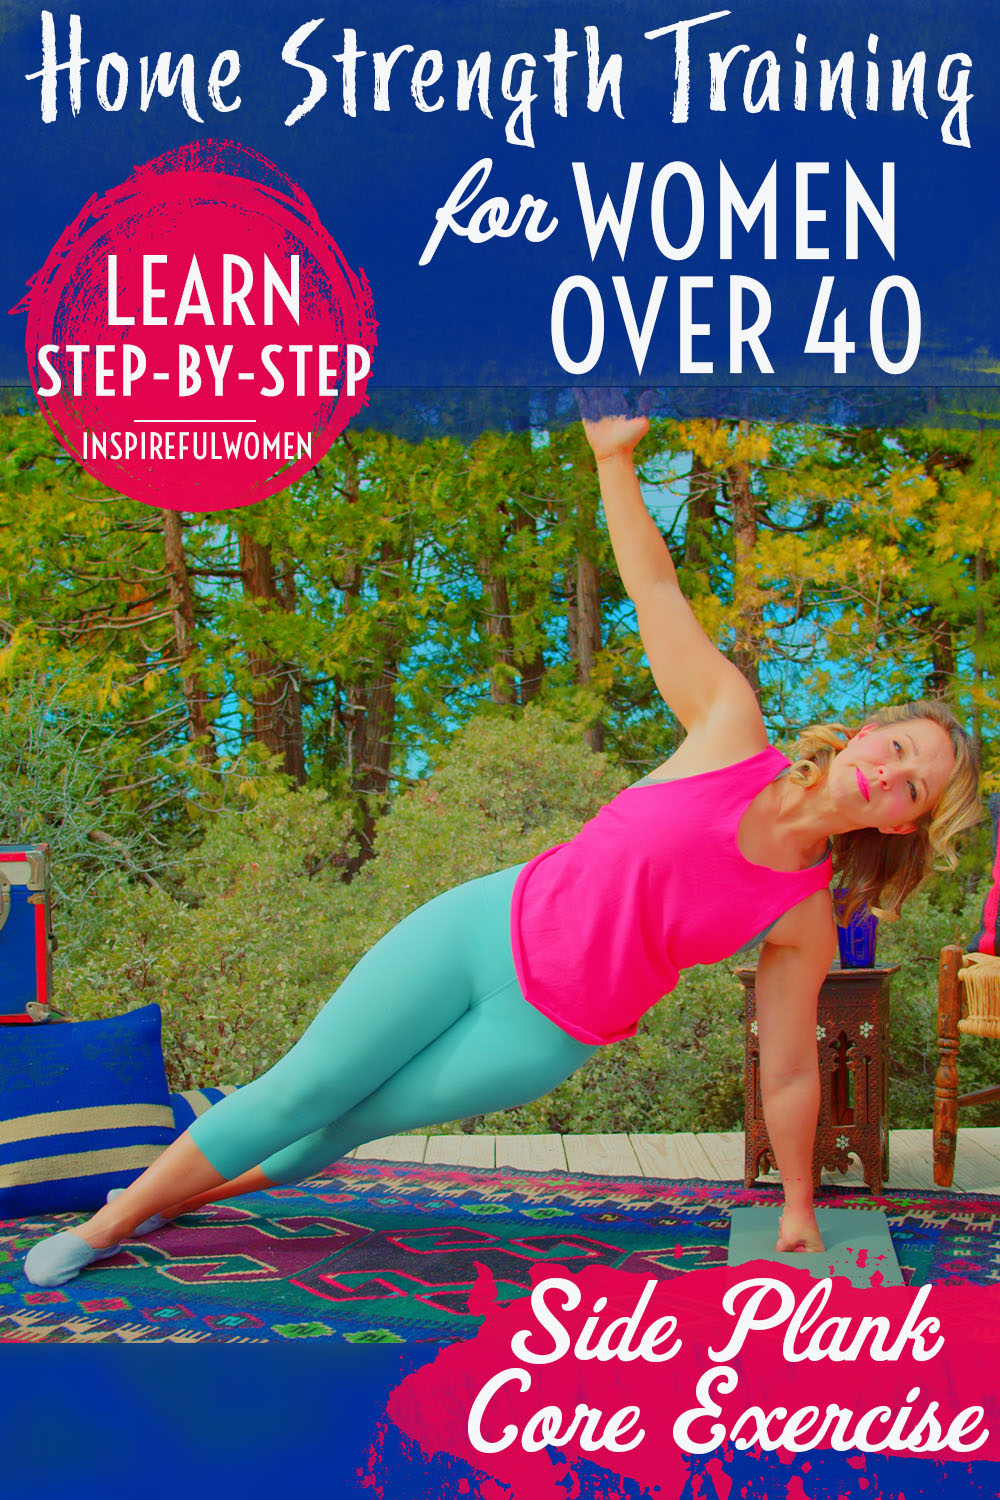
Bodyweight Side Plank - CORE
How to Do the Bodyweight Side Plank - Oblique Core Exercise | In-Depth Guide [VISUAL LEARNERS] Intermediate
Proper Form, Common Mistakes, & Variations + Harder Variations | Home Resistance Training
WHAT DO YOU WANT TO SEE?
QUICK DEMO
QUICK DEMO
MUSCLES THIS WORKS
MUSCLES
MAIN MUSCLES WORKED IN the Side Plank
LOTS OF CORE MUSCLES - SEE BELOW
obliques, quadratus lumborum, multifidi, transverse abdominis, latissimus dorsi, erector spinae.
OTHER MUSCLES WORKED:
- Rhomboids
- Mid and lower traps
- Rectus abdominis
- Pelvic floor
STARTING POINTERS
Starting Pointers
WHAT WE'RE DOING TODAY
Other names for this exercise: Side Bridge
ALL WE'RE DOING:
Holding a plank on our sides. But I shouldn't say "all" we're doing because these are pretty hard.
Here's a bodyweight ab exercise specifically for the sides of our core that doesn't require any equipment or weights at all.
This is an advanced version of the side plank. This is a full-body workout - the muscles from the feet to the arm work to hold the plank position. The arm is straight down under the shoulder, supporting the weight of the upper body. The legs are also straightened out, supporting the lower body. If you have problems with your wrists, elbows, or shoulders the forearm side plank may be a better option for you. Once you have mastered the position, it is easy to make this exercise more challenging just by making subtle changes to what the arm is doing.
HOW TO DO THE EXERCISE
LOOKS
HOW Side Planks SHAPE OUR BODY
Trim waist, upright posture, strong, graceful movement.
PROPER FORM
PROPER FORM: Side Planks
EQUIPMENT, SETS & REPS
EQUIPMENT
None
SUGGESTED STARTING WEIGHT FOR WOMEN:
None
SETS & REPS:
3 reps to fatigue on each side
PACE:
Static hold, monitor form while in the position.
BODY POSITION
BODY POSITION FOR THE Side Plank
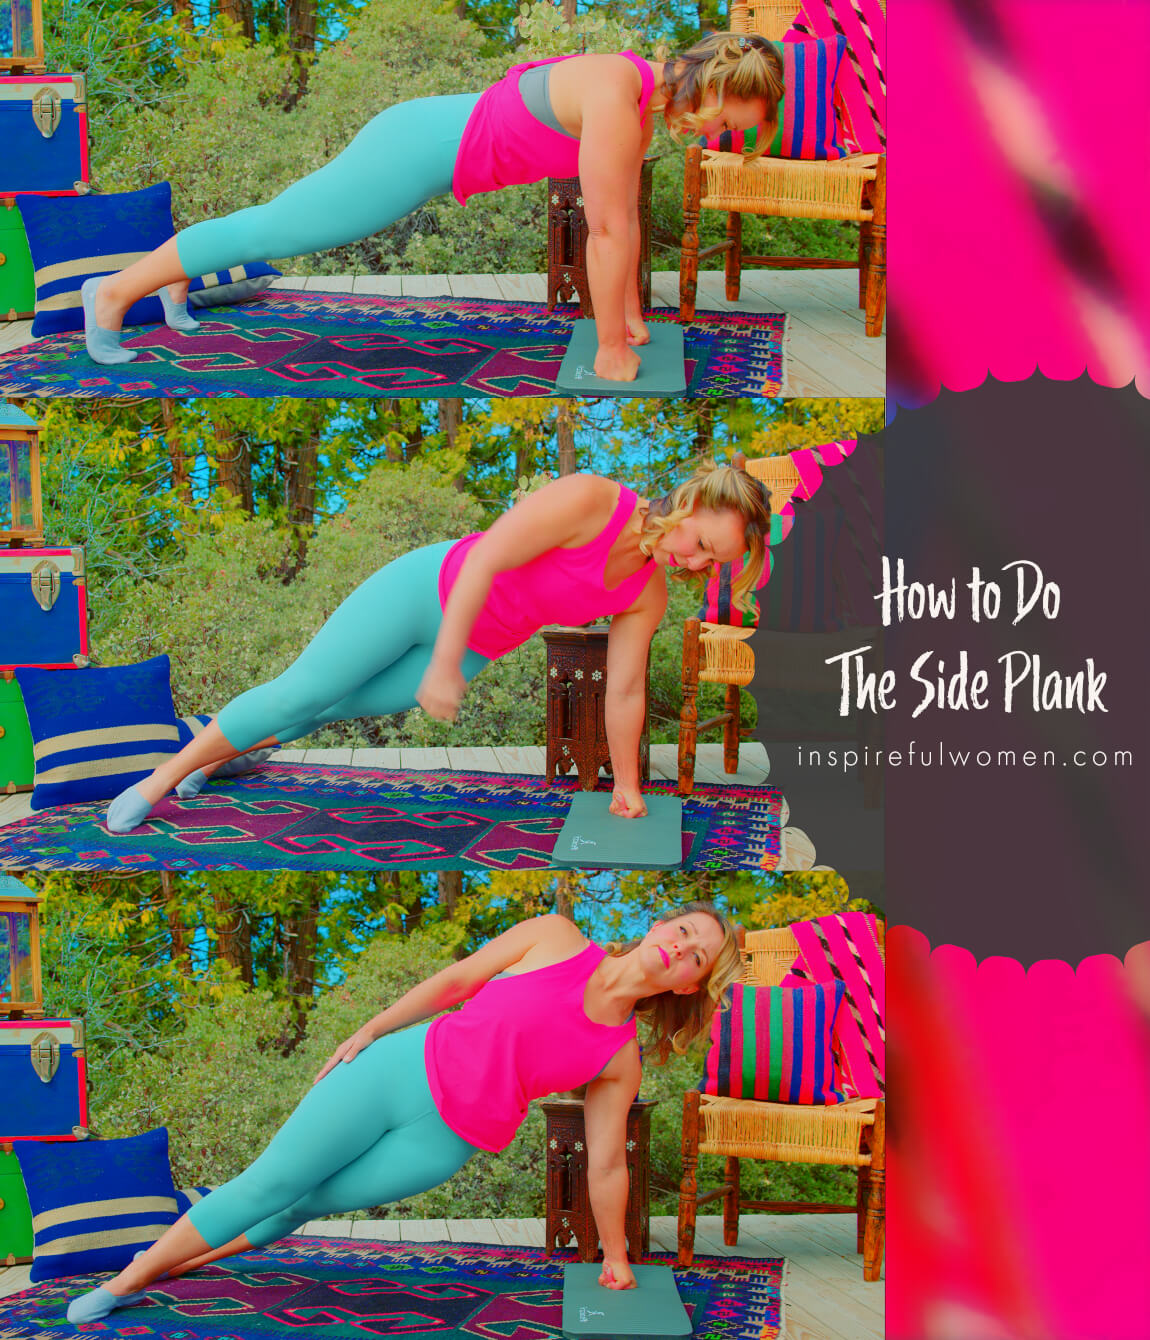
Start with your hands and knees on the floor, in a classic push-up position.
ARMS/HANDS: straight elbows soft. Hands on the floor - directly under your shoulders. If you have problems with your wrists - keeping your hand in a fist or using push-up handles can help.
LEGS: Straighten your legs out, without bending at your hips (no crease across your hips). Toes are planted on the floor.
BODY STANCE: Neutral spine, including your neck. You should be looking down at the floor. Sternum lifted shoulder blades in and down the back. You should form a straight line down the side of your body from your earlobe through your shoulder and hip down to the side of your ankle.
HOW TO DO
HOW TO DO Side Planks
CUE: Thinking about pulling both your shoulder blades down towards your pelvis can help to activate your lats - which helps to stabilize your torso.
Lift one arm up and rotate your body so that your shoulders are stacked one over the other - your shoulders and hips should be squared to the front.
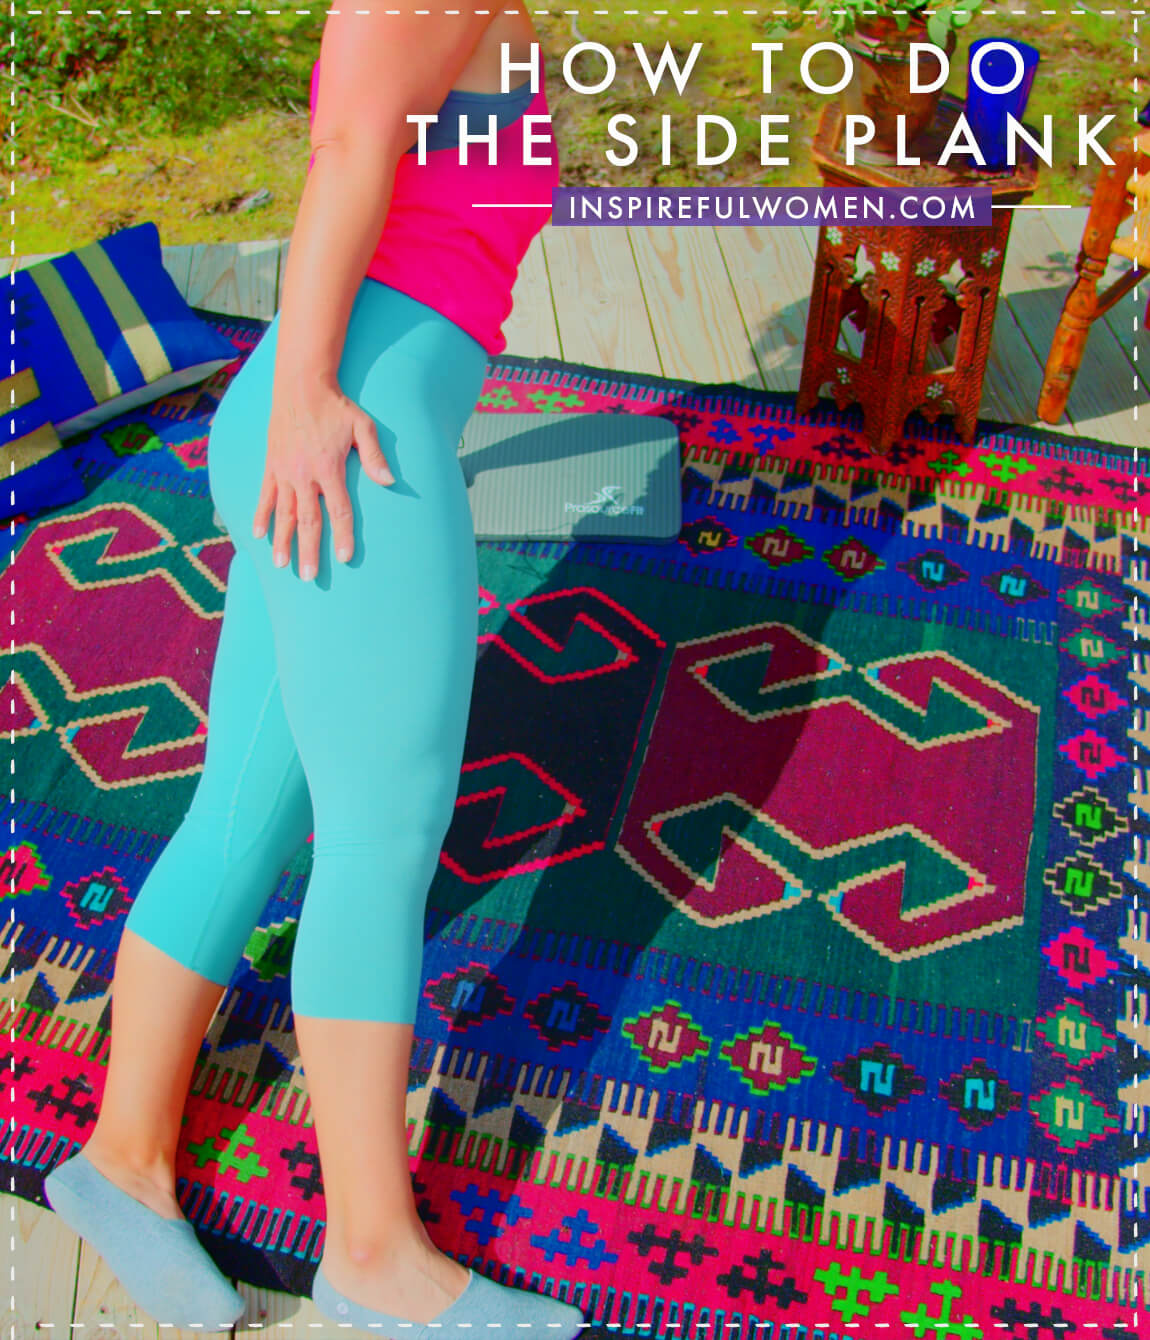
Your feet will be staggered with your bottom leg at a slight angle in front of you (a slight hip crease) and your top leg in front of your bottom leg. The sides of your feet are resting on the floor - the outside of your bottom foot and the inside of your top foot.
ARMS:
Bottom arm - arm straight with the palm of your hand on the floor right under your shoulder.
Top arm - straight up in line with your shoulders, or your arm can be lying along the side of your torso, or your hand on the top of your pelvis, your arm can be folded in and tucked to your chest with your hand on the opposite shoulder, whatever is most comfortable. The sides of your torso should be even - no side bending to either side.
You should be able to draw a straight line (from the front) through your head, torso, belly button, and between your knees. From the top - earlobe, shoulder, hip, bottom knee, and foot.
Starting at your head, do a body scan, checking for proper alignment and muscle activation.
Engage your core muscles by gently pulling your belly button towards your spine while breathing normally.
Continue to scan your body moving from head to toe continuously until you are not able to hold the correct positioning.
Rotate back to the push up position and lower your back to the floor to take a break. Push back up and rotate to the side plank position to continue for the desired number of reps.
HOW TO SAFELY GET OUT OF THE EXERCISE
Rotate back to the push up position, lower your hips to the floor, roll to your stomach, and push back with your hands to kneeling. Step to standing.
COMMON MISTAKES
COMMON MISTAKES
WHAT TO AVOID WITH THE Side Plank
KEY TIP:
Guess what? Good news! Many avoids are the same for most movements. Once you learn the basics, there's really only a few extra avoids for each individual movement.
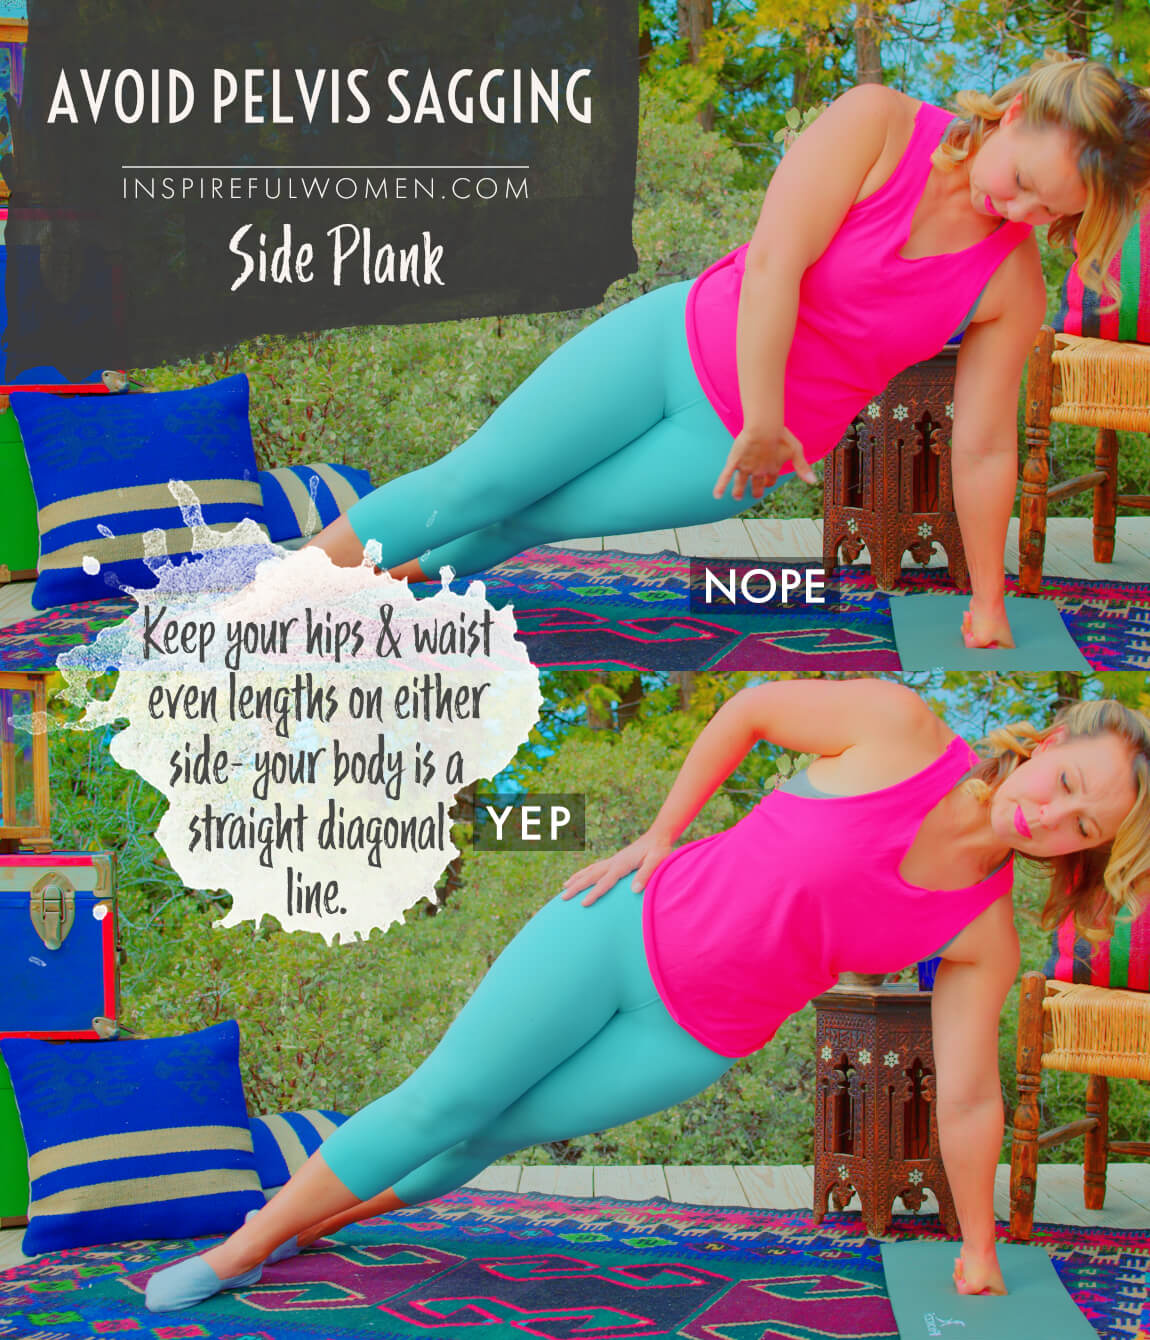
1. Avoid pelvis sagging
AVOID: Letting the pelvis or midsection sag.
WHY NOT?
- This can pull your low back out of the neutral position and can lead to injury or muscle strain.
WHAT TO DO:
- The sides of the waist should be equal.
- Activate the hip abductors of the bottom leg to push the pelvis to a level position.
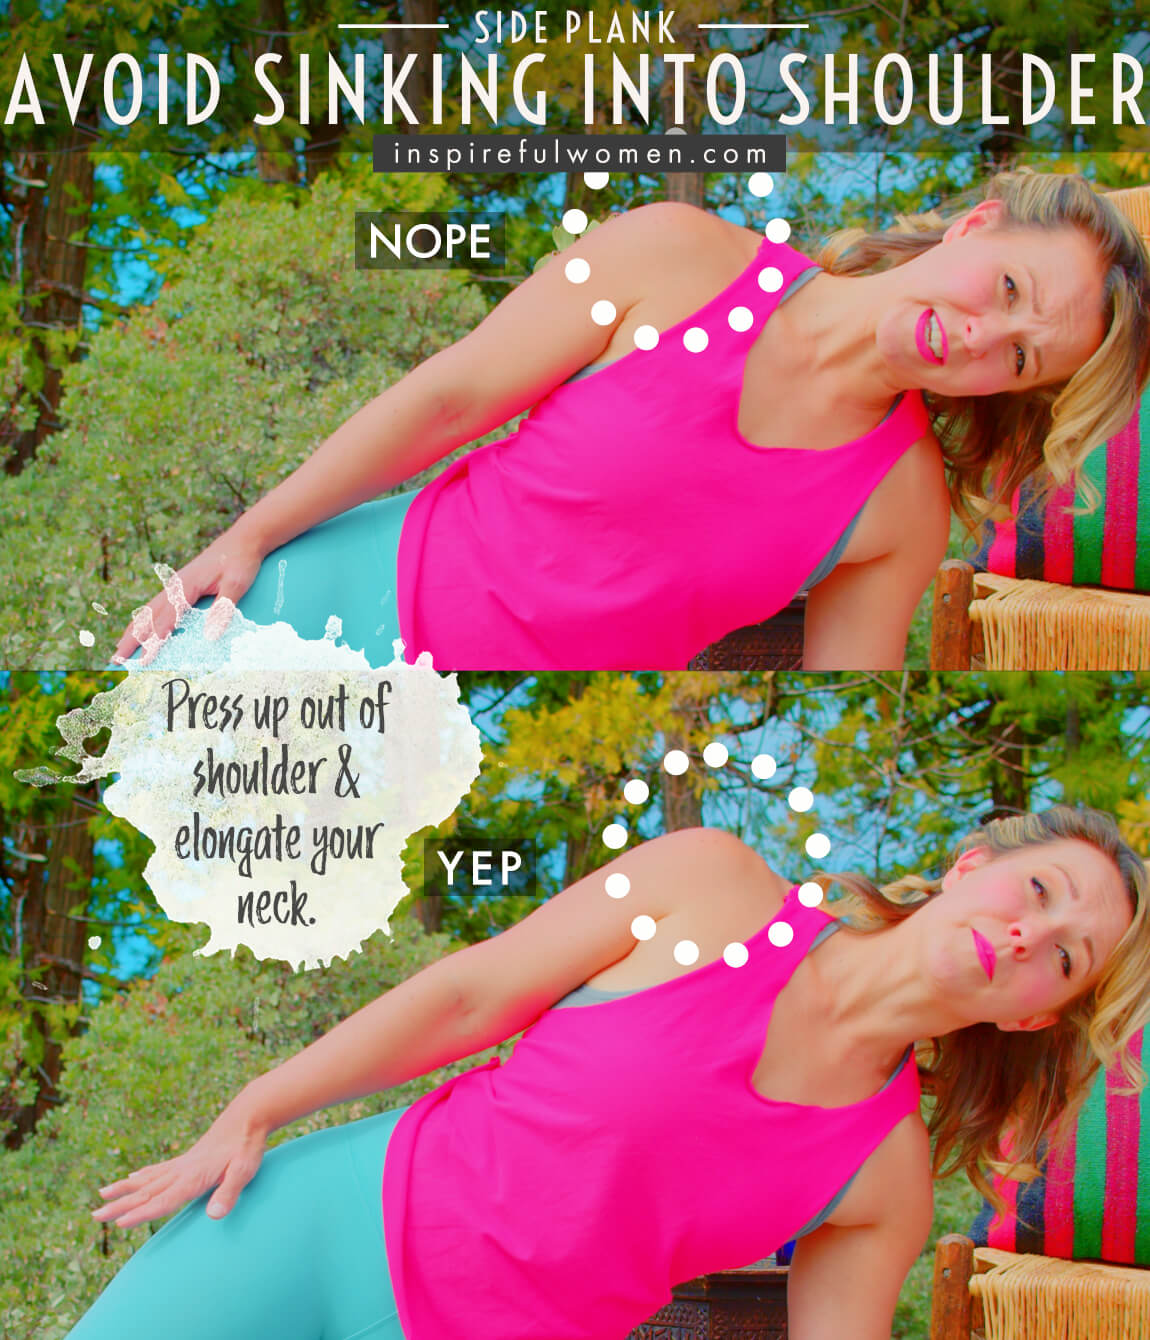
2. Avoid head sinking into shoulder
AVOID: Dropping into the shoulder or letting the shoulder rise up towards the earlobe.
WHY NOT?
- Stresses the shoulder joints, and increases the lumbar curve.
WHAT TO DO:
- Keep the shoulders back and sternum lifted and the shoulder blade depressed.
- Press down into the floor with the support hand.
- Lengthen the spine (including the neck) and energize the arm that is reaching out.
- This will activate the muscles of the core.
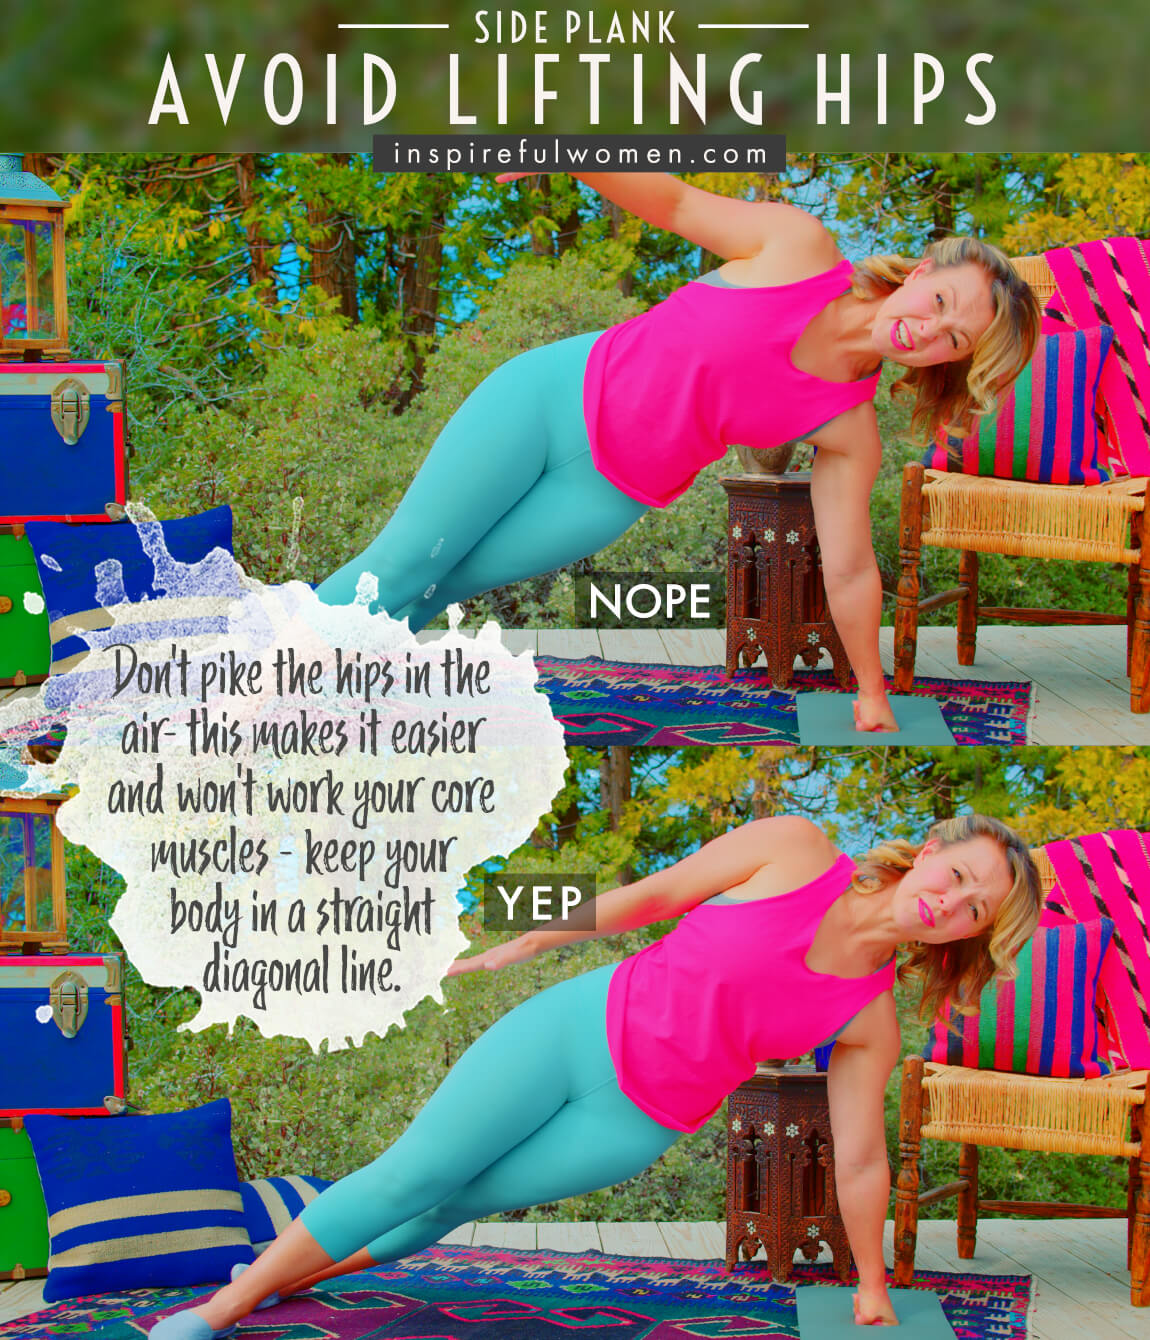
3. Avoid lifting hips
AVOID: Lifting the hips up into the air too high.
WHY NOT?
- This means you are side-bending the spine.
- It will decrease the activity of the obliques and quadratus lumborum.
WHAT TO DO:
- The goal is to work the muscles in a neutral spine position.
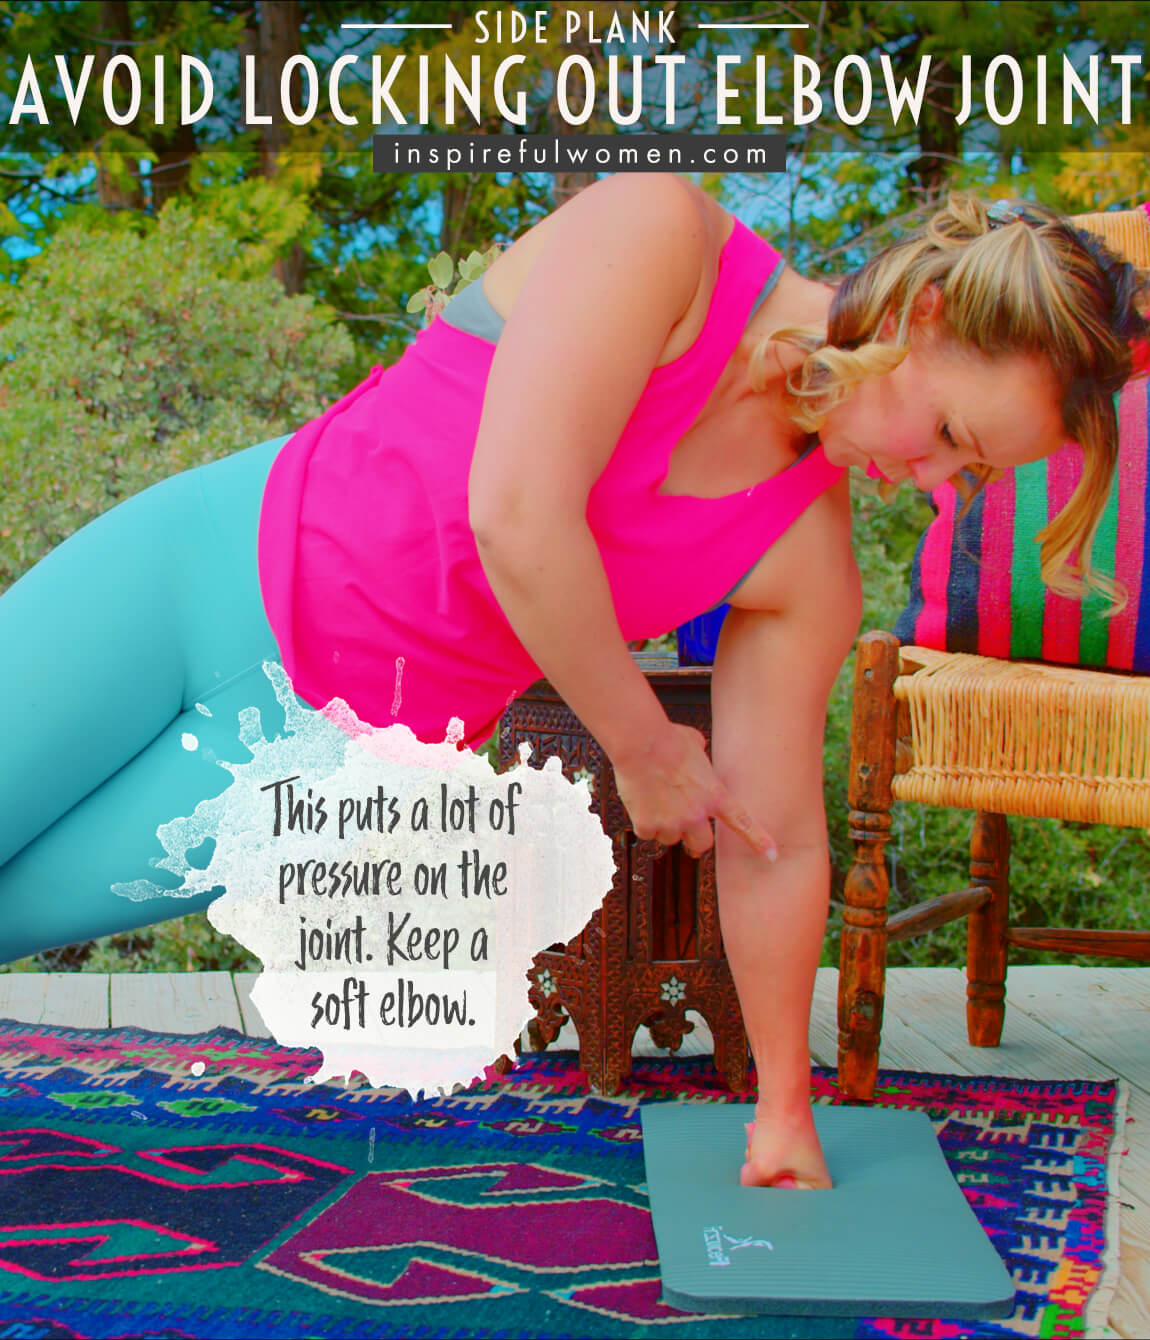
4. Avoid Locking elbows
AVOID: Avoid locking or hyperextending your supporting elbow.
WHY NOT?
- This puts too much force through the joint and may result in long-term damage over time.
WHAT TO DO:
- Keep the support supporting elbow soft or just slightly bent.
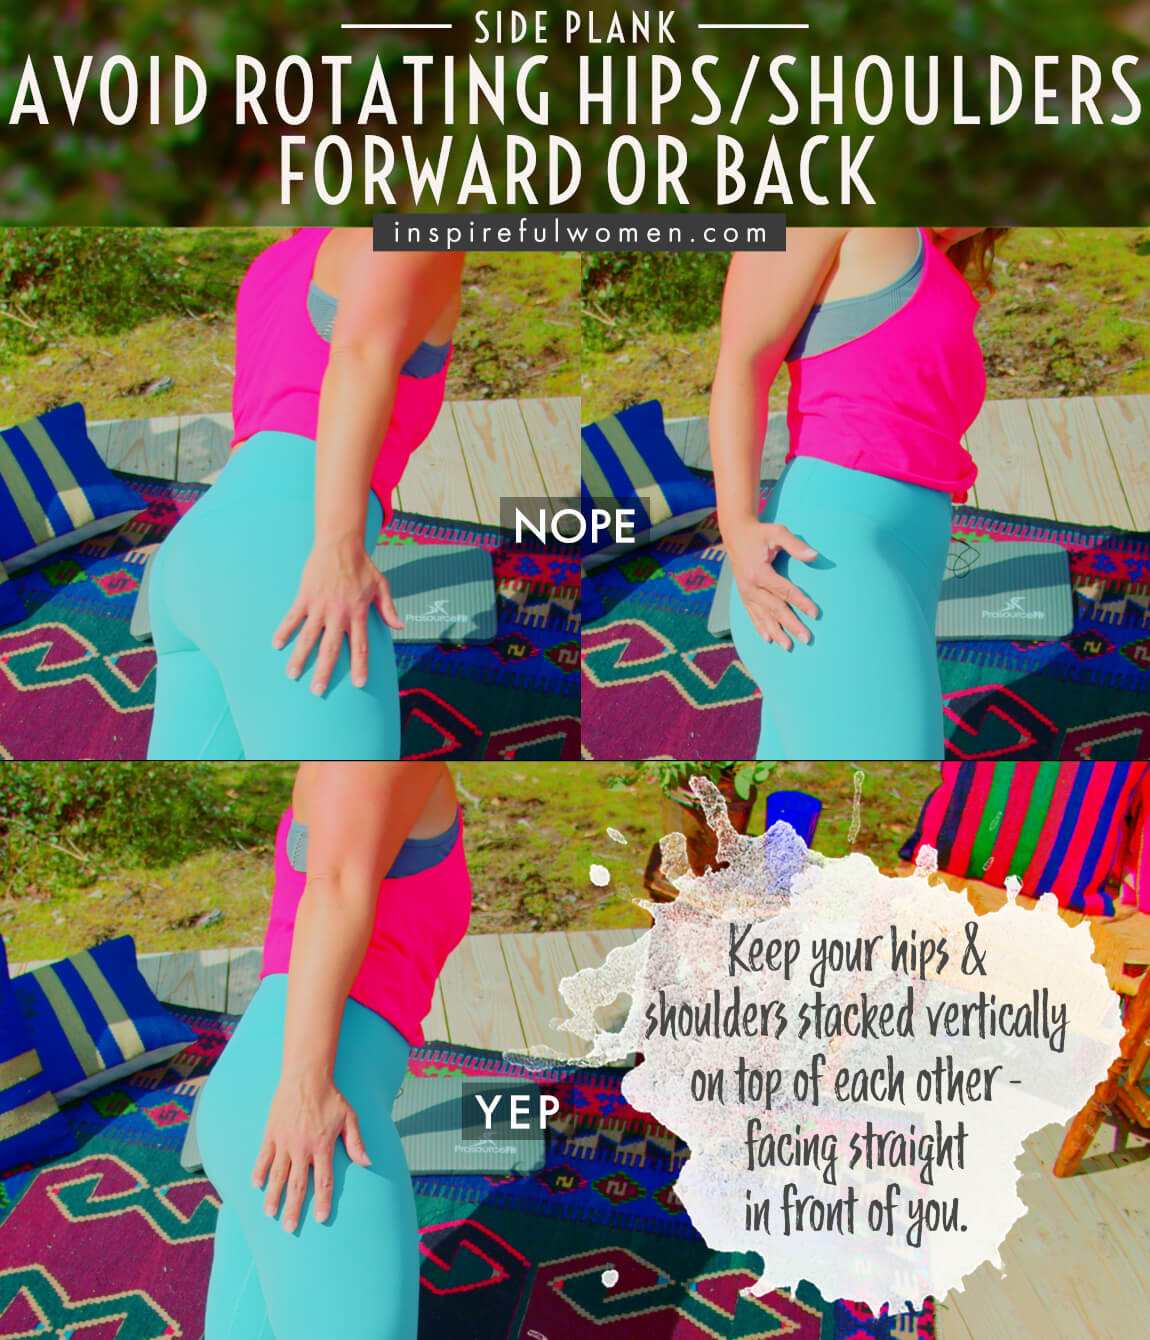
5. Avoid hips shoulders rotating
AVOID: Letting your hips or shoulders rotate/ lean forward or backward.
WHY NOT?
- This means that your spine is rotating.
- This defeats the purpose of the exercise.
- The goal of the exercise is to activate the muscles of the torso to train the muscles to hold the spine in a neutral position.
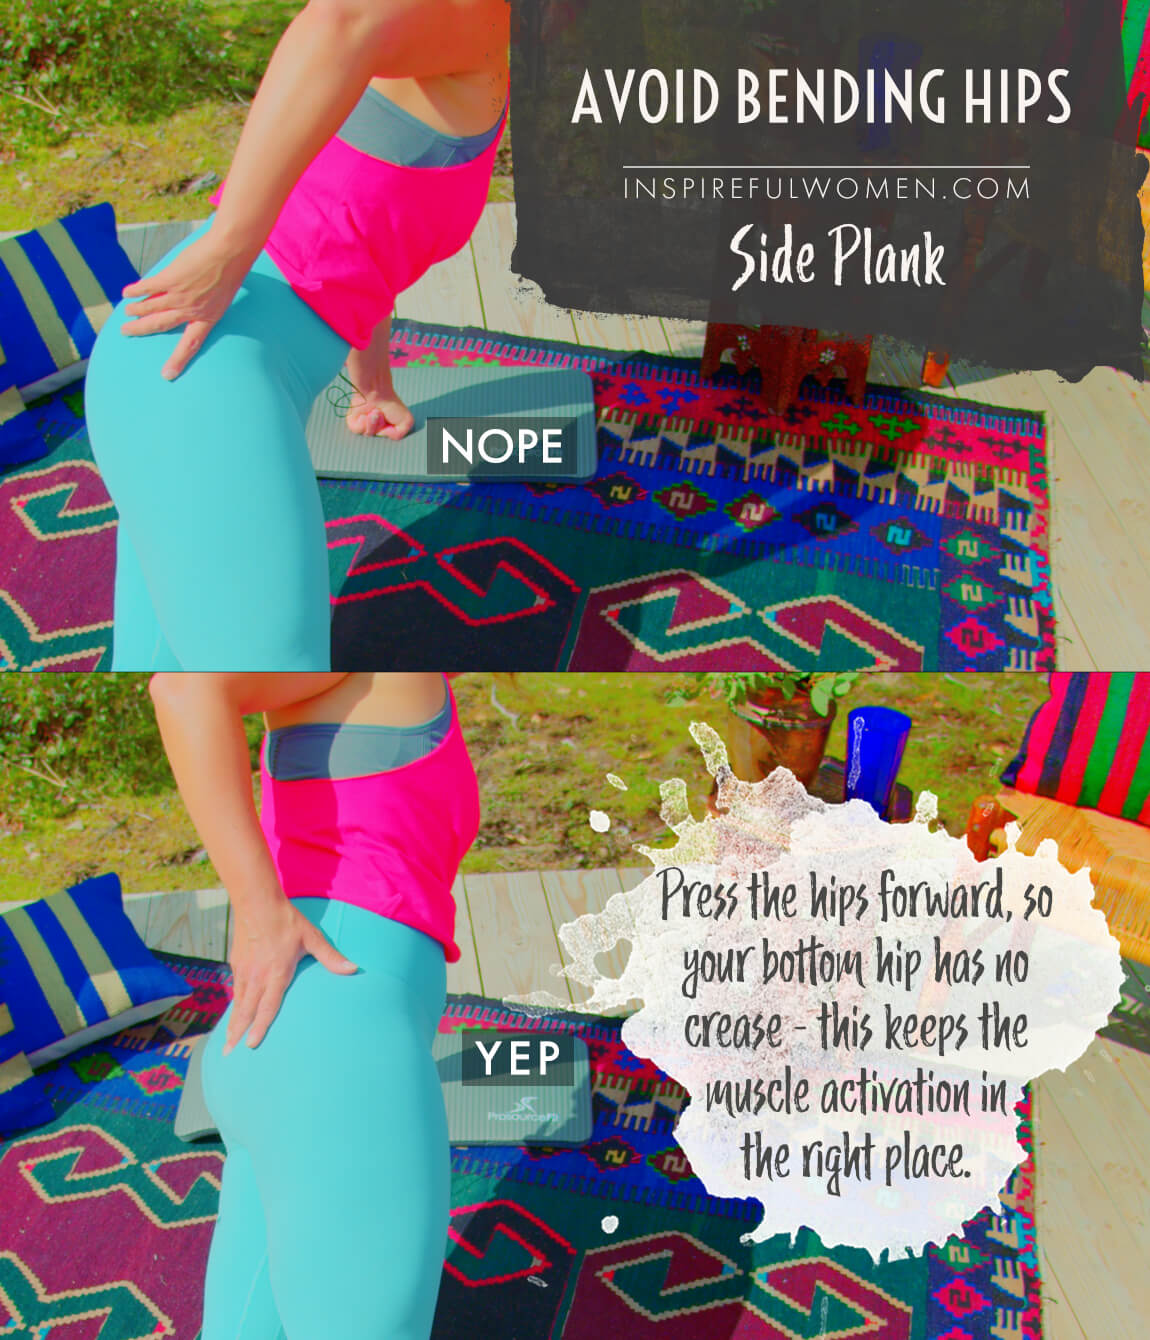
6. Avoid bending hips
AVOID: Bending at the hips.
WHY NOT?
- This is a common cheat that will make the exercise much easier.
- This happens when you use your hip flexors to hold you up.
- This defeats the purpose of the exercise - using the hip flexors instead of the core muscles.
WHAT TO DO:
- Keep a straight line from earlobe to feet - it is helpful to use a mirror, or take a video to look at your form.
VARIATIONS
VARIATIONS
VARIATIONS OF Side PLanks
feet placement
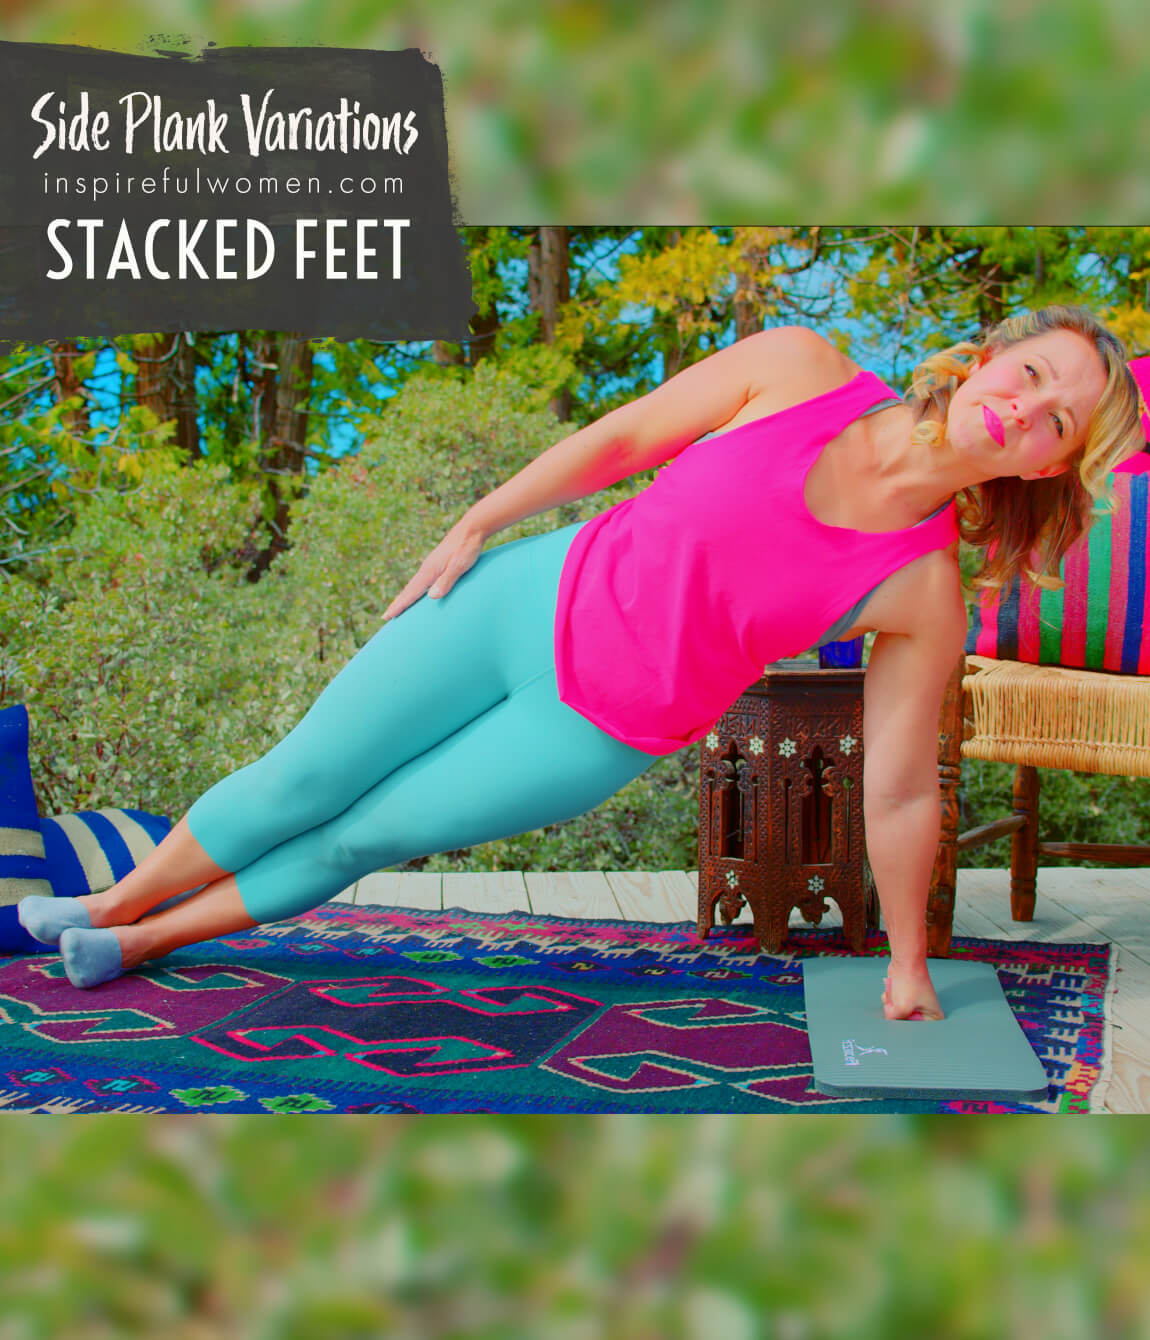
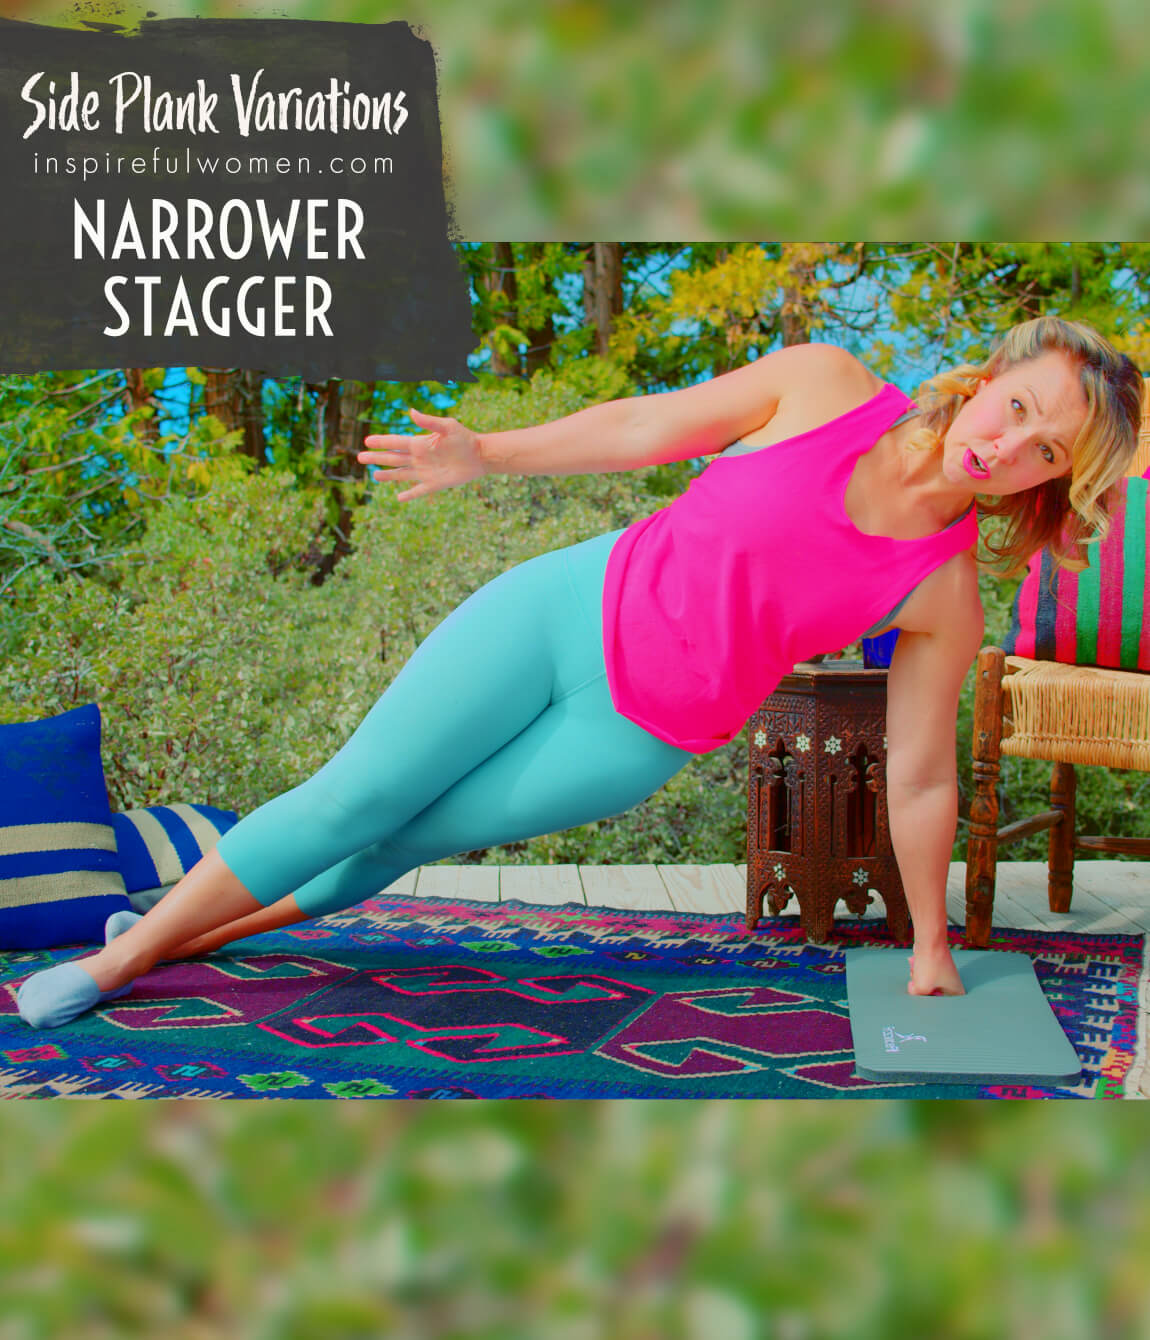
Foot Width Placement
Stacking the feet one on top of the other will be less stable and harder to do. Staggering the feet - with both feet on the floor - one in front of the other will be more stable and will be easier.
alternate way to get into position
alternate way to get into position
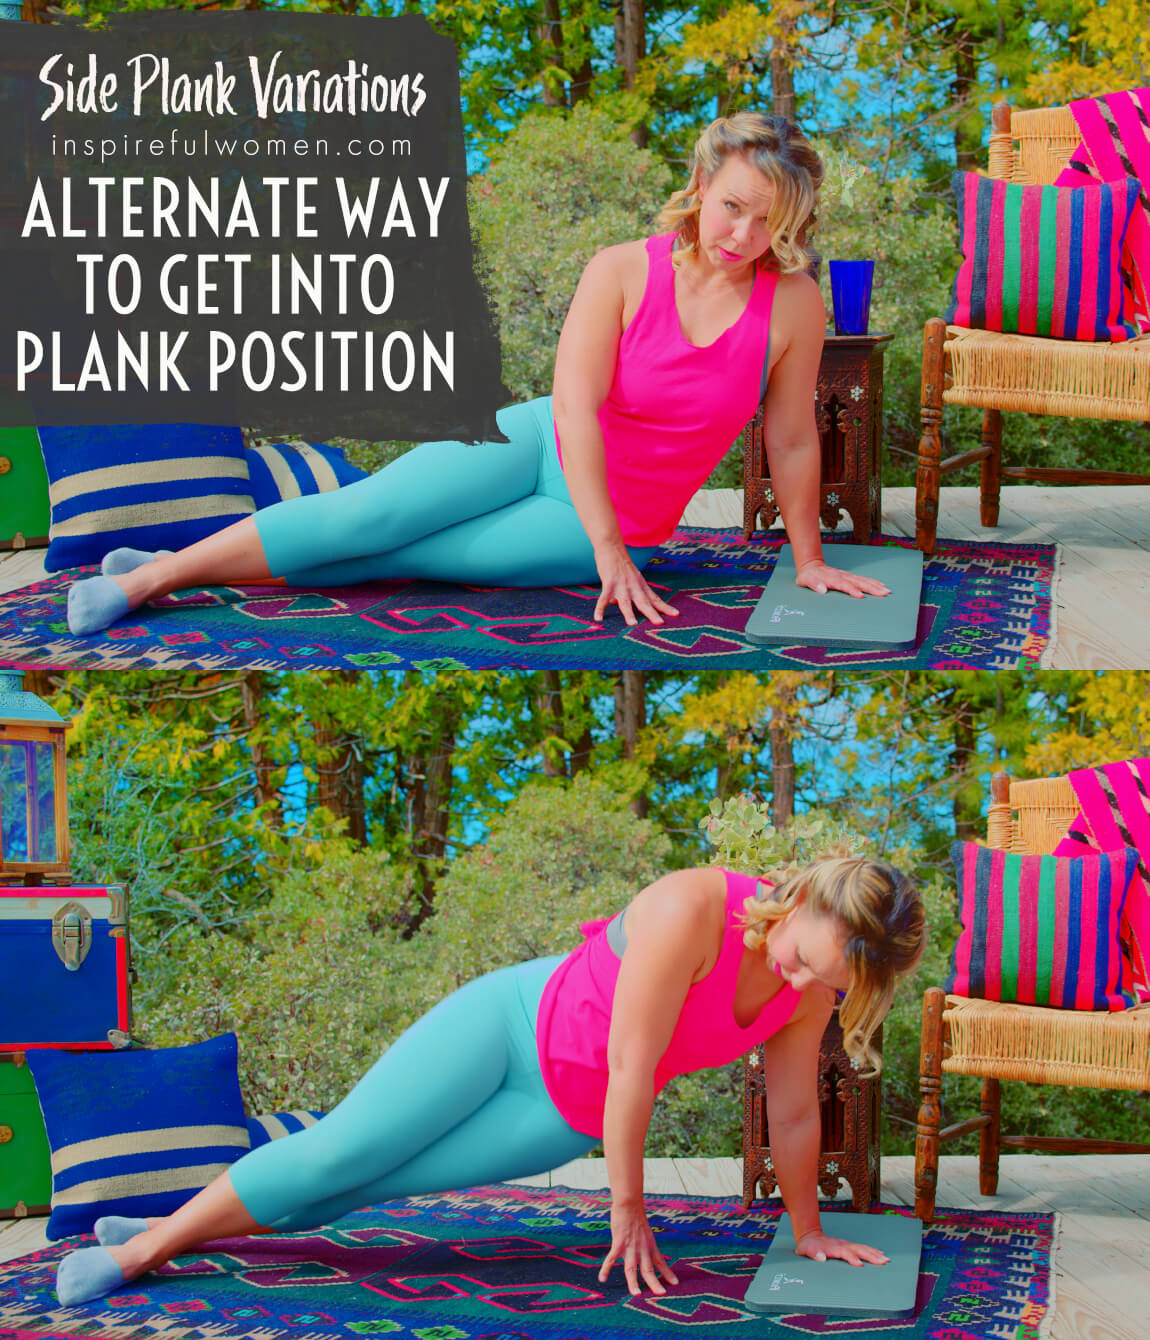
This is an optional way for getting into the side plank position. You may find it easier if you have difficulty rotating the torso from the pushup position. It does require you to make adjustments to the position of the spine as you press up - you will start in a position where your spine is side bent and as you push up you will need to make sure your torso is straight.
Sit on one side (on the side of your pelvis as if you were going to lie down on your side. Stagger your feet with your bottom leg at a slight angle in front of you (a slight hip crease) and your top leg in front of your bottom leg. The sides of your feet are resting on the floor - the outside of your bottom foot and the inside of your top foot.
ARMS:
Bottom arm - arm straight with the palm of your hand on the floor right under your shoulder.
Top arm - your arm can be lying along the side of your torso, or your hand on the top of your pelvis, or your arm can be folded in and tucked to your chest with your hand on your opposite shoulder, whatever is most comfortable.
Push down into your feet and hand, keeping your knees straight, as you push your hips forward and up - the hip crease in the front of your bottom leg should be straight at the top of the movement. The sides of the torso should be even - no side bending to either side.
MAKE IT HARDER
HARDER
MAKING THE SIDE PLANK MORE CHALLENGING
plank to pushup
plank to pushup
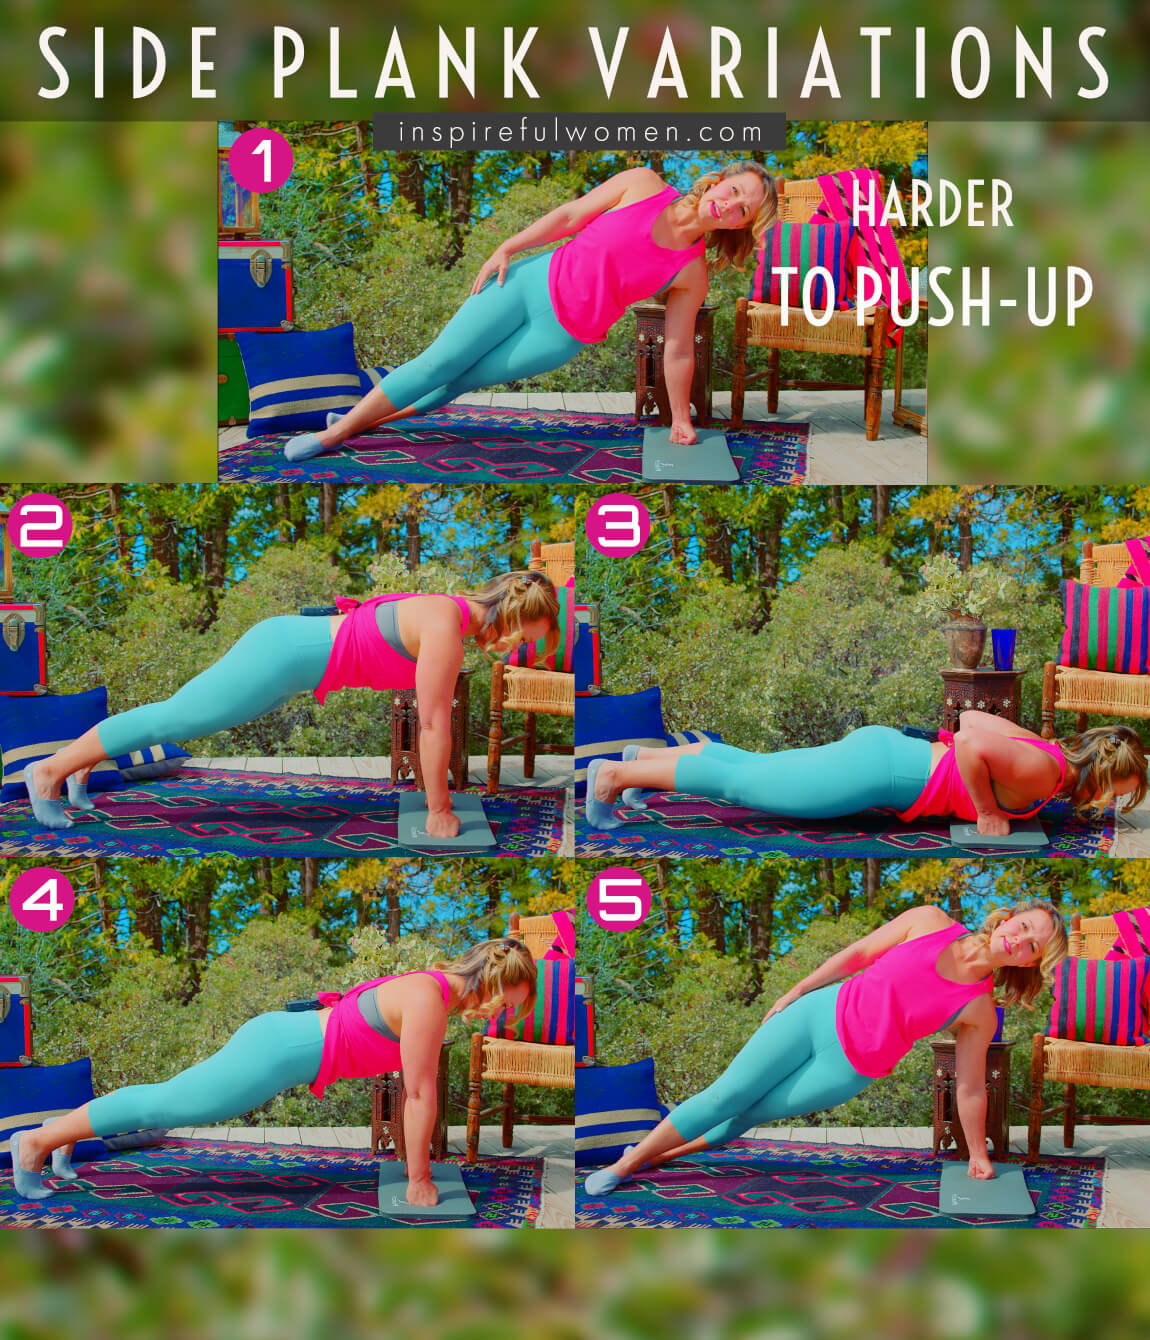
After the first side plank, return to the pushup position, complete 1-3 pushups, and then rotate to begin your next side plank. This is a nice way to really challenge your upper body strength and core endurance.
arm in air
arm in air
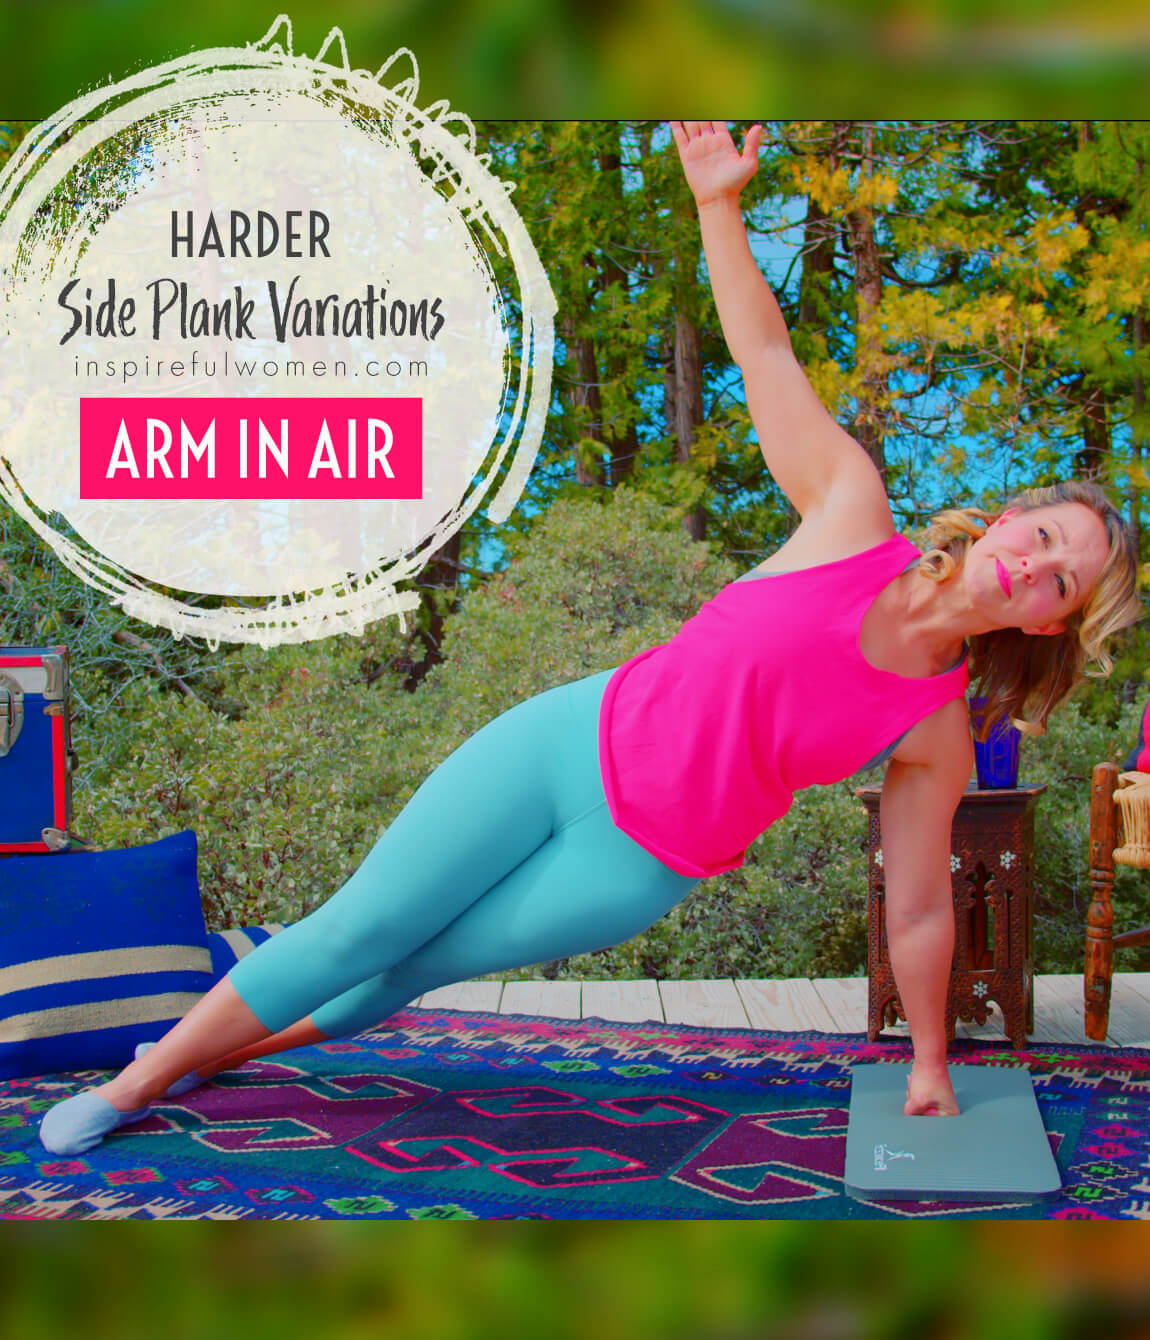
Lift the top arm up. You can just hold it straight up which will make it harder to stay stable, or you can lift it up so that it is parallel with the floor and move the arm forward (shoulder flexion) and back - either to the torso or even behind the torso. You can also try the side-lying plank rows.
lift top leg
lift top leg
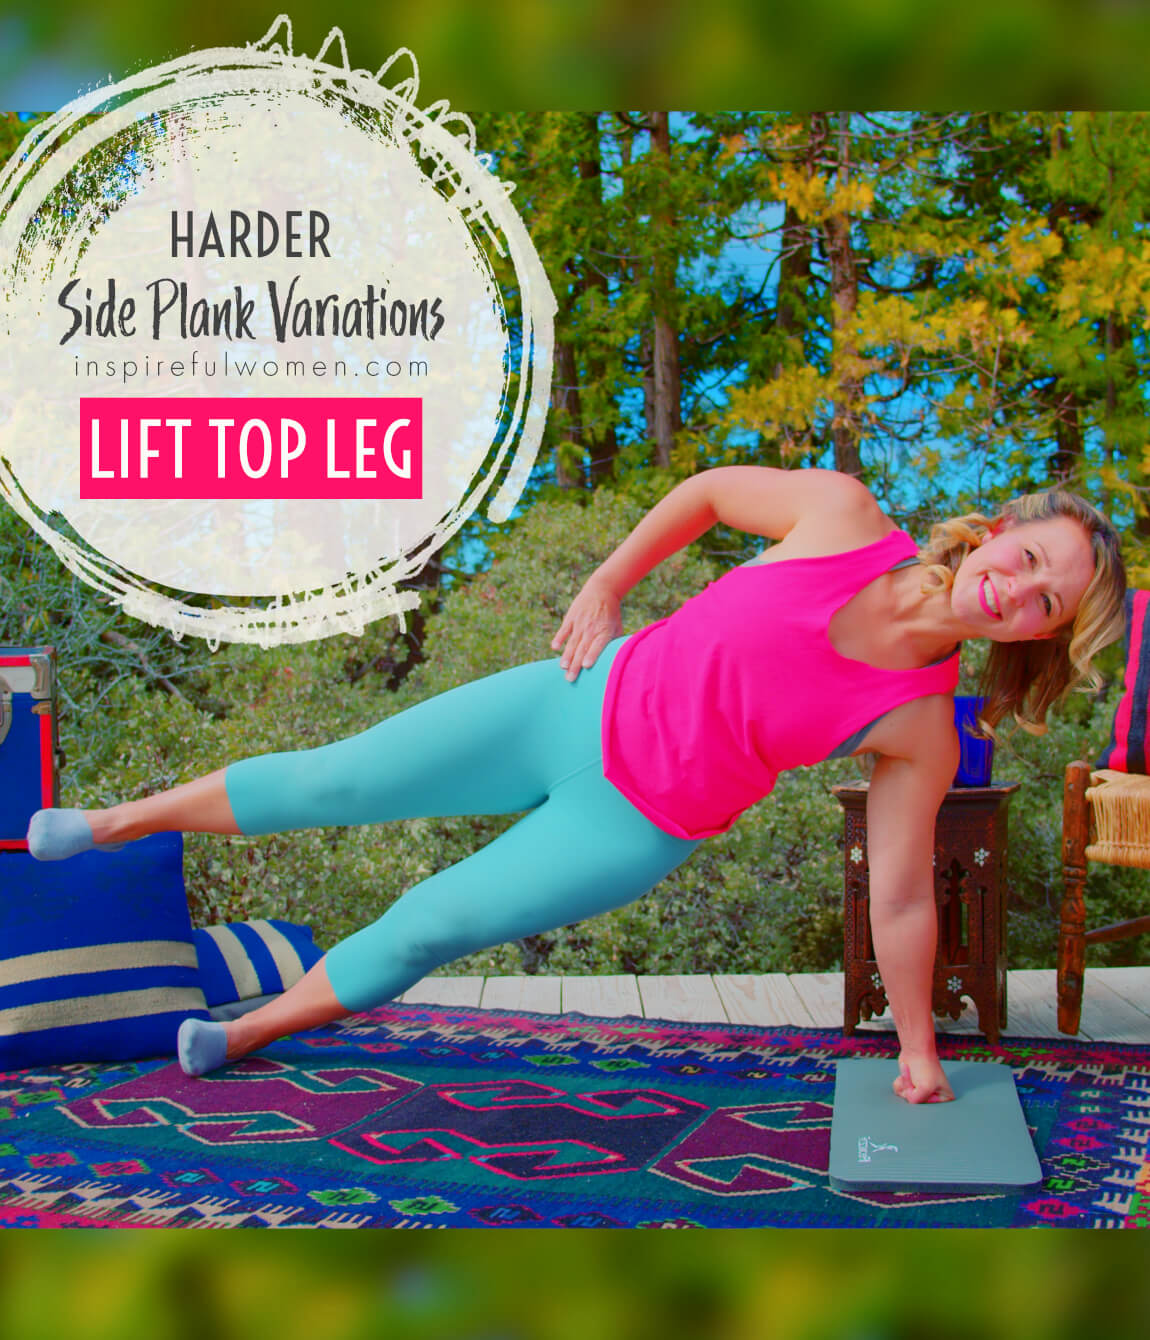
Lift the top leg so that it is about parallel with the floor and hold the position.
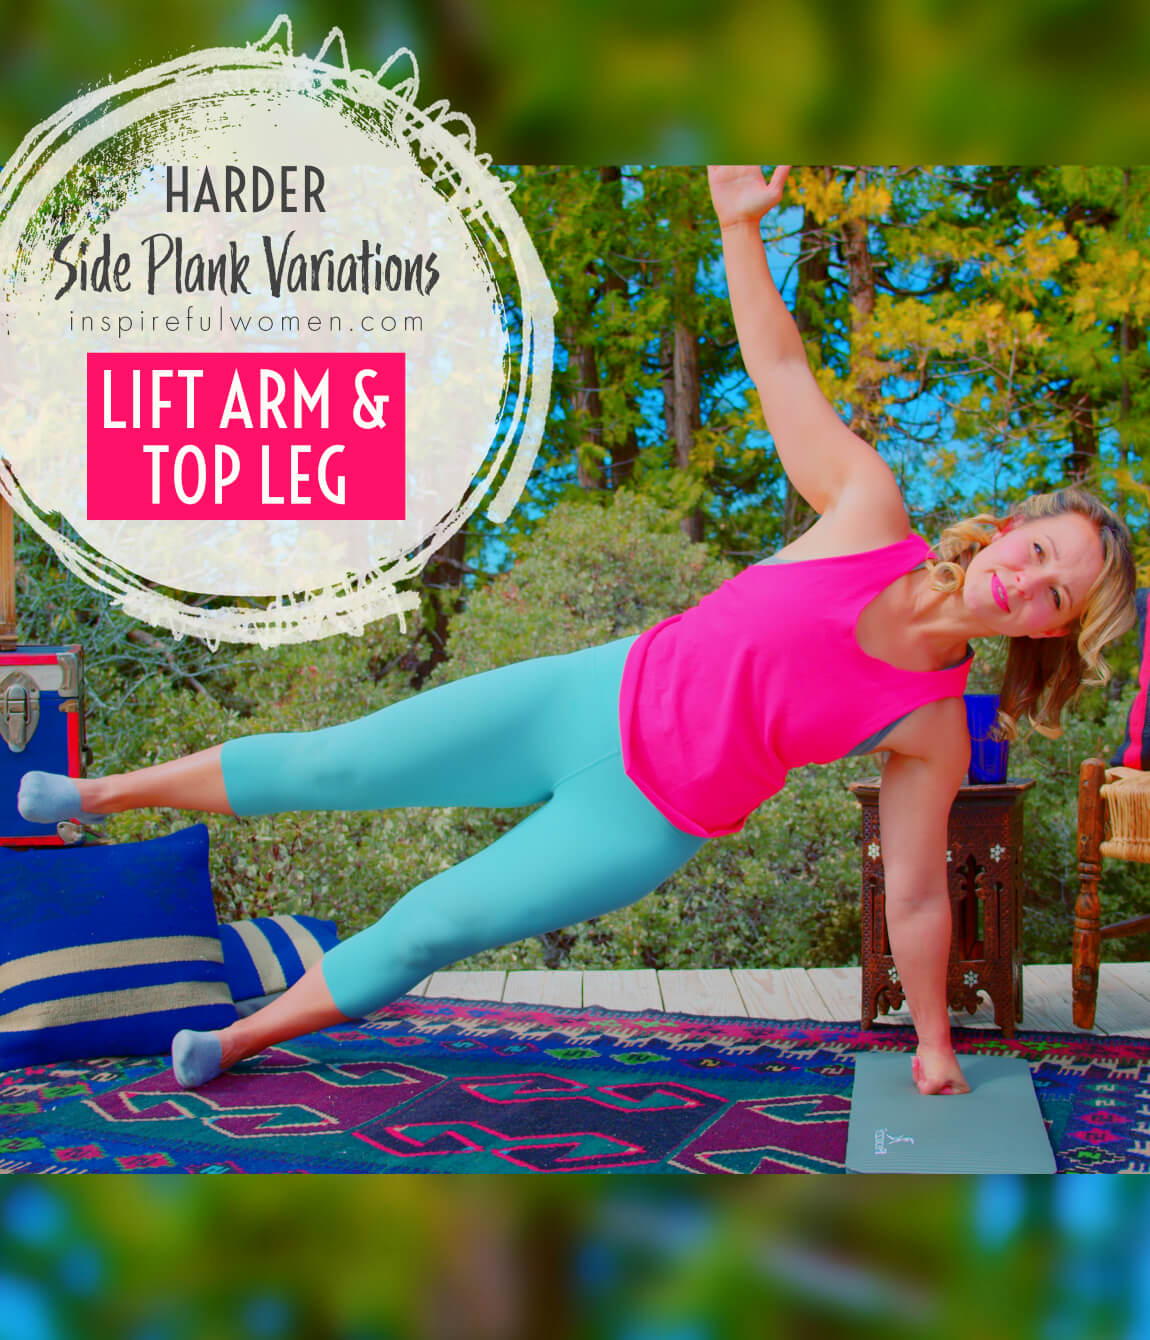
lift top leg and arm
lift top leg and arm
LIFT and HOLD TOP LEG: Lift the top leg so that it is about parallel with the floor and hold the position.
TOP ARM: Lift the top arm up into a T position and hold.
WHAT WE'RE DOING TODAY
WHAT & WHY
BENEFITS OF TRAINING THE core MUSCLE
WHAT
The side plank position is a very effective position for training the core, lats, and pelvic and hip muscles. This exercise is done lying down on your side, just using gravity to work your muscles.
The spine is positioned in neutral - no side bending or flexing of the spine. Then the hips are lifted up off of the floor. I’m going to show you a way to get into a position that I’ve learned from the Physical Therapist Tim Keeley think is a little more effective at helping us be in the right position during the exercise than what I commonly see taught online.
GETTING INTO POSITION BY MOVING FORWARD, NOT UP
This is going to seem counterintuitive because we know that a plank involves our body rising vertically in the air. The regular way most of us were taught to get into position for a plank involves bending at our sides to hoist ourselves vertically up into position.
But after seeing some really good info from physical therapists, the best way to get into position is actually to start in a tipped-over bottom-of-the-squat type position & push our hips FORWARD, rather than up. This will still get us into the right place we need to be but with a higher likelihood that our body parts are in a good position to work the correct muscles.
The best way to get into the side plank position is to start with the knees in front of the torso. Using the gluteus maximus, the hips are pushed forward, like a side-lying bridge (or even like the movement at the hips when you come up from a squat or hip thrust), to straighten the front of the hips and lift your pelvis up off of the floor. So rather than thinking of lifting up vertically, which is what I think we’d all naturally do, we’re actually moving our hips forward.
It is easier to keep your spine in a neutral position when you get into a side plank this way and it ensures that you are using your gluteal muscles to hold the position (not your hip flexors). From Carol: Most people lie on their sides with their hips in a flexed position, then push up into the side plank, they keep their hips in flexion instead of neutral. And if they realize their hips are flexed once in the plank, it is very hard to adjust to correct.
Doing the side plank on the forearm and from the knees is the basic version. Once you are able to hold the position nice and steady for at least 20 seconds, the exercise can be progressed to increase the challenge. There are many different variations you can try once you have mastered the side plank. Extending the legs out, and using a straight arm instead of the forearm will make the exercise quite a bit more challenging. Many leg lift exercises and arm movements can be done in this position.
WHY BOTHER DOING IT?
WHY
WHY DO WE EVEN CARE?
HEALTHIER WAY TO WORK THE SIDES OF OUR CORE
The side planks are good for working the muscles on the side of the torso, the obliques, and the quadratus lumborum. Many people think that you have to do exercises that involve twisting the trunk back and forth, like Russian Twists, to target these muscles. The problem with those exercises is that they could make the lower back unstable instead of strengthening the muscles to make it more stable. Rotating one section of the spine over and over again can stretch out the supporting structures, and over time cause too much motion in that section of the spine. This excessive motion can result in damage to the joints, nerves, and ligaments.
The safest way to work the core muscles is to
1. hold the spine in neutral
2. against an outside force trying to pull the spine out of neutral.
That could be a band pulling at your, or in this case, the outside force is gravity.
When you lie on your side and suspend your midsection above the floor, gravity will be pulling it down. The obliques and quadratus lumborum along with all of the other muscles of the core will have to work to hold the spine in neutral.
The greater the distance between the two anchor points of the body, the greater the force pulling down. For the side plank - the easiest position would be the knees anchored on one end and the forearm on the other end. Extending the legs out would lengthen the distance between the two anchor points and the muscles would have to work harder.
TRAINS SPINAL STABILITY WHICH = A FEELING OF A STRONG CORE
Core “strengthening” is more about training the muscles on how and when to respond as opposed to growing muscle. Many people that injure their backs have strong back and abdominal muscles with a well-formed 6-pack appearance, but ironically, they have poor spinal stability. What exactly is spinal stability? It is basically using the muscles to stiffen the spine to prevent the spine from moving under a load. If you want to be able to lift, pull, push or carry something, first the spine has to be “stiffened”. Imagine trying to use a shovel with a flexible handle. You would not be able to pick much up with it. That is the same idea as the spine. The spine is flexible to allow movement but if you want to pick something up the muscles need to support and stiffen the spine. In order to do this, the muscles work together in coordination, like a well-orchestrated symphony - each muscle is trained to do its job, knowing exactly when to contract, how much to contract and when to relax. When the core muscles work correctly - it is like wearing one of those back braces you see people wear when they do the heavy lifting. The muscles surround and support the spine, stiffening it up so you can lift more weight without damaging the spine.
LOW COMPRESSION POSITION - GOOD IF YOUR BACK IS FEELING SORE OR TIGHT
One of the benefits of working the core muscles in the side-lying position is that there is less compression of the spine. When you are standing up there is compression on the disks of the spine because gravity is pulling the vertebrae straight down, pulling the vertebrae closer together, and compressing the disks (there is one disk between every two vertebrae). When you lie on your side there is less compression on the discs. The side plank can be very effective for targeting the core muscles while minimizing compression of the spine. This is a nice option if you have been doing a lot of loaded spine exercises or if your back feels sore or tight.
GLUTE MEDIUS BONUS WORK
Another benefit of working the core muscles in this position is that you are activating the muscles on the side of the hip that help support the pelvis at the same time - the gluteus medius. The movement of the pelvis and back are interconnected - the movement of one area will affect the movement of the other. It is important to train the muscles that stabilize the pelvis to work in coordination with the muscles that stabilize the spine.
EVERYDAY LIFE
EVERYDAY LIFE &
MUSCLE FUNCTION
HOW WE USE OUR core MUSCLES IN EVERYDAY LIFE
1. ALL OF THE MUSCLES OF THE CORE WORK TOGETHER TO STABILIZE THE SPINE. THE OBLIQUES AND QUADRATUS LUMBORUM ARE PARTICULARLY IMPORTANT FOR HOLDING THE SPINE STABLE DURING:
Rotation of the torso:
- Swinging a golf club or tennis racket
- Loading/unloading the dishwasher
- Shoveling
- Vacuuming
- Mopping
- Raking
SCIENCY STUFF
ALLLL MUSCLES & WHEN
ALL MUSCLES WORKING & WHEN DURING THE Side Plank - Straight Leg
The muscles of the upper back, shoulder blade, arm, legs, and hips will work to hold the body still as it is pushed up into a side plank position.
The feet and arm serve as the weight-bearing points. In this position, the hips rest on the floor. The latissimus dorsi pulls the shoulder blade in and back to activate the lats to stabilize the low back. In order to lift the hips up, the gluteus max muscles on the side of the body closest to the floor contract concentrically to push up to the side plank position. The external and internal obliques, and quadratus lumborum are the most active core stabilizers working as you lift the pelvis up into the side plank position.
All of the core muscles (internal and external obliques, quadratus lumborum, psoas major, rectus abdominis, erector spinae, multifidi, transverse abdominis) will contribute isometrically to stabilize the torso in the side plank position.
PIN IT FOR LATER!
