Band STANDING TORSO ROTATION
How to Do the Band Standing Trunk Rotation - Core | In-Depth Guide [VISUAL LEARNERS] Beginner
Proper Form, Common Mistakes, & Variations | Home Resistance Training

WHAT DO YOU WANT TO SEE?
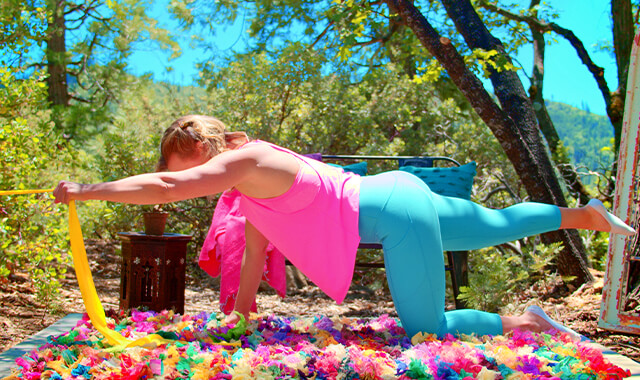
QUICK DEMO
QUICK DEMO
MUSCLES THIS WORKS
MUSCLES
MAIN MUSCLES WORKED IN Band Standing Torso Rotations
Obliques
OTHER MUSCLES WORKED:
- Transverse abdominis
- Quadratus lumborum
- Erector spinae
- Multifidi
- Gluteus maximus
- Deep hip rotators
WHAT WE'RE DOING TODAY
WHAT & WHY
BENEFITS OF TRAINING THE obliques
WHAT
WHAT WE'RE DOING TODAY
Other names for this exercise: Band Torso Rotation, Standing Trunk Rotation, Horizontal Trunk Rotations - Band, Core Rotation Exercise
ALL WE'RE DOING:
I don't golf but I think it's a teensy bit like pretending to golf.
I personally feel this one takes a little breaking down to get. At least it did for me! This is an effective standing ab exercise for women for training rotation of our trunk - our obliques will really be involved here to tone these muscles at home. This exercise is usually done at the gym with a cable machine, but we can re-create it at home with a resistance band very easily, and will strengthen our core in a functional way.
The basic idea is that we’ll be thinking of our whole torso- head to shoulders to pelvis, as 1 cylinder and we’ll turn, or rotate, our whole torso as one piece, either to the right or left a little. The idea is that our shoulders and pelvis will turn together - we don’t want just our pelvis turning, or just our shoulders turning. They move together. Doing this will mean that our oblique muscles- muscles that are a part of our core, will be working hard to prevent our spine from twisting when we do this movement.
In this case, what is achieving the movement is actually our lower body - our legs. We view this as a core exercise though because as our strong lower body rotates us towards the right or left, we have to use our oblique muscles to make sure our whole torso goes with it. If they didn’t do their job, our hips would turn towards the right for instance, but our shoulders wouldn’t go with it and would still be facing forward - when the hips are in one place and the shoulders are facing another way, that means we’ve got a twist in our spine going on.
Horizontal Cylinder Rotations are a total body exercise focusing on using the core muscles, especially the obliques to stabilize the spine. The movement is done in standing, holding the spine in neutral still while using the lower body to push the torso into the rotation - rotating at the hips. The legs are the prime movers, generating the force needed to rotate the torso against the pull of the band. The core muscles work to hold the spine in a neutral position as it pivots around the leg. This exercise is easily adjusted to challenge everyone from beginner to advanced levels of difficulty.
WHY BOTHER DOING IT?
WHY
WHY DO WE EVEN CARE?
TO EVERYTHING (TURN, TURN, TURN), THERE IS A SEASON (TURN, TURN, TURN) AKA IMPROVES OUR STRENGTH AND ABILITY WITH WHOLE BODY ACTIVITIES THAT INVOLVE TURNING
While this exercise won’t improve our ability to sing this popular classic song by the Byrds (you are totally singing in your head right now aren’t you?), it WILL help you do heavy-duty activities (grunt work type stuff) that involves rotating - I like to say turning because I grasp that word better.
This movement is used in many common activities that involve planting the legs and driving off of the ground as the power from the legs is transferred up to the arms - shoveling, vacuuming, raking, and also recreational activities like swinging a golf club or tennis racket. The obliques are challenged in this exercise to prevent the low back from rotating as the entire torso rotates in one segment. The core muscles are working to prevent rotation.
CREATES A STABLE SPINE THAT PREVENTS INJURY TO OUR LOW BACK
The obliques lie on the sides of the torso wrapping around to the back and front. Their job is to rotate and to prevent rotation of the lumbar spine, to increase the stability of the spine, they can also bend the spine forward and help in moving the pelvis and ribs. The obliques work together with the other core muscles to stabilize the spine. Too much movement in the spine during daily activity can cause small (or large) amounts of damage to the soft tissues and joints. Over time this can cause pain and injury to the spine. It is surprising how many people have back pain that have no history of injuring their back. The wear and tear on the structures of the spine over time add up, and eventually give out.
Rotation, especially under load and when combined with flexion, is one of the main causes of injuries to the discs of the low back. Training the core to maintain a neutral spine during rotating activities can help prevent injury to the lumbar discs.
EVERYDAY LIFE
EVERYDAY LIFE &
MUSCLE FUNCTION
HOW WE USE OUR Oblique MUSCLES IN EVERYDAY LIFE
1. STABILIZE THE SPINE IN NEUTRAL DURING: THE EXTERNAL AND INTERNAL OBLIQUES ALONG WITH THE TRANSVERSE ABDOMINIS WILL ACT TO COMPRESS THE ABDOMEN AND STABILIZE THE SPINE
- Taking dishes out of dishwasher or dryer
- Lifting and moving heavy objects from one side to the other
- Pushing a stroller, or wheelbarrow around a corner
- Carrying items on one side
- Bending forward
- Gardening
- Shoveling, raking, sweeping, vacuuming
- Golfing, tennis
STARTING POINTERS
Starting Pointers
This is the standard version of Horizontal Trunk Rotations. Standing sideways to the band, your arms hold the band at midchest as you use your legs to push your torso into rotation against the resistance of the band. This exercise is a really good way to feel how the power from your legs is transferred up through the trunk to the arms. It is also beneficial for learning how to move your torso in one segment, holding the spine in a neutral position and very still as you move through the hip joints.
It is easy to adjust this exercise for any level of fitness. If you are new to the neutral spine position and the feeling of moving the torso in one segment, try doing the movement without any resistance (no band) to begin with.
HOW TO DO THE EXERCISE
LOOKS
HOW Band Torso Rotations SHAPE OUR BODY
Toned midsection and legs, flat abdomen.
PROPER FORM
PROPER FORM: Band Torso Rotation
EQUIPMENT, SETS & REPS
EQUIPMENT
Main set (3: Light/Med/Heavy)
X-Heavy Band (I recommend getting this too if you plan to use resistance bands frequently).
SUGGESTED STARTING WEIGHT FOR WOMEN:
Light resistance bands
SETS & REPS:
8 - 10 times on each side
PACE:
Slow and controlled
BODY POSITION
BODY POSITION FOR THE Band Torso Rotation
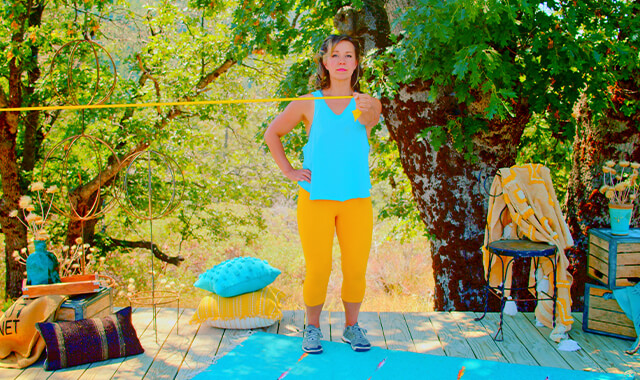
BAND: Mount the resistance band at mid-chest height - in a straight line from your hands when your arms are lifted to the front but not quite to shoulder level (around 70 degrees of flexion). Stand sideways to the band.
HANDS: Interlace your fingers around the end of the band
FEET: About hip-width apart, toes pointed forward.
BODY STANCE: Knees slightly bent, engage your core muscles. Neutral spine (includes neck), sternum lifted, bring the shoulders blades in and down the back, chest wide to begin. Stacked - shoulders over hips over feet. Pelvis level, hips, and shoulders squared.
ARMS: Lifted to the front but not quite to shoulder level (around 70 degrees of flexion). Elbows slightly bent. The position of your arms is dependent on your strength and control. The straighter your arms (hands further away from the body increases the lever arm) the greater the resistance. Step forwards or backwards as needed until the band is in a straight line with your hands. The band should be taut in the starting position.
HOW TO DO
HOW TO DO Band Torso Rotations
CUE: Focus on keeping your shoulders and hips squared and your pelvis level. It is helpful to do this in front of a mirror.
Watch the video guys! This is too hard to learn from reading lol. This is really just here for google.
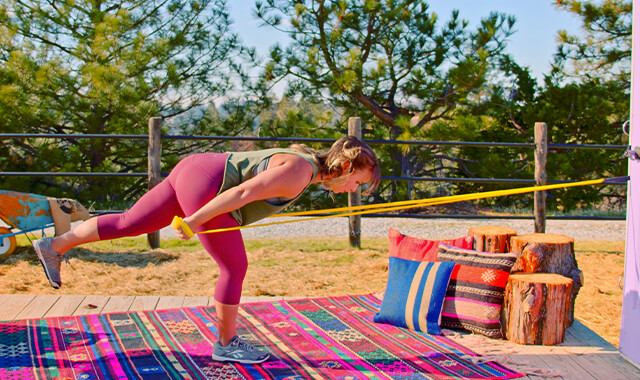
Using the leg closest to the band anchor, push down off of the floor to rotate your torso against the pull of the band (away from the anchor). To do this your gluteus maximus will pull your hip (the leg closest to the anchor) back into extension, pushing your pelvis forward. The pelvis with the rest of the trunk will rotate away from the anchor. As your trunk rotates your weight will shift onto the leg that is furthest from the anchor - the direction you are rotating towards. Keep your kneecap and foot of the leg furthest from the anchor (the one supporting your weight) pointing straight forward, and the foot flat on the floor. You are rotating your torso around that leg.
The spine stays neutral as your torso rotates transferring the energy through your arms. The hands stay at midline to the body but the torso rotates away from the band anchor. How far you rotate will depend on the strength and length of the band you are using and your strength and form - it will only be about halfway between straight forward and straight out to the side. How far you rotate is not important - concentrate on form and feeling your muscles working.
For this exercise your body weight is transferred to the leg furthest from the anchor, it is important to keep the foot flat on the floor and the kneecap facing straight forward. The leg closest to the anchor will not have much weight on it. The foot can remain flat on the floor, if you feel any strain in the inside on your knee then move your feet closer together and/or transfer more of your weight to the leg furthest from the anchor. You can also lift the heel and/or pivot on the ball of the foot (not necessary but may happen - this depends on how much resistance you are using and how far you rotate). Keep your knee fairly straight (soft, not locked), the hip is in extension - because the gluteus maximus has pushed your torso into the rotation.
Repeat for a set number of reps and switch sides and repeat. You can switch your interlaced hands halfway through the set but not required.
NOTES FROM CAROL:
Try bending the knee of your leg furthest from the anchor a little bit more, that will help to get all of the weight shifted to the standing leg and help with the sliding foot. It will also make it easier to keep the thigh of the weight bearing leg forward.
The thigh will move a teeny bit just because we don't have a lot of hip internal rotation - the amount you are doing it is ok. Don't try to rotate the torso as far. Less is more in the is case because the obliques will be working harder. Using a heavier band and rotating less would be better than using a lighter band and rotating more. The goal is for the band to be pulling the torso into rotation and the muscles of the torso resisting. The only thing that rotating further does is to increase the pull of the band. If you use a heavier band the pull will be greater without as much rotation.
I think the terminology is confusing. The hip is the joint between the femur and the pelvis - for this exercise, what you are doing is rotating the pelvis on the stable femur. So the leg remains still and the pelvis rotates on top of it.
If you hold the lower leg still and rotate the femur than you will be rotating at the knee joint - which it is not really (except a very teeny bit when the leg moves into full extension) a normal movement for the knee joint.
HOW TO SAFELY GET OUT OF THE EXERCISE
From the beginning position, release the band.


COMMON MISTAKES
COMMON MISTAKES
WHAT TO AVOID WITH THE Band Torso Rotation
KEY TIP:
Guess what? Good news! Many avoids are the same for most movements. Once you learn the basics, there's really only a few extra avoids for each individual movement.
1. Avoid Forgetting to Transfer Weight
AVOID: Not transferring our weight.

2. Avoid not keeping your shoulders and hips level
AVOID: Not keeping your shoulders and hips level.
WHY NOT?
- This would indicate that you are not keeping the spine in neutral, you are side bending as you rotate.
- Repetitive spinal rotation under load (resistance of band) can cause soft tissue/joint irritation or damage over time.
WHAT TO DO:
- The shoulders and hips should stay level.
- The shoulders should be stacked over the hips.

3. Avoid Rolling Knee In/Out
AVOID: Letting your knee (of the weight-bearing leg) roll in or out.
WHY NOT?
- This will strain the ligaments inside/outside of the knee joint.
- One of the goals of this exercise is to work the muscles of the lower limb (foot/lower leg/knee/thigh/hip) in proper alignment to improve balance and stability.
WHAT TO DO:
- Keep the lower leg/knee/thigh in line.
- Keep the foot flat on the floor, without rolling in or out, weight equally distributed on the two sides of the ball of the foot and the heel.

4. Avoid Wrist Bending
AVOID: Moving through the wrists.
WHY NOT:
- This can lead to tissue/joint irritation or damage over time.

5. Avoid Arm Movement Instead of Hip Movement
AVOID: Letting your arms rotate.
WHY NOT?
- This is a challenging exercise and it is easy to let the arms move as the band pulls on them.
- This decreases the muscle activity
WHAT TO DO:
- Keep focused on keeping the hands at the midline of the chest.
- Use less resistance.

6. Avoid Locking Knees
AVOID: Locking the knee of the weight-bearing leg.
WHY NOT?
- This can make it difficult to keep the low back a neutral position.
- Not maintaining a neutral spine position can lead to injury or muscle strain.
- Can be hard on the knee joint if the joint is locked out.
- It will decrease the amount of muscle activation in the legs.
- It also tends to make it more difficult to move smoothly - the movement is more mechanical.
WHAT TO DO:
- Keep the knees soft with a slight bend.

VARIATIONS
VARIATIONS
VARIATIONS OF Band Torso Rotations
Change Angle of Pull
Change Angle of pull
The variations for the line of pull are many you can stand angled so that your back is turned towards the anchor and pull from behind the hip and around to the opposite shoulder, or any position in between (facing sideways to facing away from the anchor) to increase or decrease the amount of rotational/ forward-backward force on the torso.
Anchoring the band so the line of pull is to the front of the hands will pull the torso into flexion - working the back extensors.
Anchoring the band so the line of pull is behind the hands will pull the torso into flexion - working the spinal flexors (rectus abdominis) more.


SCIENCY STUFF
ALLLL MUSCLES & WHEN
ALL MUSCLES WORKING & WHEN DURING THE Band Torso Rotation
The shoulder blades are positioned in and down the back (depressed and retracted - rhomboids, trapezius, latissimus, serratus anterior, pectoralis).
The internal and external obliques, and quadratus lumborum (other core muscles also but which ones and to what extent is dependent on how much resistance is used and the line of pull from the band) hold the shoulders and hips squared. The shoulder furthest from the band anchor needs to work to prevent being pulled across the chest (horizontal adduction) - the posterior deltoid, lateral deltoid, teres major, teres minor, infraspinatus will work isometrically to hold the arm in place; the mid traps and rhomboids will become more active to hold the shoulder back (retraction). The shoulder closest to the band anchor needs to work to prevent being pulled out to the side (horizontal abduction) - the pectoralis major, minor and coracobrachialis muscles work isometrically to hold the arm in place.
The muscles of the upper arm and forearm will work to stabilize the wrist and elbow. As the torso rotates the muscles will work harder to hold the position against the increasing resistance of the band.
The rotation of the torso is initiated by the leg closest to the band anchor. The leg pushes off of the floor, to drive the hip into extension: gluteus maximus; and external rotation: obturator internus and externus, gluteus maximus, piriformis, superior and inferior gemellus, and quadratus femoris), to push the torso into rotation to the opposite side.
The temptation will be to rotate through the lumbar spine, instead of using the muscles to prevent the movement. The obliques, transverse abdominis, and the quadratus lumborum will contract to keep the spine from rotating or flexing. All of the core stabilizers (transverse abdominis, erector spinae, rectus abdominis, multifidi, iliopsoas, latissimus dorsi with a combination of eccentric, concentric and isometric contractions) keep the torso stable. The activation of the muscles will change with the amount of force and the direction of force as the torso rotates.
As the torso rotates the body weight is shifted towards the foot furthest from the band anchor. All of the muscles in the foot and leg will work to stabilize the leg. The abductors (gluteus medius and minimis) will be particularly active to keep the hip and shoulders stacked.
At the end of the movement, the resistance will be the greatest, most of the core muscles (multifidi, quadratus lumborum, obliques, transverse abdominis, iliopsoas, serratus posterior, lats) will be working against the rotational force to stabilize the core.
To return to the starting position: the hip closest to the anchor will work eccentrically to control external rotation and extension against the pull of the band.
PIN IT FOR LATER!

