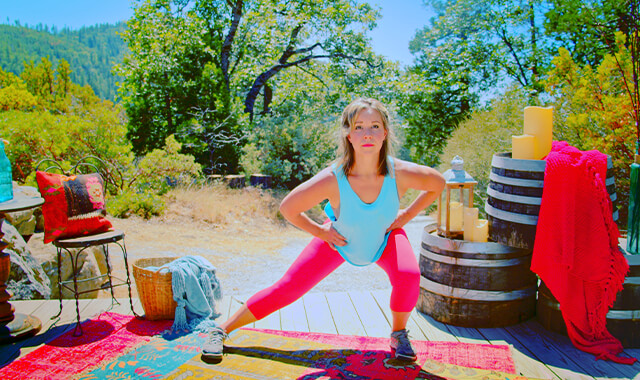
Bodyweight Split Squats
How to Do Split Squats - No Weights - Quads & Glutes Exercise | In-Depth Guide [VISUAL LEARNERS] Beginner
Proper Form, Common Mistakes, Variations + Easier & Harder | Home Resistance Training
WHAT DO YOU WANT TO SEE?
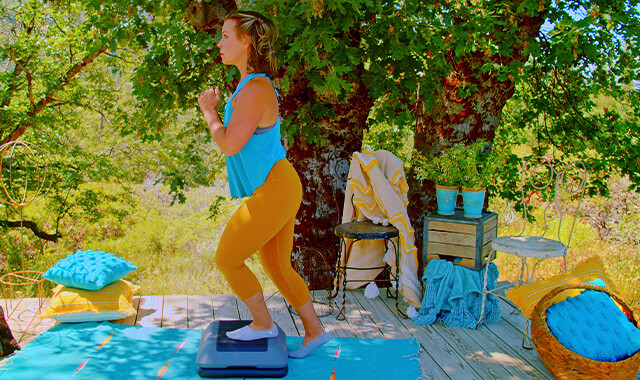
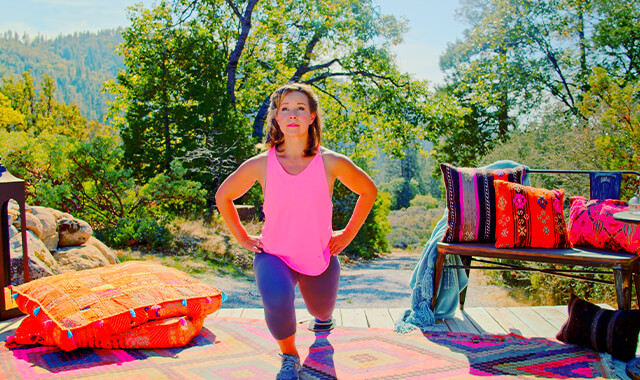
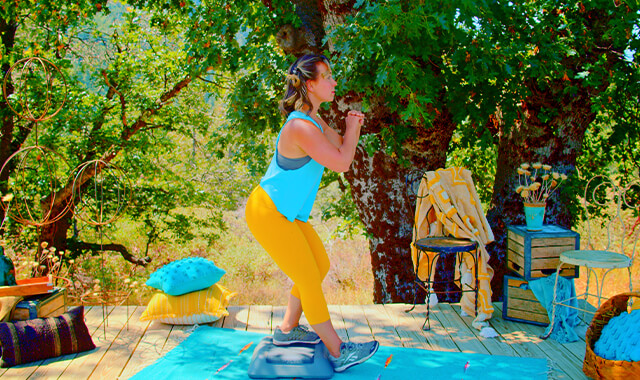
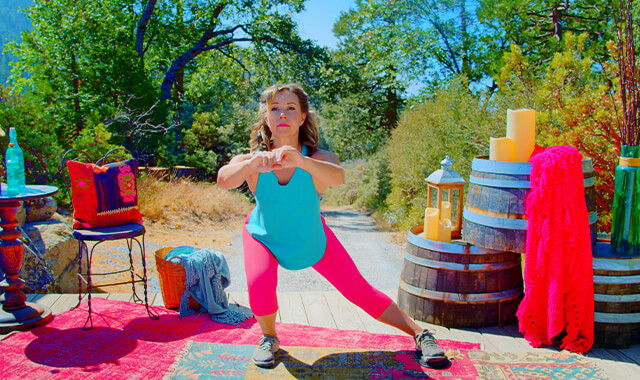
QUICK DEMO
QUICK DEMO
MUSCLES THIS WORKS
MUSCLES
MAIN MUSCLES WORKED IN SPLIT SQUATS
QUADRICEPS
OTHER MUSCLES WORKED (fyi, tons!):
- GLUTES
- HAMSTRINGS
- DELTOIDS(if holding on shoulders)
- GRIP STRENGTH (if holding weights at side)
- CORE STABILIZERS
- HIP STABILIZERS (adductors and abductors
- SMALLER INTERNAL AND EXTERNAL ROTATORS
- CORE STABILIZERS (transverse abdominis, erector spinae, multifidi, obliques)
- MUSCLES OF THE LOWER LEG for stabilization (peroneals, gastroc, soleus, tib anterior)
WHAT WE'RE DOING TODAY
WHAT & WHY
BENEFITS OF TRAINING YOUR QUADRICEPS MUSCLES
WHAT
WHAT WE'RE DOING TODAY
Bodyweight split squats are an effective exercise for strengthening the muscles of your lower body and improving balance. With no equipment required, they can be easily performed at home or anywhere with enough space.
WORKING OUR QUADS
The split squat will work the largest muscle group of the thigh, the quadriceps muscles. The movement is done in a standing position with one leg behind the other, in a split stance.
ALL WE'RE DOING IS:
I'm just going to be honest - this movement is not as simple as most. But don't go! I'm breaking it alllll down for you.
Basic idea: With one foot in front and one foot in back, squat down, and then back up.
IF YOU'RE SCARED YOU WON'T HAVE THE BALANCE FOR THIS:
Never fear ladies! You are not alone first of all, and I will show you some simple ways to do this movement while keeping your balance so you feel safe. One is simply to do this with one hand resting on chair or table to your side. See all the make easier options below.
WORKING ON BALANCE
I'm talking about the helping-me-not-fall-over type of balance, not work/life balance. 😉
In addition to working the thigh muscles, this exercise is also good for your balance (if you don't raise your hand when I ask who needs help with this like me, you're either not over 40, or you are over 40 but you're an athlete, in which case this is probably not the site for you).
The exercise works the front leg the most - especially the front of the thigh (quadriceps) and the muscles of the side and back of the hip (gluteals). You will bend the ankle, knee and hip of the front leg to lower yourself down until your thigh is parallel to the floor. Even though you will really feel your thigh muscles of your front leg working, this exercise is also good for your balance, and all of the muscles of the leg that help to strengthen your ankle, knee and hip.
WHY BOTHER DOING IT?
WHY
WHY DO WE EVEN CARE?
This exercise is done with both legs but it is used to help you improve the balance, stability, and strength of a single leg. Training one leg at a time has a lot of benefits.
EQUALIZE THE STRENGTH OF EACH LEG
Having one leg that is stronger or more stable than the other leg can cause you to use the legs differently without being aware of it - you begin to favor or compensate for the weaknesses. And many of us do commonly have a stronger and weaker side. For me, my right leg is my stronger leg.
When we have this imbalance, we may begin to use one leg more than the other when going up and downstairs, getting up off of the toilet, or squatting down. Or worse yet, we begin to avoid squatting down, we may notice that we are “pulling” ourselves up the stairs on the handrail, or we begin to push ourselves out of a chair using our arms. Over time the leg will get weaker because it is not being used as much.
Our arms are much smaller than our legs so doing jobs with our arms that are supposed to be designated "leg jobs" is a jerry-rigged idea.
So I guess we can say one reason to do this sort of exercise is so that we don't turn leg jobs into arm jobs.
Training each leg separately allows us to notice "oh, wow I can easily do 10 reps on this leg, but my other leg can barely eek out 6 reps" even though you're even mentally cheering it on like 'c'mon leg, you can do it, rep 7 here we go, let's get after it!'
Once we're aware of this difference, then we can purposefully spent a little extra time doing more sets with the weaker leg to bring it up to snuff.
IMPROVE OUR BALANCE
Single leg training will challenge your balance. Our balance tends to get worse with age, this is just a fact says Carol, the physical therapist whose taught me everything I know.
Tell me about it Carol. I could see it getting worse, but even just turning 40 myself, things are all well and good on nice even ground, but the second there's a crumb under my foot it's like watch out floor.
If you're in your 60's you might be like "Rayzel, even if there's no crumb, I still practically die if I don't have both my feet under me."
We are going to change this ladies! You and me both.
The good news is, you can easily improve your balance by working on it. A well-designed exercise program will include single-leg movements to challenge your balance.
IMPROVES JOINT STABILITY
Single leg exercises help to improve the stability of our joints. An unstable joint has too much movement. This movement can lead to damage to the joints - like osteoarthritis (or OA).
It is important to work the muscles that cross the joints and keep them stable. The split squat is a really good exercise for strengthening the muscles that cross the ankle, knee, and hip.
HEATHY, STRONG QUADS = HEALTHIER KNEE JOINT = LESS KNEE ISSUES
The quadriceps are responsible for the health of your knee joint.
The kneecap is actually IN the tendon from the quadriceps muscles. The muscle guides the kneecap in a little groove that it moves in. If the muscles of the quadriceps are not trained to hold and move the kneecap correctly - it can cause damage to the back of the kneecap.
Split squats are perfect for training the quadriceps to move the kneecap correctly.
SPLIT STANCES ARE COOL
Split stance positions are a great way to make exercising our leg muscles at home effective, without having to use super heavy weights at the gym in order to fatigue the muscles.
Because our larger lower body muscles are just so.....well, large, they are naturally pretty strong, and that can make it a challenge to find ways to fatigue these muscles at home without those heavier weight. The split stance really helps with this, because we have a lot more of our bodyweight on one leg now (ie the "heavy weights we are using is not a machine or large dumbbells, but rather our own bodyweight now!), rather than both legs spreading our weight equally. This position is also a great segway to eventually being able to do single leg movements.
The split squat exercise works the front leg the most - especially the front of the thigh (quadriceps) and the muscles of the side and back of the hip (gluteals).
You will bend the ankle, knee, and hip of the front leg to lower yourself down until your thigh is parallel to the floor (so we have 3 joints moving around here!) That means we're doing a compound exercise. Compound exercises can take a little more work to learn properly because we're moving in multiple places on our bodies, BUT they are great to do because they work more muscles at one time.
EVERYDAY LIFE
EVERYDAY LIFE &
STARTING POINTERS
HOW WE USE OUR QUADRICEPS IN EVERYDAY LIFE
1. STRAIGHTENS THE KNEE & CONTROLS THE MOVEMENT WHEN WE BEND OUR KNEES
In more formal terms, the quads extend the knee, and helps eccentrically decelerate/control the action of our hamstrings flexing the knee.
- Getting out of a chair, off the toilet
- Going up and down stairs
- Walking
- Squatting
- Lifting heavy objects/kids from the floor
- Getting up and down from the floor/kneeling
2. STABILIZES OUR KNEE JOINT
- During all standing and walking activities
3. ONE OF THE QUAD MUSCLES HELPS US BEND THE HIP
Quad means 4 right? And one of the muscles that the quadriceps are made up of is called rectus femoris (who thought of this terrible name?) This particular muscle also crosses the hip joint on the front of our body, so therefore it also helps us bend at the hip joint.
- Marching
- Getting into a car
- Going up stairs
STARTING POINTERS
Starting Pointers
This is the standard easy version split squat. This movement is done with both legs in contact with the floor but it is used to progress toward single-leg exercises.
Split squats are great for beginners and can easily be progressed to challenge advanced exercisers.
Bodyweight is used as the resistance, but dumbbells can be added to increase the load on the quadriceps. The focus of this exercise is on good form, balance, and control.
HOW TO FEEL WHAT MUSCLE IS WORKING
How to Feel What Muscle is Working
Put your hands on your thighs and squat down (just a partial squat will do). You should feel the muscles on the front of your thighs contract.
HOW TO DO THE EXERCISE
LOOKS
HOW SPLIT SQUATS SHAPE OUR BODY
Split squats tone our thighs - mostly front, and some back, toned/lifted glutes. Key word, lifted.
This will help give the inside portion of the quads (the medial quad, aka the vastus medalis obliquus or VMO for short ) that “tear drop” shape.
PROPER FORM
PROPER FORM: SPLIT SQUATS
EQUIPMENT, SETS & REPS
SUGGESTED STARTING WEIGHT FOR WOMEN:
Bodyweight
SETS & REPS:
2 -3 sets of 8-10 reps per side
PACE:
This movement predominantly trains the quadriceps, which are a 50/50 mix of fast/slow-twitch fibers. Pacing options (further mentioned in variations) can range from primarily controlled moderate speed to slower or pulsing movements
BODY POSITION
BODY POSITION FOR THE SPLIT SQUAT
MAIN POSITIONING POINTERS:
- Torso in line with front leg (as if you are standing)
- Hips squared to front
All body placement decisions will be based off these 2 key factors.
FEET: Feet width - this will be variable depending on what’s comfortable for you - here’s some factors: feet directly under you, a bit narrower than hip width, may be a good starting place.
What you want is a width that makes it most doable to: Keep your hips level as you go down up and up (wider stances will make this more challenging to your glute medius muscle)
Not rotating the back leg’s hip back as you go down (narrower stances will more likely promote this)
STEP BACK OR FORWARDS: Take a step forward with one leg OR take 1 step back so that the heel of the back foot is off the ground and you are balanced more on your toes.
TORSO IN LINE WITH FRONT LEG: Your torso should be in line with your front leg. You will likely end up making adjustments to both feet until they feel they have the correct position. This one takes a bit of shifting to feel like the weight is distributed and you are able to feel balanced.
-- About 70% of your weight should be on the working (front) leg. --
Make sure that the pelvis is square to the front - if your stance is too long (ie your back leg is wayyyy behind you) then your pelvis may rotate back with the back leg.
BODY STANCE: Upright torso, head, and neck. Maintain tall, proud chest, core gently engaged. Shoulders and pelvis are square to the front.
NECK: Tall neck, face and eyes forward
HOW TO DO
HOW TO DO SPLIT SQUATS
MAIN MOVEMENT POINTERS:
- Keep hips level throughout movement.
- It’s okay for knee to travel past toes.
- Weight is mostly (70%) over the front leg, if possible.
- Slow controlled descent- muscles working hard as you go down- RESIST the descent.
DOWN:
- From the starting split stance position, hinge forward a bit at the hips as you bend your front and back knees and your front hip to lower straight down toward the floor, gently touching the floor with the back knee, or just shy of it. How much to hinge? You want to hinge to transfer the weight over the front foot, so roughly - the shoulders over the arch of the front foot. The exact position would depend on how much weight you want on the front foot vs back foot and how vertical you want the shin to be.
- Your shoulders should be over the arch of the front foot.
- Focus on keeping hips level as you go down (I need my phone camera to check this and I lift my shirt) - pulling inward with your opposite glute/hip to keep the back leg hip from dropping.
UP:
- Pressing through the front leg, with assistance from the back leg, stand back up to starting position, maintaining both feet planted in the same split stance position
- Pull all the way up so the front hip is in a neutral position (no crease in the hip).
Note: The front leg should feel more like the “working” leg for this exercise, but you will certainly feel the rear leg working as well. Your body and trunk should rise up from the bottom position at a smooth rate. It should look like an elevator is raising your torso back to the top floor.
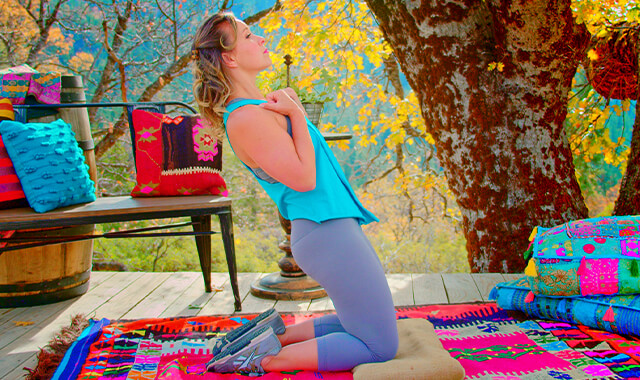
HOW TO SAFELY GET OUT OF THE EXERCISE
Option 1:
When in upright standing position, come out of the split stance into a normal stance by bringing front leg backward and/or back leg forward so that the feet are even in a normal standing pose. Lower the weights off the shoulders down to your side, the bend at the knees and hips to place the weights onto the ground
Option 2:
From the ½ kneeling position, lower the weights from the shoulders down to your sides, then place on the floor. Stand up from the ½ kneeling position.

COMMON MISTAKES
COMMON MISTAKES
WHAT TO AVOID WITH THE SPLIT SQUAT
KEY TIP:
Guess what? Good news! Many avoids are the same for most movements. Once you learn the basics, there's really only a few extra avoids for each individual movement.
1. Avoid letting the hip of the back leg drop as you go down
When this happens (happens to me a lot) it is the opposite glute medius that is not doing it’s job. Think about pulling IN with the outer hip of the working leg and this will help raise that opposite hip to level. This may take time to create the mind-muscle connection as well as to increase the strength of the glute medius to do this. Often one side will be more of an issue than the other. You can also do some warm-up exercises before you begin your workout that help gets that muscle firing beforehand.
Another tip: think about lifting the bottom rib of the working side and moving it over your working hip. That is an old skating tip. It helps get your center of gravity over the working leg. It works really well. Almost like you are shifting your upper body over the leg just a bit to help move the center of gravity away from the non-working leg. The "lifting" is important, almost as if you were stacking it on top of the hip. So no leaning with the torso.

2. Avoid trunk collapsing excessively forward/down
Avoid rounding the upper back.
- This happens when you lean the upper body forward instead of hinging at the hips
- This may stretch the ligaments of the spine and will not strengthen the muscles that hold you in good posture
- Hinge at the hips to shift the weight forward but keep your shoulders back and your sternum lifted
- You should be able to draw a straight line down your earlobe, shoulders and hips

3. Avoid front knee caving inward or outward
- This puts too much strain on the ligaments on the sides of the knee joint.
- A goal of the exercise is to work the muscles and train the body to move with proper form, this includes the alignment of the leg.
- Keep the thigh in line with the knee, in line with the lower leg and ankle.
- The center of the kneecap should line up with the second and third toes (approximately)

4. Avoid rotating shoulders or pelvis as you lower down/press up
- When stepping back to get into position, make sure that your pelvis does not rotate back with the leg
- A goal of this exercise is to strengthen the muscles of the hip and pelvis, letting the pelvis rotate back will decrease the activity of the hip and pelvic stabilizers.
- Keep your pelvis squared to the front the entire time (more likely with a narrower stance- try adjusting how far apart your feet are in width if you’re struggling with this).

5. Avoid Stopping short at the top
Avoid forgetting to fully straighten the working hip (front leg) at the top of the movement
- There should not be a crease in the front of the hip at the top of the movement
- This will decrease the activity of the gluteus maximus muscle and will not move the hip into a neutral position.

6. Avoid dropping elbows down
Avoid dropping elbows down (if weights are being held on shoulders) or rounding of the upper back

VARIATIONS
VARIATIONS
VARIATIONS OF SPLIT SQUATS
WIDER STANCE
Wider stance
You can spread your back foot out a bit wider for a wider stance. Moving your back foot out from the body makes a larger base of support to work off of. However, this also makes it harder to put the majority of the weight on the working leg, and this can make it harder to keep your pelvis level during the exercise - the hip of the back leg will drop down more easily because the weight of the non-working leg being further away from your midline pulls your pelvis out that way, making the working leg hip abductors having to work even harder. Moving the leg closer in will not pull the center of gravity out to the side.
So play with stance to find what feels stable for you, while still helping you to keep you hips level during the exercise.

NARROWER STANCE
narrower stance
Try a narrower stance.
For single leg exercises it is frequently the case that starting out with your feet closer together before lifting a leg (which you are sort of doing when you have most of the weight on the front foot) makes it much easier to balance. It is really easy to feel this if you sit on a swiss ball and put your feet far apart. Straighten one leg (knee), you will start to fall to the side. But, if you start with your feet together and lift one leg you will be able to stay balanced.

dumbbell On opposite side of working leg
Dumbbell On opposite side of the working leg
For this variation all you do is hold the dumbbell on the side of your back leg. This just changes how the muscles work a little bit. It may increase the requirements of your opposite glute medius to keep the hips level (the glute medius of the front leg). That's a good thing because sometimes we have a poor mind-muscle connection with our glute medius which can make keeping the hips level during these movements difficult. So this can help improve that issue.

DUMBBELL on same side as working leg
Dumbbell Held On same side as working leg
This is exactly as it says- you hold one dumbbell on the same side as the front leg. This may make it a little easier to keep your hips level during the movement.

Dumbbells HELD at sides
Dumbbells held at sides
Let your arms hang straight down, holding a dumbbell in each hand. This is a common way to do this movement. I personally prefer to have the dumbbells held on my shoulders (see the next variation).
That said, this version here is good for also improving grip strength at the same time and will train the muscles that help keep your torso upright and still as you work to keep your arms still while your body is moving up and down.

dumbbells on shoulders
Dumbbells on shoulders
This is my personal favorite way to do this movement. I really like letting the dumbbells rest on my shoulders because I feel like this allows me to really focus on the movement and contraction of the muscles of my legs doing the split squat, without being distracted by also keeping my arms still like I would if the dumbbells were dangling from my straight arms. My arms and shoulders are mostly passive and I can give almost my sole attention to my lower body working.
Carol the physical therapist cautions those with back/spinal issues though that having the weight on the shoulders can put more pressure on the discs, so if you pain in your spine doing this, do another version.

Dumbbell held like a goblet
DB held like a goblet

hold each end of 1 dumbbell
hold each end of One Dumbbell
If you'd like to just use one dumbbell this is a comfortable way to hold it.

Front Rack Split Squats
Front Rack Hold with Dumbbells
Hold 2 dumbbells at the upper chest level (top of the sternum)
This shifts the weight to the front of you a bit, making the quads work harder.

Resistance Band Split Squat
Banded Split Squat
Place a resistance band under the foot of the working leg/the front foot. Take a step back with the other leg, making sure your stride is wide enough so that the back heel is off the ground and you’re balancing on the toes of the back foot. Bring the band up to shoulder level, keeping elbows inside the band. Be sure there’s enough tension on the band for it remain taut through the entire range of motion, even at the bottom.

50/50 Split Squat
50/50
This version of the split squat is where your weight is distributed equally between the front and back leg, with your torso midway between the legs, rather than having your torso in line with the front leg as in a normal split squat. You may be able to use more weight in this case because you are transferring your weight so that it’s not so much on one leg.
The split squat is intended to be a stepping stone progression from double leg exercises to single leg exercises. It can take a long time to have the strength, balance and stability to get 70% of the weight on the front leg for the normal split squat, so doing this version is a good first step. However, if you are able to do the original version of split squat, that would be more desirable.
For this variation, you will not hinge your torso forward at the hips. Your shoulders remain over your hips with an upright torso and your hips are approximately centered between the knee of the back leg and the heel of the front leg.
The movement is straight up and down, as if you were being pulled straight up from the top of your head.
This will work the quadriceps muscle, gluteus maximus and hamstring of the back leg as you push up to standing. This will decrease the hip extension of the front leg and will decrease the gluteus maximus and hamstring activity. With equal weight distribution you will be pushing ½ body weight with each leg.

MAKE IT HARDER
HARDER
MAKING THE SPLIT SQUAT MORE CHALLENGING
SLOW ECCENTRIC
Slow on the Down
The idea here is simply to take a lot longer to descend than usual - you can take 5-10 seconds to descend. This is called doing a slow eccentric. This helps fatigue the muscle, in a way that is often safer for the muscle as well (less likely of getting injured).
pause/hold at the bottom position
pause/hold at the bottom position
Perform pause/holds at the bottom position for 3-5 sec, but not resting or losing the tension. This can really help fatigue the muscle and increase our strength at this bottom position which is very functional for activities like getting up from a low chair, getting up from the floor, and squatting to get to a low cupboard.

BULGARIAN SPLIT SQUAT
Bulgarian Split Squat
I will have a full tutorial on this exercise in another post as it's really it's own special thing, but for now, see above for the basics. This is a way to make the split squat harder by elevating your back leg, shifting more of your weight to the front leg, and challenging your balance more.

BOTTOM HALF SPLIT SQUATS
Bottom Half Split Squat
Limit the range the muscles is working in to the lower ½ or ¾ of the bottom of the movement, to create more “time under tension”
Usefulness of this: This is a good way to work on your strength at the bottom of the range which is where the quads are stretched over the knee and have to work the harder. For example, when you think about getting up from a low chair, which part of the motion is most difficult? At the beginning or the end? Usualy it feels hardest at the beginning when your knees are more bent and it becomes easier as you approach to standing.
So training the bottom half of the split squat is beneficial to do occasionally. It is good for improving the strength of the quads in a position where they are weaker. This will help to improve the ability to squat deeper.
Working at the bottom of the movement will keep the focus on the quads, but it will not use the gluteus maximus muscle very much. The glute works most at the top of the movement when you go from the flexed hip to neutral hip (no crease) and you will be removing that from the equation.
Because it's important to work our muscles and joints through a large range of motion, you wouldn't want to make this the main way you do this movement. This is just one version to throw in sometimes to mix up our exercise. It can even be done towards the end of a set - an added bonus to really fatigue the muscles.

MAKE IT EASIER
EASIER
MAKE THE SPLIT SQUAT MORE DOABLE
PILLOW UNDER KNEE
pillow under knee
Place a cushion or a pillow under your back knee to touch down to, if there’s any issue with bringing your kneecap in contact with the floor.
If you have a lot of trouble with pressure on the kneecap - move the shin forward on the pillow so that the kneecap is hanging over the front edge, suspended over the floor.

shallow split squat
shallow split squat
Use some foam cushions (stack them) to create a higher surface to squat down to and gradually reduce the height of the surface as you gain strength. This can also feel better on the knee that's touching down if the surface is soft!

Only go as far as you can
Only go as far as you can
Only go down as far as you are able to have good form and slowly increase the depth of the squat.
Remember that deeper, lower, more is not better. The goals for your exercises should be good form, good control, correct muscle activation and no increase in pain. The only way to get stronger and physically better is to exercise without injury. The phrase "No pain no gain" is a very old way of thinking - it has been replaced with "Pain - no gain".
I use to have such an all or nothing mentality! I felt like if I couldn't do the entire thing of something then I just couldn't do it. The way we get stronger though is incrementally - by doing what we can, no matter how small or shallow the movement, then building on that - you will be amazed at how your ability increases over time with consistency!

stability-aided split squat
stability-aided split squat
Surface to Balance with: Position yourself by something to help maintain your balance (i.e. wall, chair). Try not to put any weight on the surface - it is there only for stability. If you are working your right leg and you find yourself falling to the left -- have the stabilizing surface on your right side. If you are falling to the right -- have the stabilizing surface on the left side.

sit to stand
sit to stand
An easier version of this exercise could be a sit to stand movement from a chair with a slightly staggered or offset foot placement of about 4-6".
OPTIONS for how you sit- there are benefits to both:
FULLY SIT BETWEEN EACH REP: weight transfers from feet/legs to your bottom: If you sit down in between then the muscles can briefly relax between reps and then have to work again. This can be good for gaining control over the muscles - bringing attention to feeling them relax and then contract. Also, some people find it challenging to be able to relax and contract the muscle completely. You will also work through a larger range of motion. These are used in rehabilitation to teach people how to lower themselves down completely, with good control - no plopping. Then really push down to lift themselves back up. This is a good exercise for getting out of a low car, off of a toilet, or standing up from a low, soft couch.
ONLY TOUCH DOWN LIGHTLY BETWEEN REPS: In this version, your weight distribution doesn’t shift. If you don't sit down fully then you keep tension on the quads throughout the exercise. Some believe that this is a good way to build muscle. When you do this you'll be working through a smaller range of motion. It's important to work through a large range of motion when we exercise too, so it's a good idea to work both of these versions into or training here and there.

dual chair support split squat
2 Chairs to Support You
This is a great way to feel safe if you struggle with your balance. You will use 2 chairs to assist you.
This option allows you to work on increasing the depth of the squat as you build strength while keeping you well supported if you struggle with balance.
Stand between two chairs, the chairs should be placed with the seat facing you, one on each side of your working leg. Squat down as far as you are able.
NOTE: remember not to round the back in order to reach your hands to the chair sooner. Keep your spine neutral. It is your hip, knee and ankle that are creasing and bending, not your back. Place hands on the seats of the two chairs and put some of your weight through each hand. If you are only able to get down a little way, turn the chairs around and use the backs of the chairs - just make sure they are heavy and won't tip. Continue to deepen your squat. Use your hands as needed to push up to standing. Progress by decreasing the amount of weight you are putting through your upper body.

SCIENCY STUFF
SCIENCY STUFF
SPIFFILICIOUS FACTS ABOUT MUSCLES & MOVES
This movement can be used to progress from two-legged movements, such as squats, towards single leg movements will help to improve balance, control and strength. Progressing from double to single leg exercises has two great benefits. It can increase your ability to lift more with the double leg exercises by ensuring both legs are working equally, also it is a great progression to single leg exercises which are more functional and improve balance, stability, core strength, since we do most activities with more weight on 1 leg than another or only 1 leg.
Double leg exercises are great for building a lot of muscle but not very good for balance, stability. And let me just speak for all us over 40 women - we need help with balance and stability these days amiright?
Doing the split squat is a good way to work on transitioning from two legs to one leg.
Beneficial for identifying asymmetrical strength differences between left and right legs.
ALLLL MUSCLES & WHEN
ALL MUSCLES WORKING & WHEN DURING THE SPLIT SQUAT
Working the muscles through a big range of motion is helpful for building functional strength. The front leg will go from an upright, slightly bent position, to 90 degrees of knee bend (knee flexion) at the bottom position. The back leg should gently touch the floor or stop just slightly shy of the floor.
The core muscles will work throughout the movement to hold the spine in a neutral position. The working leg (front leg) quadriceps and the gluteus maximus work eccentrically to control the downward pull of gravity to control the descent (lowering) as the knee and hip bend and the body is lowered towards the ground. The muscles of the lower and upper leg work to stabilize the hip, knee, and ankle joints to hold the leg in good alignment. To return to standing the gluteus maximus and quadriceps begin the movement by extending the hip and knee (straightening), as the body is pushed up the hamstrings and gastrocs work to extend the leg.
The muscles of the back leg work to take some of the weight off of the working leg (front leg) and to help with balance and stability.
Other/auxiliary muscles worked: glutes, hamstrings, deltoids (if holding on shoulders), grip strength (if holding weights at side), core stabilizers, hip stabilizers (adductors and abductors, smaller internal and external rotators, core stabilizers (transverse abdominis, erector spinae, multifidi, obliques), muscles of the lower leg for stabilization (peroneals, gastroc, soleus, tib anterior).
PIN IT FOR LATER!


