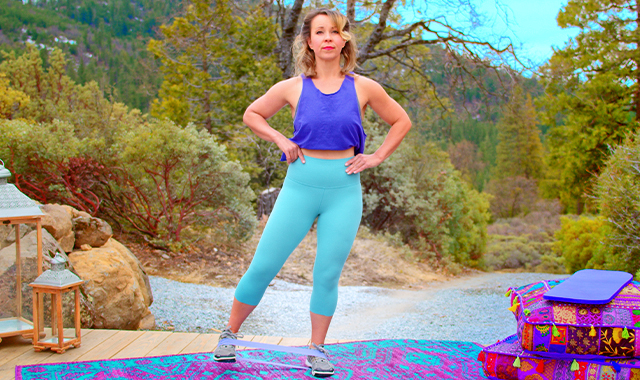
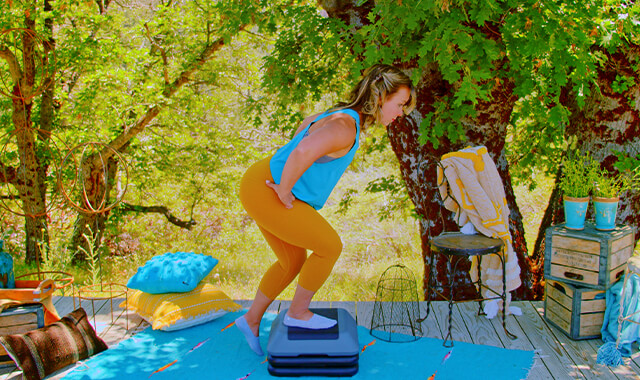
Marching Yoga Ball Glute Bridge
How to Do The Marching Yoga Ball Glute Bridge | In-Depth Guide [VISUAL LEARNERS] Intermediate
Proper Form, Common Mistakes, & Variations | Home Resistance Training
WHAT DO YOU WANT TO SEE?
QUICK DEMO
QUICK DEMO
MUSCLES THIS WORKS
MUSCLES
MAIN MUSCLES WORKED IN the Marching Ball Glute Bridge
GLUTEUS MAXIMUS & HAMSTRINGS
OTHER MUSCLES WORKED:
- Adductor magnus
- Core (erector spinae, transverse abdominis)
STARTING POINTERS
Starting Pointers
WHAT WE'RE DOING TODAY
ALL WE'RE DOING:
Marching while kinda laying down with your feet on a yoga ball....just watch the video.
The Stability Ball Glute Bridge March is an effective intermediate exercise for enhancing hip stability, strengthening the glutes, and improving overall lower body control. By incorporating an exercise ball into the glute bridge movement and adding a marching action, this exercise challenges your hip stability and engages your entire lower body
The Glute Bridge March can be used to work on transitioning from a double-leg to a single-leg bridge. When you add a stability ball to this exercise, the muscle activity of the leg that remains on the ball as the other lifts off will have to work extra hard to support the weight and also to hold the leg in good alignment.
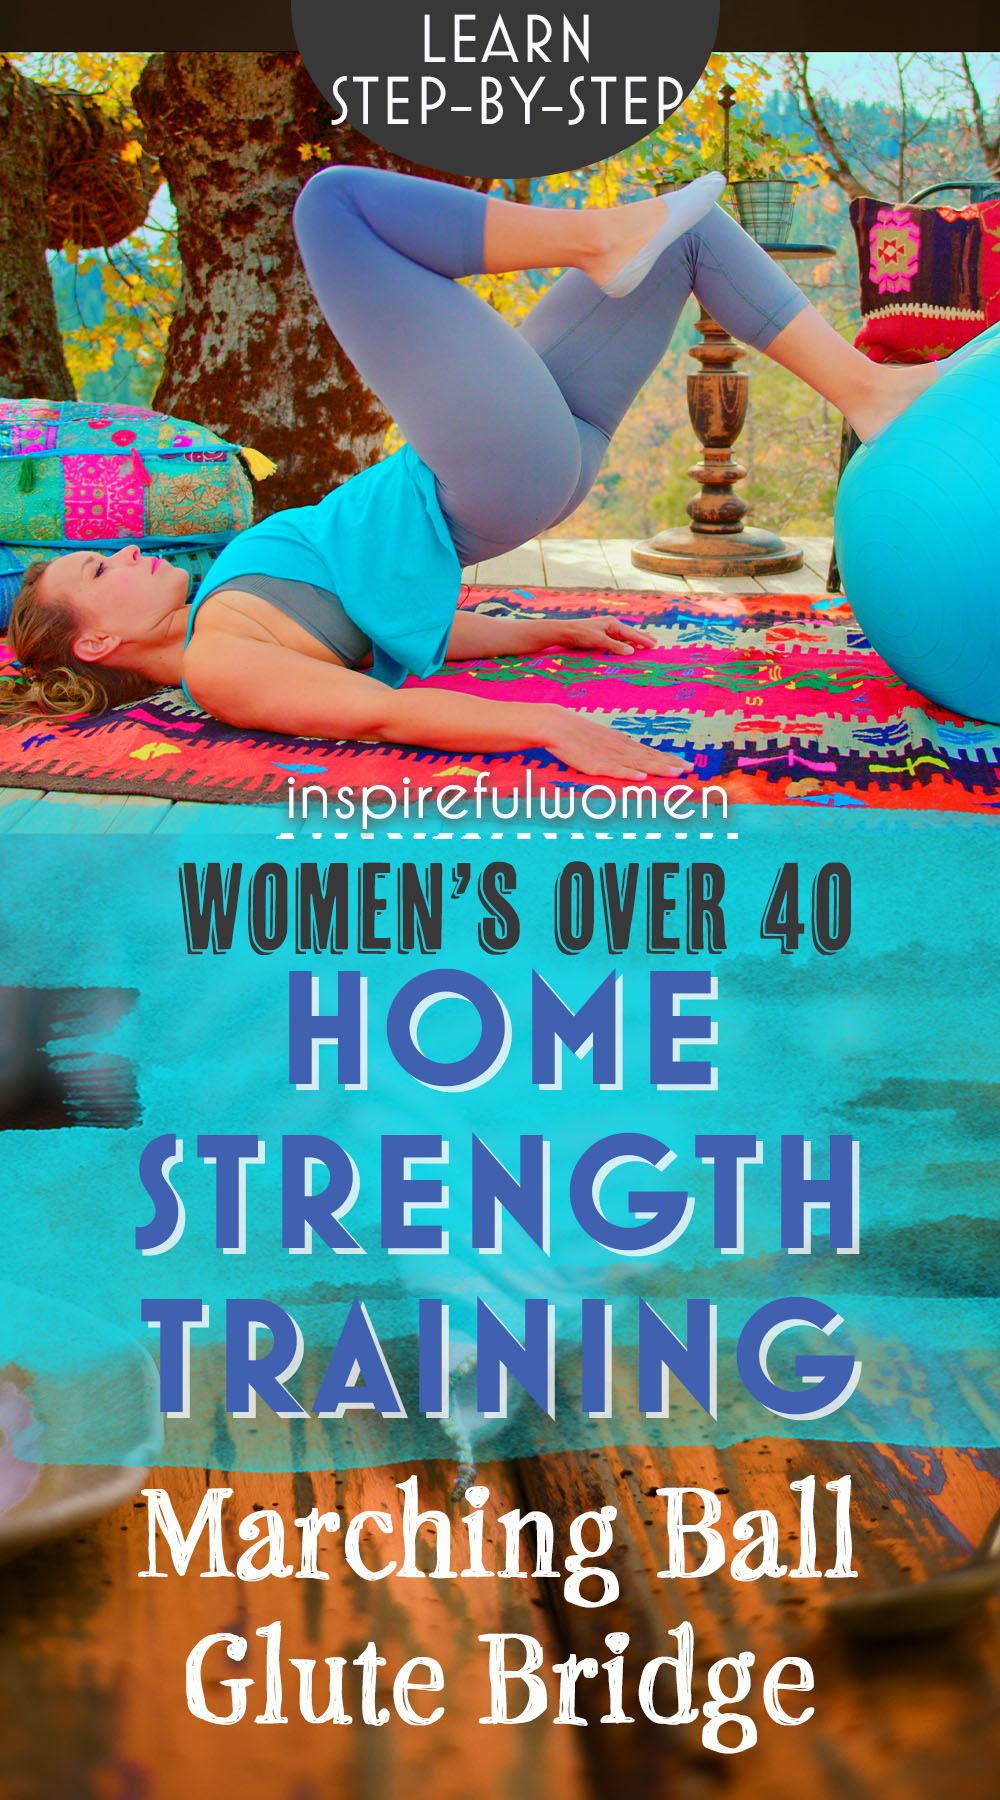
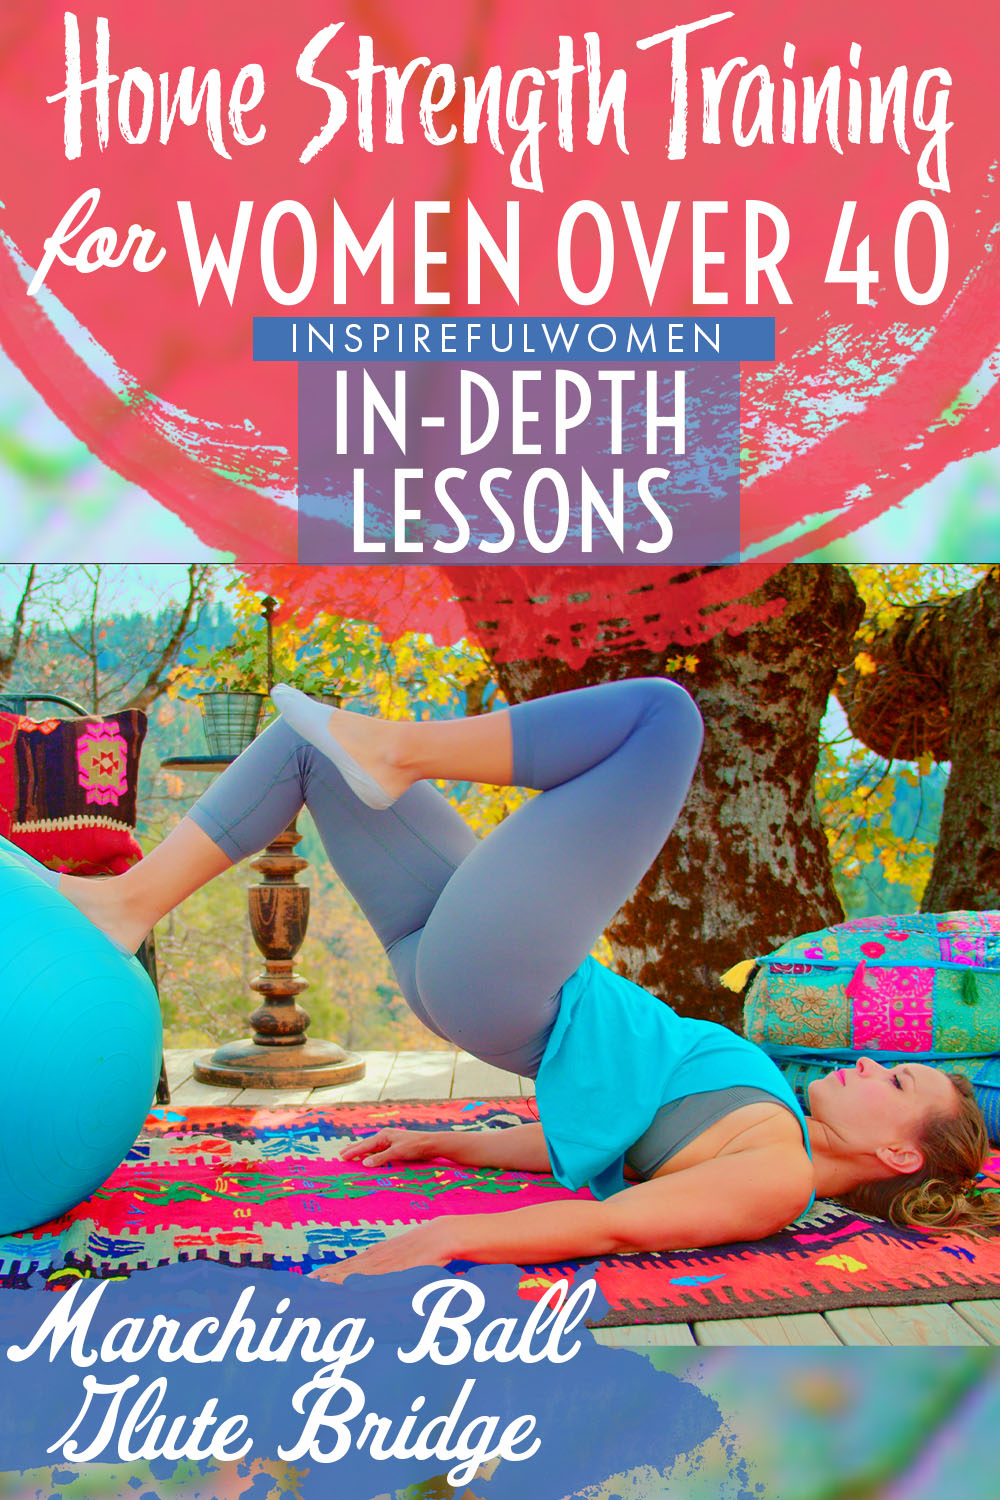
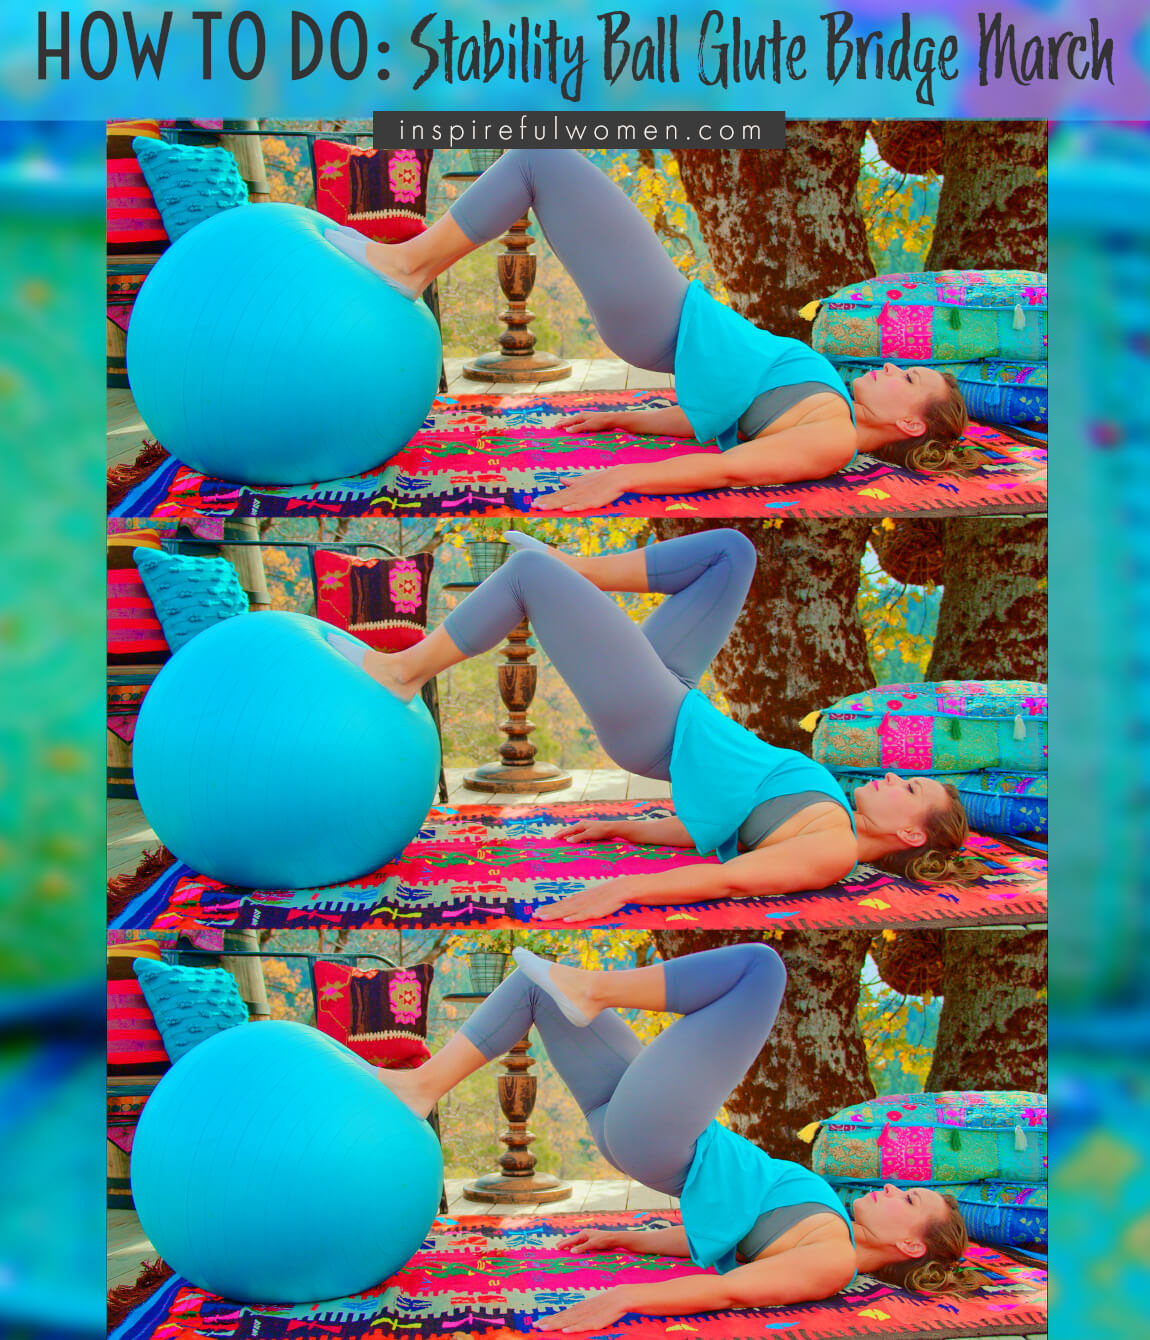
This version is done by placing the bottoms of the feet on the ball, bridging up with both legs, and while holding the position, alternating bent knee leg lifts. This trains the core and hip muscles to hold the torso and pelvis still when one leg is lifted off of the ball.
Marching while holding a bridge position on the stability ball can be used as a progression from glute bridge with marching on the floor, or stability ball glute bridges. This is a good option if you have difficulty keeping the pelvis level during the single leg stability ball bridge, or if your leg muscles are not quite strong enough to push up into the bridge using just one leg. Move your feet closer together than where they are with a double leg bridge, it will make it easier to lift one leg.
HOW TO DO THE EXERCISE
LOOKS
HOW the Marching Ball Glute Bridge SHAPE OUR BODY
Rounded, firm, and lifted buttocks.
PROPER FORM
PROPER FORM: Marching Ball Glute Bridge
EQUIPMENT, SETS & REPS
EQUIPMENT
- Stability Ball
- Mat for floor
- Folded washcloth to support the neck if needed
SUGGESTED STARTING WEIGHT FOR WOMEN:
Body weight
SETS & REPS:
2 sets of 8-10 marches
PACE:
Quick up and slow down – must be able to hold pelvis and spine in neutral.
BODY POSITION
BODY POSITION FOR THE Marching Ball Glute Bridge
BODY STANCE: Lie on your back. Feet up on a stability ball. Neutral spine (includes neck). Shoulders gently pressing down on the floor.
ARMS: On the floor. They can be bent with your hands resting on your chest or outstretched - having more of your arm on the floor will be more stable.
FEET: The bottoms of your feet on the ball - on the upper side of the ball so that your feet are flat. You can also put the back of your heel or ankle on the ball if that works better for you. Feet approximately 4 inches apart - more narrow than hip-width.
LEGS: The exact position of your legs will be dependent on whether you prefer the back of your ankle/heel on the ball or the bottoms of your feet on the ball, your leg length, and the size of the ball. The goal is to bend your knees but keep a neutral spine. Bend your hips to 90 degrees and bend your knees to pull the ball close to your bottom. The amount that you bend your knees is dependent on your ability to keep your pelvis and low back in neutral, not rolled back. The gluteus maximus muscle will do more of the work when your knees are bent more. With your knees straighter, the hamstrings will be contributing more.
HOW TO DO
HOW TO DO the Marching Ball Glute Bridge
CUE: As you push down into your feet to lift your pelvis up, you should feel the weight distributed equally across your upper back and shoulders. Keep your pelvis level as you shift the weight off of the lifting leg and on to the supporting leg.
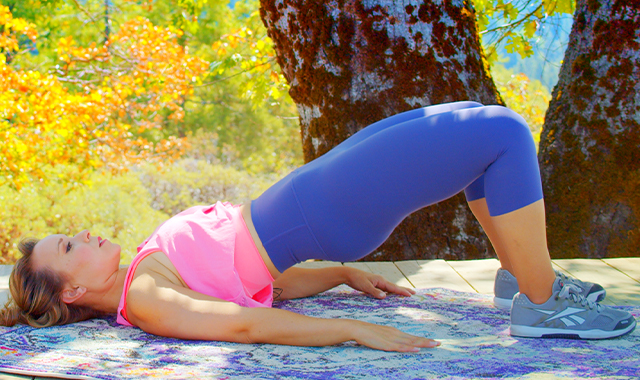
Push down into the ball with your feet and use your gluteus maximus (buttocks) to lift your pelvis up off of the floor.
Your weight will be in your shoulders, upper back and feet.
Continue to push your pelvis up, trying to make a straight line between your knees, hips and shoulders (you should be able to draw a line - straight but angled down, from the shoulders to the knees).
Keep your core muscles engaged to hold your spine and pelvis level and in neutral. You can push the hips up a bit higher to bring the legs behind the pelvis as long as you are able to keep the spine in neutral - not arching the back up.
Keep your pelvis level and your spine in neutral as you lift one leg off of the ball. Bring your thigh up just until your hip is bent to 90 degrees - knee pointing straight to the ceiling, or less. Lifting it more may cause your low back to round and will not work the muscles any more (no benefit to lifting higher).
Lower your leg back to the ball and lift your other leg.
Continue to alternate legs for the desired number of reps.
Monitor your form - keep your hips lifted, your pelvis level, and your spine in neutral.
Use your gluteus maximus muscle to control the return to the floor.
Relax your muscles briefly, push down into the ball with your feet, contract your gluteus maximus muscles and push up for the next set.
HOW TO SAFELY GET OUT OF THE EXERCISE
Bend your knees and lower your pelvis down to the floor. Remove your feet from the ball. Roll on to your side and push up to standing.
COMMON MISTAKES
COMMON MISTAKES
WHAT TO AVOID WITH THE Marching Ball Glute Bridge
KEY TIP:
Guess what? Good news! Many avoids are the same for most movements. Once you learn the basics, there's really only a few extra avoids for each individual movement.
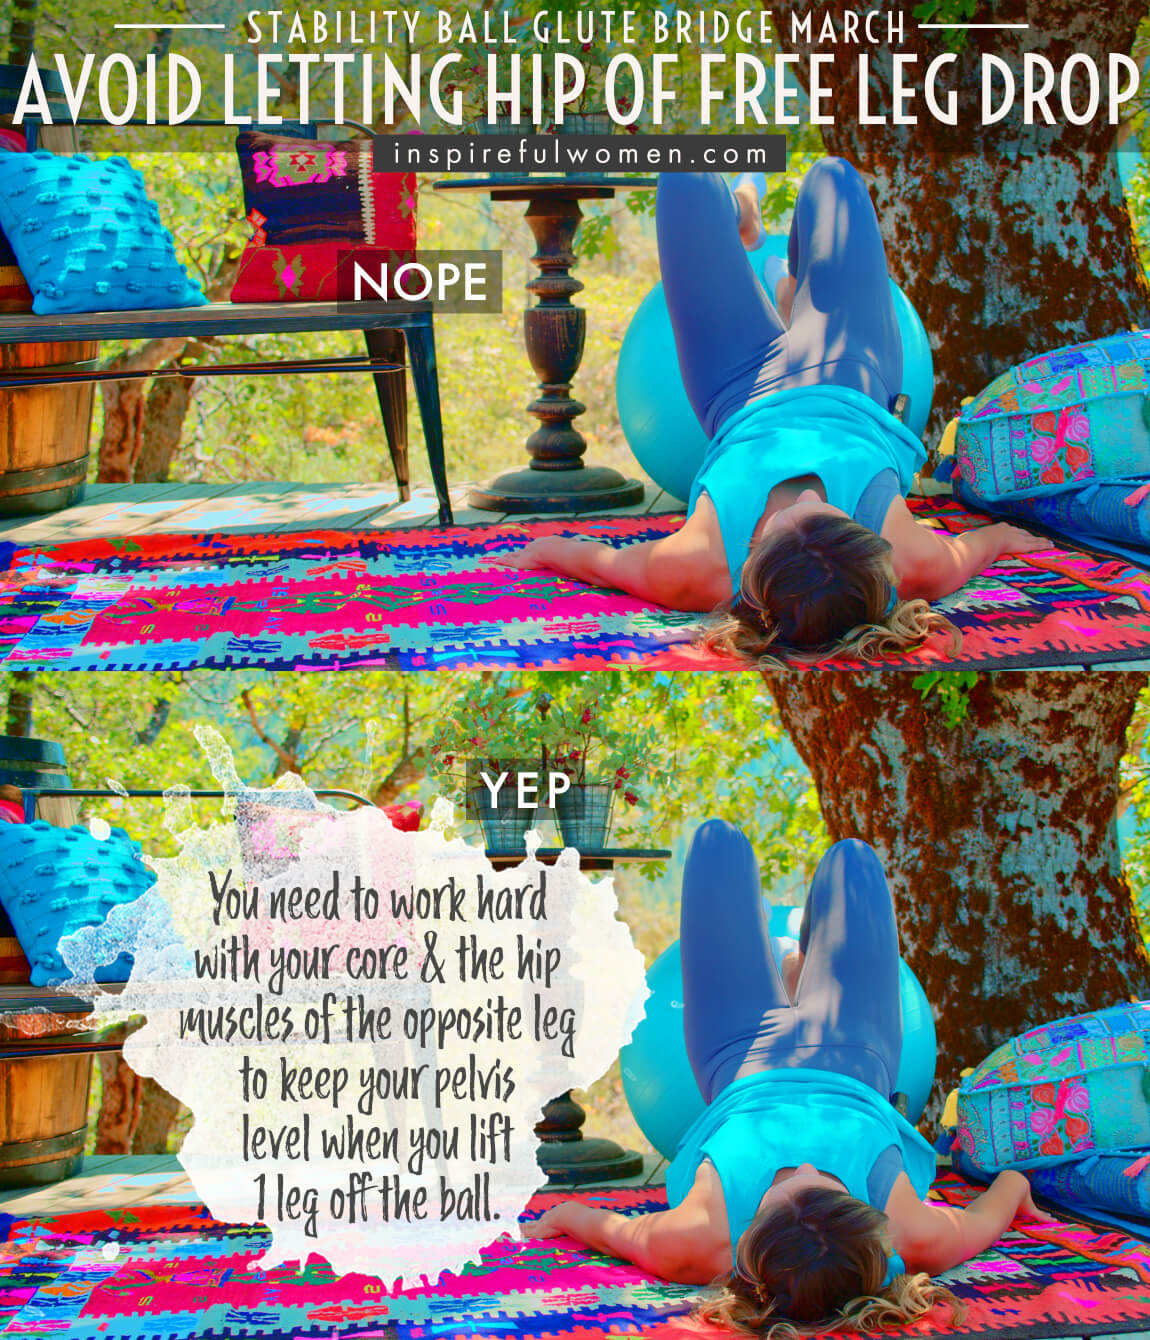
1. Avoid Pelvis Dropping or Rotating
AVOID: Avoid tilting your pelvis.
WHY NOT?
- Moving through the low back and pelvis can irritate the joints of the spine and sacrum.
- Moving through the low back and pelvis will not train the gluteus maximus to extend the hips while keeping the pelvis and low back in neutral.
- This exercise is targeting the muscles of the hip during movement of the hip while stabilizing the spine.
WHAT TO DO:
- The movement should be isolated to the hips - moving from being bent to being straight.
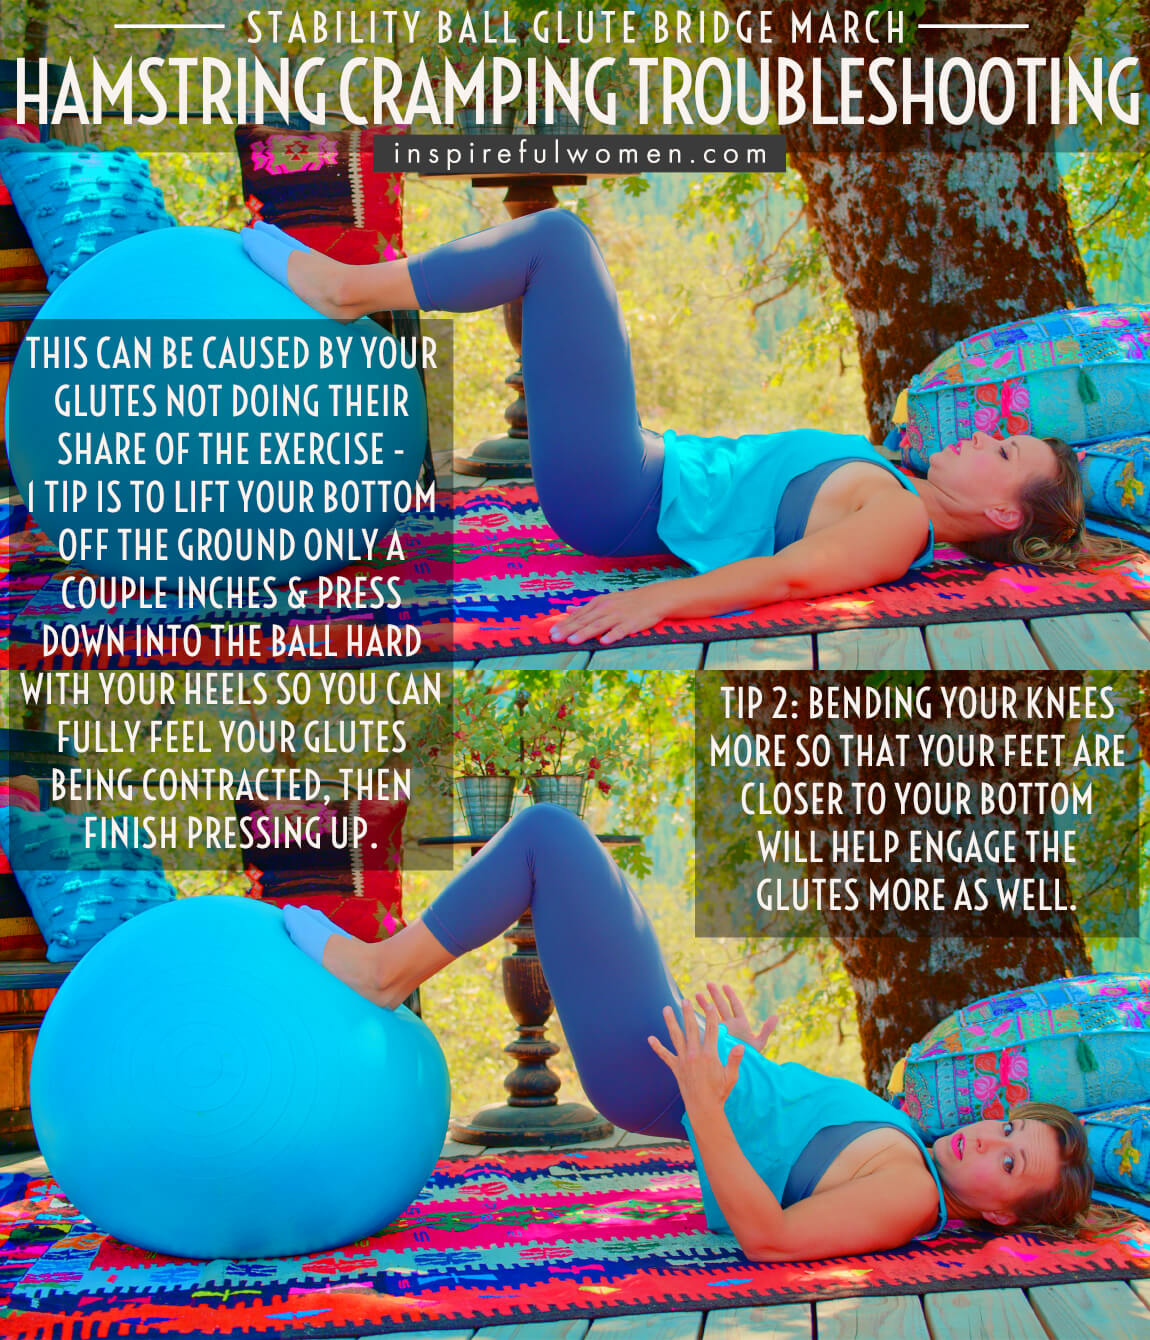
2. Avoid Hamstring Cramping
AVOID: Avoid using the hamstrings without the gluteus maximus.
WHY NOT?
- If your hamstrings cramp it means that your hamstrings are trying to take over the job of the glutes.
WHAT TO DO:
- Make sure that you are pushing down into your feet.
- As you push down the crease at the front of the hip should flatten as the thigh bone is pushed forward by the gluteus maximus.
- Try putting your hands on the lower buttocks to feel the gluteus maximus working.
3. Avoid Arms Pushing Into Floor
AVOID: Pushing with your arms.
WHAT TO DO:
- If you are doing the exercise with the arms in contact with the floor, avoid pushing down into the arms to help lift the pelvis from the floor.
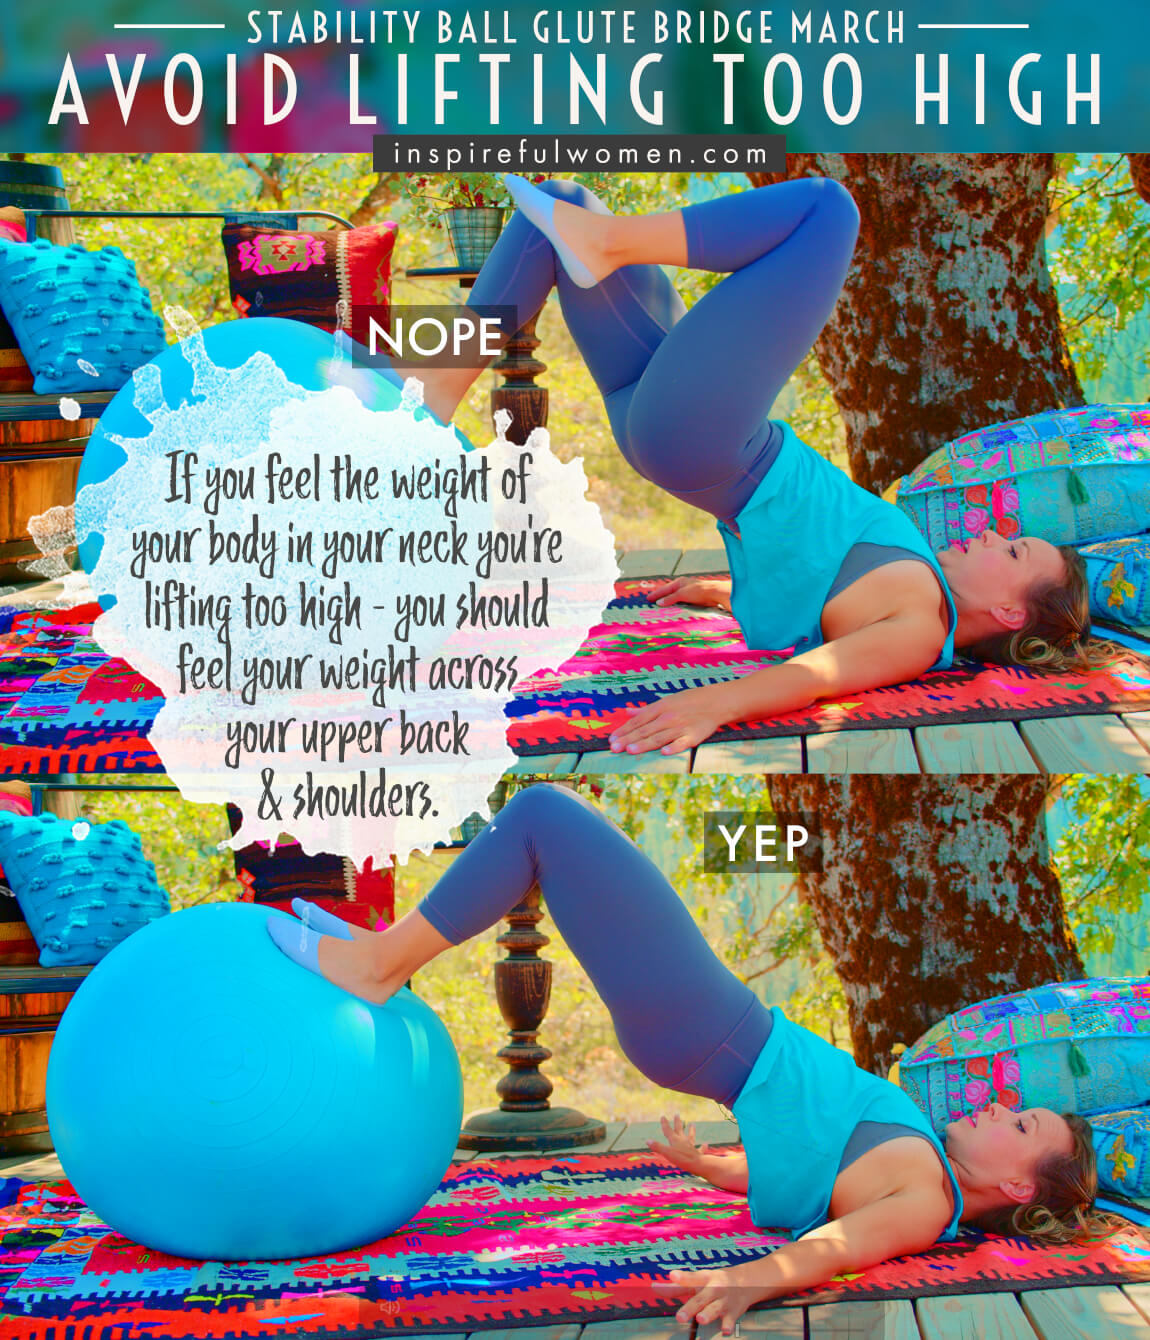
4. Avoid Lifting Too High
AVOID: Avoid lifting the pelvis up so high that your weight is shifted onto the neck or head.
WHY NOT:
- Lifting the pelvis higher shifts the weight up towards your shoulders and upper back.
- If you lift too high you will feel pressure on your neck or head.
WHAT TO DO:
- It is ok if you lift up and your cervical spine is in a more flexed (passive) position, but there should be no discomfort and the muscle should be relaxed.
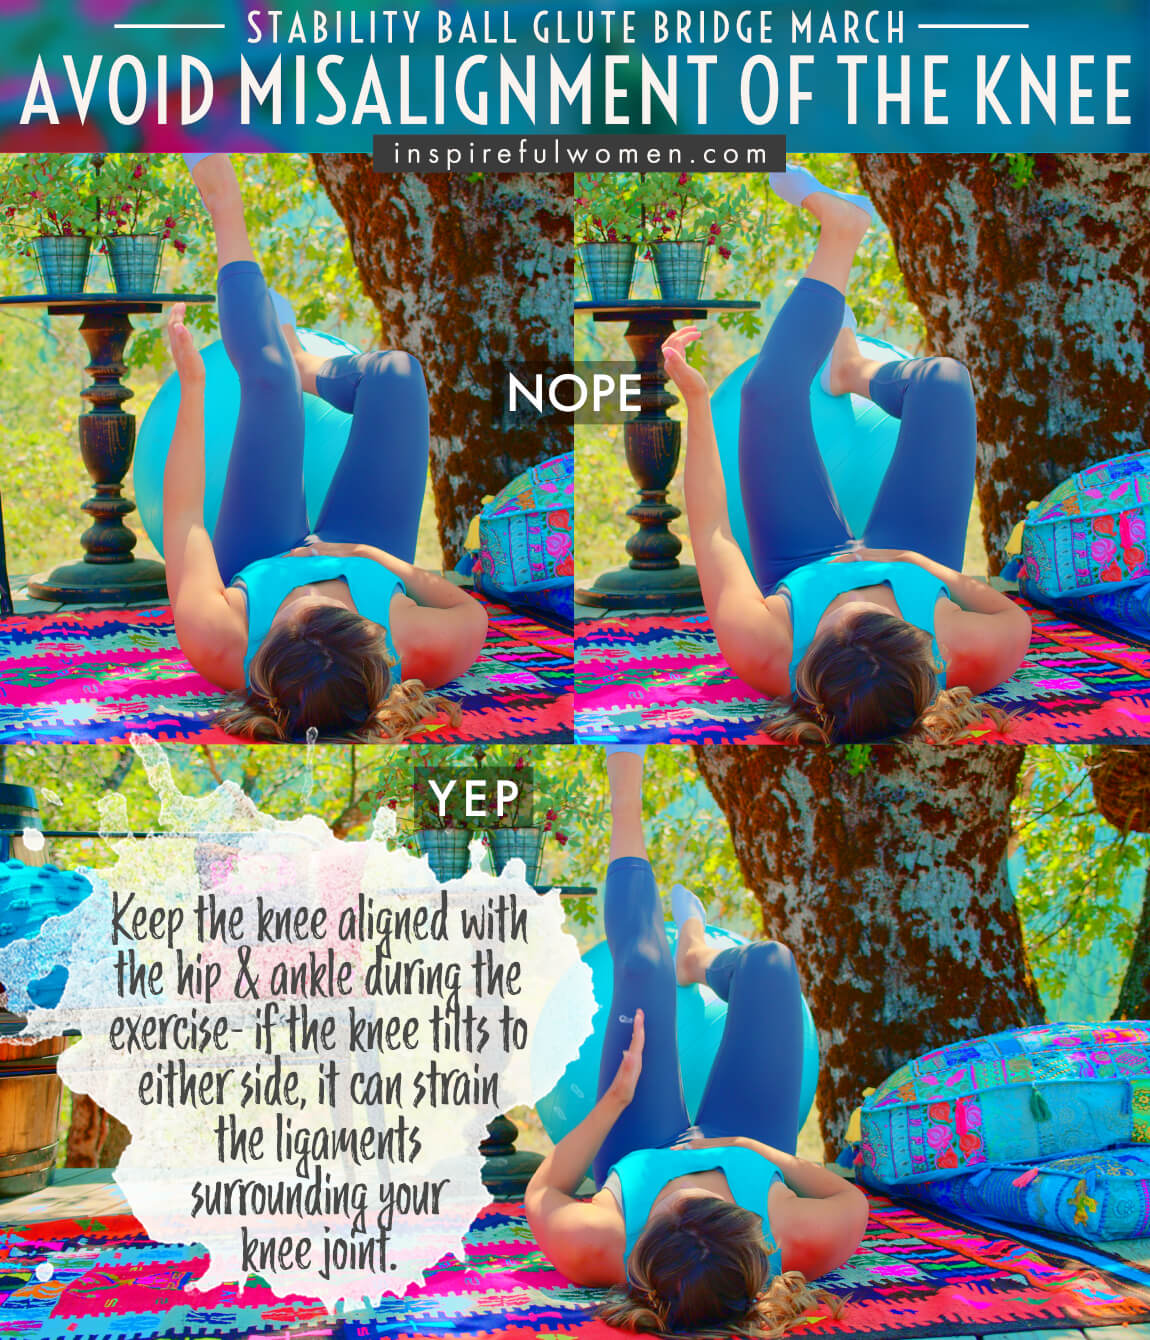
5. Avoid Misalignment of Leg
AVOID: Avoid letting your knee or ankle roll in or out.
WHY NOT?
- You should not be rolling your knees or ankles inward or outward. Poor alignment will put a strain on the ligaments of the joints.
- It will also lessen the effect of the exercise by missing the opportunity to train the stabilizing muscles.
WHAT TO DO:
- Make sure you have good alignment of your upper leg, knee, lower leg, ankle, and foot.
- Maintain good alignment: center of hip joint-a line down the thigh bone- center of kneecap-a line down the lower leg-center of ankle.
WHAT WE'RE DOING TODAY
WHAT & WHY
BENEFITS OF TRAINING THE Gluteus maximus & hamstrings
WHAT
Stability Ball Glute Bridges are an easy way to get more out of the basic glute bridge. Adding a stability ball to the exercise makes bridges quite a bit more difficult.
- One reason for this is your feet will be pushing down into an unstable surface, the muscles that stabilize the legs, hips and core will have to work harder. Training the muscles of the core and pelvis to hold everything stable helps to improve coordination and balance. Something that we all should be working on as we age.
- You will be working through a greater range of motion, which is also a great way to work out muscles - think about a shallow squat compared to a full squat - a full squat will work the muscles more and increase strength across a broader range of motion. Not only is this good for the muscles, but it is good for the joints. We spend a lot of our day sitting or walking, neither of those move the hip joint very much. This can lead to stiffness in the joint. Moving the hip joint through a large range of motion keeps the joint healthy and mobile [increases blood flow, joint fluid, keeps the muscles and ligaments flexible.]
Stability Ball Glute Bridges are done lying down on the floor with the feet placed on the ball. Pushing down into the ball, the muscles of the buttocks and back of the thighs - gluteus maximus, hamstrings, and adductor magnus, contract to lift the pelvis up off of the floor. The instability of the ball needs to be controlled by the core muscles and the muscles that cross the ankle, knee and hip joints.
The position and size of the ball will affect which muscles are used the most. To target the gluteus maximus more, try to position yourself close to the ball so that the knees are bent more than 90 degrees (a right angle). To keep your low back in a neutral position (not flattening to the floor), think of pushing your tailbone down.
If you have difficulty with your hamstrings cramping when you do this exercise, that means that the gluteus maximus are not doing their job and the hamstrings are trying to do all of the work. It may help to move your feet lower down on the ball, or you can try moving the ball closer to your buttocks to bend the knees more and try to limit the contribution from the hamstrings. Play around with the position, you can monitor how active your hamstrings are by placing your hands on the backs of your thighs as you try changing the position of the ball and/or your feet.
Another option is to do very small lifts, only lifting a few inches off the ground but making sure the glute max is doing the work, as you train your body, you can increase the lift. It may help to push the ball away as you lift up, and then let it roll back in as you lower down. If you use this option - make sure that you put your hands on your glute max to ensure they are doing the work. It is possible that you are just straightening your knees out - so using your quads, and not the glute max. If you still are using your hamstrings too much, it may be better to start with the basic bridge until you train the glutes to do their share of the work.
WHY BOTHER DOING IT?
WHY
WHY DO WE EVEN CARE?
NO MORE WALLFLOWER GLUTES
One thing I’d like to say is that ever since I made glute and hamstring focused exercises a consistent part of my exercise routine, and temporarily eliminated exercises where my quads could too easily take over like squats and lunges, the pain and achiness in my hamstrings when I used to walk up hills went away. This is the most satisfying result in my everyday life from my exercise routine that I have experienced yet, really and truly.
The most common, standard lower body exercises that we all have done in most workouts are squats and lunges, am I right? These are indeed healthy to do, not saying they aren’t. I’m not advocating to get rid of squats and lunges. But I have been discovering something interesting. The physical therapist I work with mentioned something interesting about our glutes, and really our entire backsides. Somehow it seems our modern-day life has caused an issue where many of us have rather inactive backsides, which then causes overactive front sides.
Our hamstrings and glutes don’t get as involved naturally with movements they SHOULD be contributing to. We can become what’s called quad dominant, where the front of our thigh muscles are doing more of the work in movements (like squats and lunges) where our glutes and hamstrings should be contributing more than they are. This ends up causing muscle imbalances. Which leads to things like I mentioned at the start which is that, even though I lifted heavyweights, and did squats, lunges, and even deadlifts ALL the time back in my Crossfit days, which supposedly should utilize and strengthen my hamstrings and glutes in addition to my quads, my hamstrings would always constantly hurt and ache when I tried to take a simple walk uphill, and it wasn’t muscle soreness from a workout. My hamstrings felt incredibly weak like they could never handle what I was trying to do, even though I was just….walking. And who knows what my glutes were or weren’t doing. They could have been sleeping for all I know! 😉 I never understood why this was occurring. But obviously, this made walks and hikes less than pleasant since it was a painful experience.
Fast forward to a hamstring tendon injury. While I’d like to say it was 100% bad because it’s been such an annoying issue to deal with, when I finally got the right help to heal it, it meant that I was doing daily hamstring and glute exercises and not squatting or lunging at all for some months. Guess what happened during that time?
Walking uphill became an amazing pleasant endeavor! I feel like my legs are doing what they’re supposed to now! No more pain, no more achiness. I feel like I even have a spring in my step while walking UPhill, crazy right?
This has led me to believe that while squats and lunges are indeed useful since these are functional movements we do every day in our lives, thus it makes sense to train in that way, I am also beginning to feel that if the WAY our body is doing squats and lunges, whether it’s in a workout or picking up a box from the floor, is not in a muscle balanced way because of whatever modern-day life path has led us to this place, that it makes sense to do less “functional” exercises for a time like those squats & lunges, and instead do exercises that are specifically glute and hamstrings focused, where the quads can’t take over so that we can actually correct these imbalances- whether they are actual muscle strength imbalances, or even neural imbalances - brain pathways that cause us to utilize certain muscles over others because of habit or what have you, that aren’t balanced.
This forces us to retrain how our bodies use our muscles. Then when we go back to including squats and lunges, the way and which muscles fire during such a movement would hopefully be more balanced. Otherwise, it seems we will just keep perpetuating the same imbalanced movements over and over so we won’t really get anywhere and we’ll continue to experience the negative effects of this like pain, achiness, and injury.
This is one of those movements. This position can really only be achieved by the glutes and hamstrings. This isn’t a position where the quadriceps CAN take over, so we are forcing our minds and muscles to get these backside muscles back into our lives the way they should be. No more wallflower glutes. No more fly-on-the-wall hamstrings. They are going to get in there and become the life of the party along with the quads.
COMBATS AGE-RELATED GAIT CHANGES THAT COMPOUNDS AGING
The muscles on the back of the torso and legs work anytime that we are standing up. They work to hold us upright and in good postural alignment - this includes the trunk and the legs. When the gluteus maximus and hamstrings are not doing their job, it can lead to injuries of the back, hip, and knee, normal gait patterns, and posture.
Age-related gait changes include slower walking speed and taking shorter steps. Next time you have the opportunity to watch an elderly person walk, you may notice that their leg does not extend back behind their body and they don’t move their ankles very much, they have very little push off to push their bodies forward. Healthy or “normal” walking includes the leg going behind the body and pushing off of the floor to propel the body forward. Stability ball glute bridges can help keep the hip joints moving well and work the same muscles used to pull the thigh back when you walk.
Age-related changes in posture include a forward-leaning torso, a rounded upper back, a bend at the hips, and sometimes at the knees. This stooped posture pulls the center of gravity forward, throwing your balance off. Keeping the muscles of the back of the torso and legs well trained to hold you in an upright position can help to prevent these postural changes.
EVERYDAY LIFE
EVERYDAY LIFE &
MUSCLE FUNCTION
HOW WE USE OUR glutes & hamstrings IN EVERYDAY LIFE
1. THE GLUTEUS MAXIMUS AND HAMSTRINGS MOVE THE THIGH BACK FROM A BENT POSITION TO STRAIGHTEN THE HIP (HIP EXTENSION)
- Transitioning from sit to stand
- Standing upright with good posture
- Running uphill
- Jumping
- Standing back up from squatting down
- Lifting items from the floor
2. HELP TO TRANSFER POWER FROM THE LEGS TO THE ARMS
- Batting
- Golfing
- Tennis
- Shoveling
- Vacuuming
- Throwing a ball
HOW TO FEEL WHAT MUSCLE IS WORKING
How to Feel What Muscle is Working
The most relevant way to feel the gluteus maximus muscles working is to get into the starting position for the bridge - lying on your back with the hips and knees bent, feet flat on the floor. Place your hands on your lower buttocks. Squeeze the muscles and lift the pelvis off of the floor - just about one inch. Make sure that you feel both sides working. It is fairly common, especially if you have any history of back or hip pain, to have one gluteus maximus that is more active than the other. Try activating one side at a time. Make a mental note if you feel a difference between the two sides. When you are doing the bridges pay close attention to using both sides equally.
SCIENCY STUFF
SCIENCY STUFF
SPIFFILICIOUS FACTS ABOUT MUSCLES & MOVES
The transverse abdominis and erector spinae are engaged to hold the spine in neutral.
The gluteus maximus with help from the hamstrings act concentrically to extend the hips from a flexed position (crease at hips) towards neutral (no crease). The gluteus maximus and adductor magnus become more active as the hip moves from flexion into extension. The gluteus maximus is most active from neutral into extension. The core muscles are active throughout the exercise.
The muscles that cross the ankle, knee and hip joints will be co-contracting to hold the legs still as you bridge up and down.
The same muscles of the hip work eccentrically to lower the body back towards the floor.
ALL MUSCLES & WHEN
ALL MUSCLES WORKING & WHEN DURING THE Marching Ball Glute Bridge
The transverse abdominis, erector spinae are engaged to hold the spine in neutral.
The gluteus maximus with help from the hamstrings act concentrically to extend the hips from a flexed position (crease at hips) towards neutral (no crease). The gluteus maximus and adductor magnus become more active as the hip moves from flexion into extension. The gluteus maximus is most active moving from neutral into extension.
The core muscles are active throughout the exercise. The hip flexors (iliopsoas and rectus femoris) act concentrically to lift one leg up into a “march”. The gluteus medius and minimis and the internal on the opposite side work isometrically to hold the pelvis level. The transverse abdominis and obliques become more active to hold the spine in neutral. If the right leg is lifted, and the left leg is supporting the weight, the right side (unsupported side) of the pelvis will be pulled down by gravity. The left internal obliques and the right external obliques act to prevent the spine from rotating to the right.
The muscles of the foot, and the ones crossing the ankle, knee and hip of the working (supporting) leg co-contract to stabilize the leg as the other leg is lifted off of the floor.
The hip flexors of the lifted leg contract eccentrically as the leg is lowered back to the floor.
The same muscles of the hip work eccentrically to lower the body back towards the floor.
PIN IT FOR LATER!
