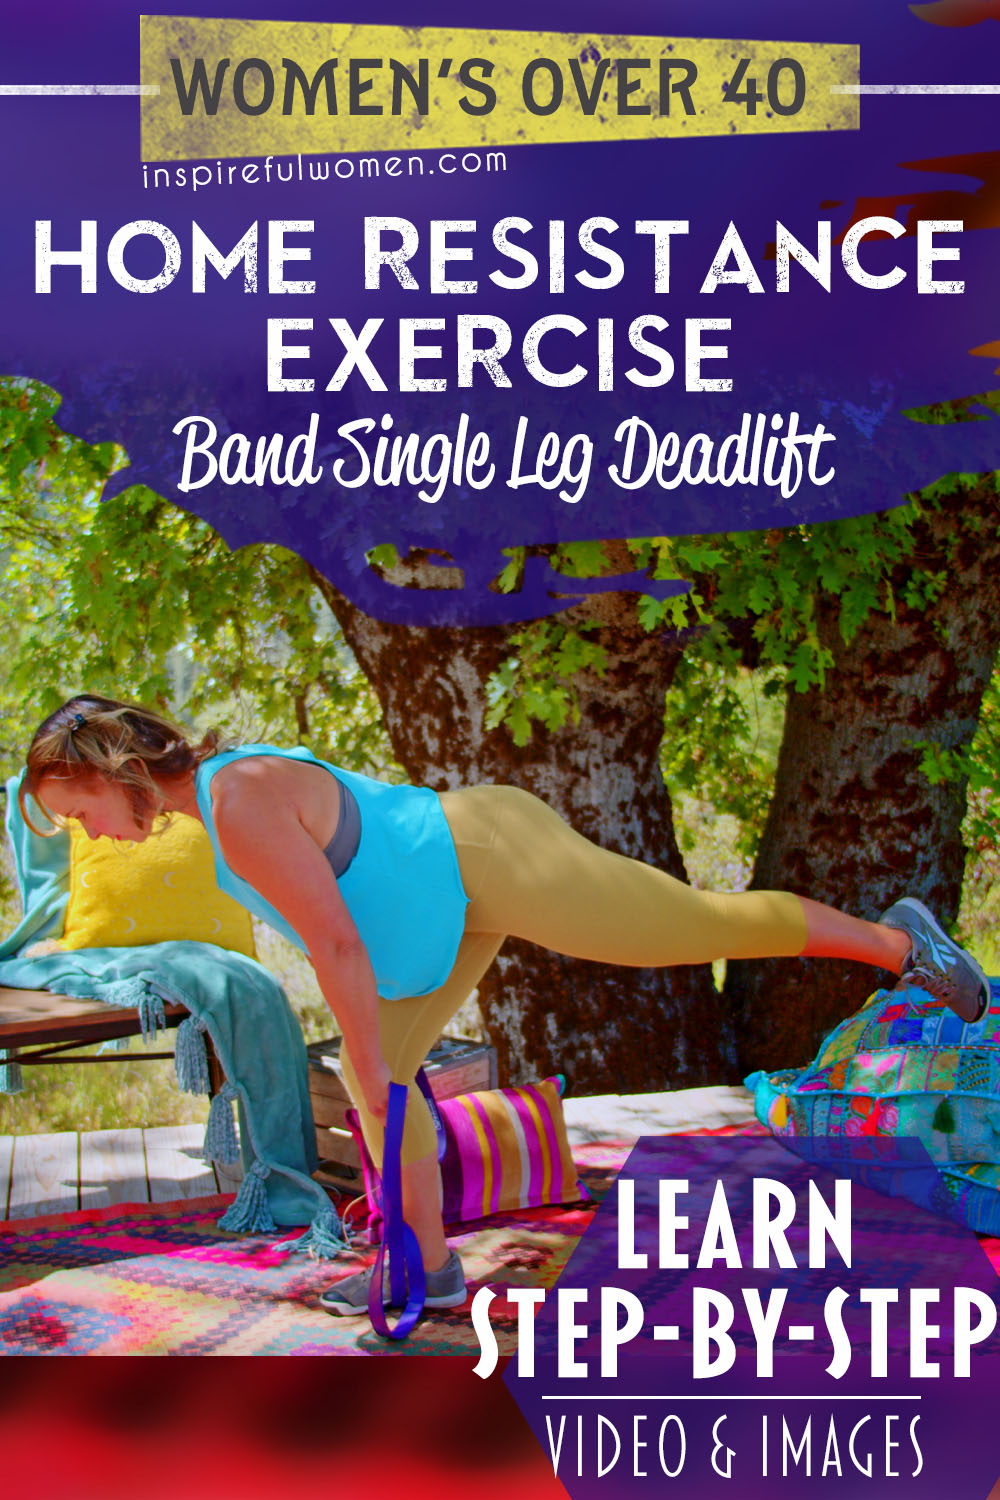
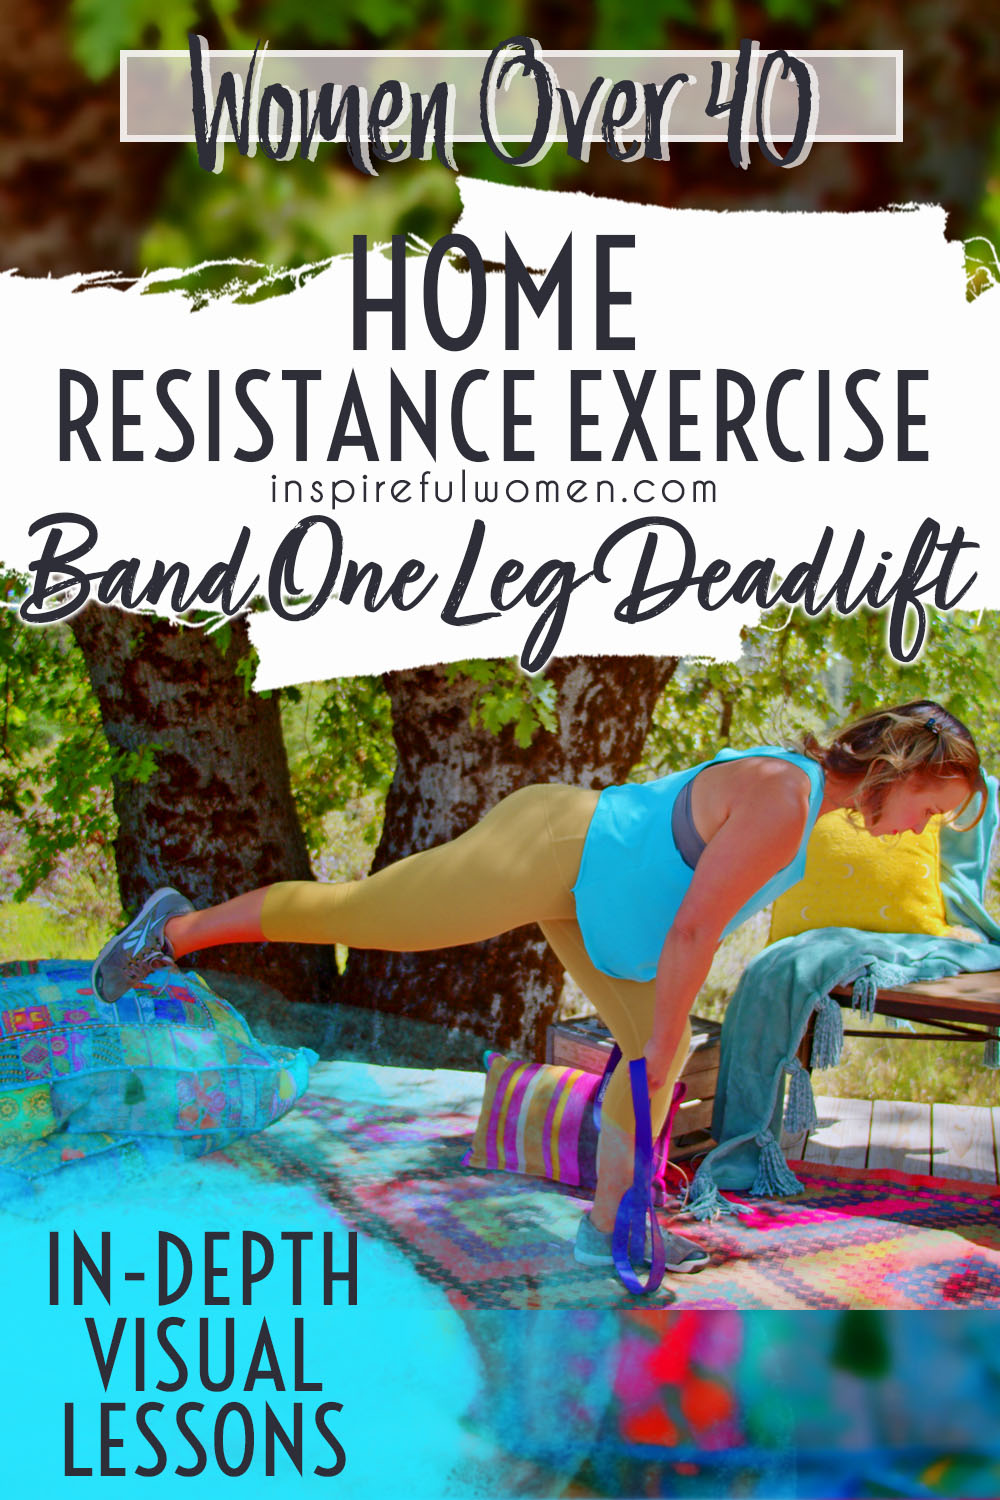
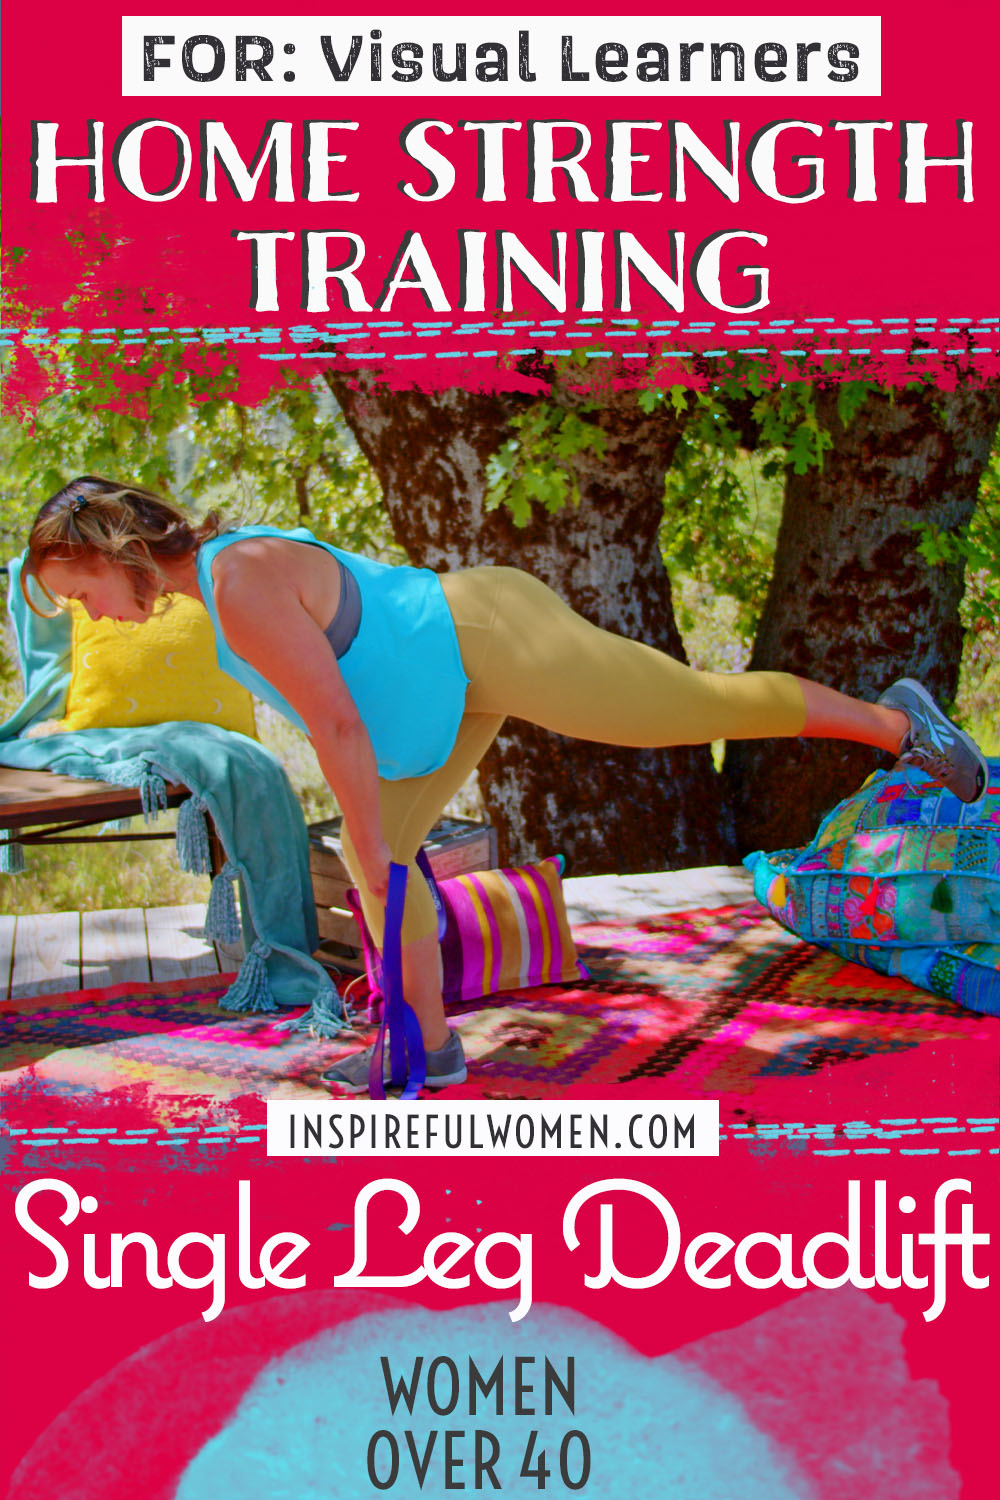
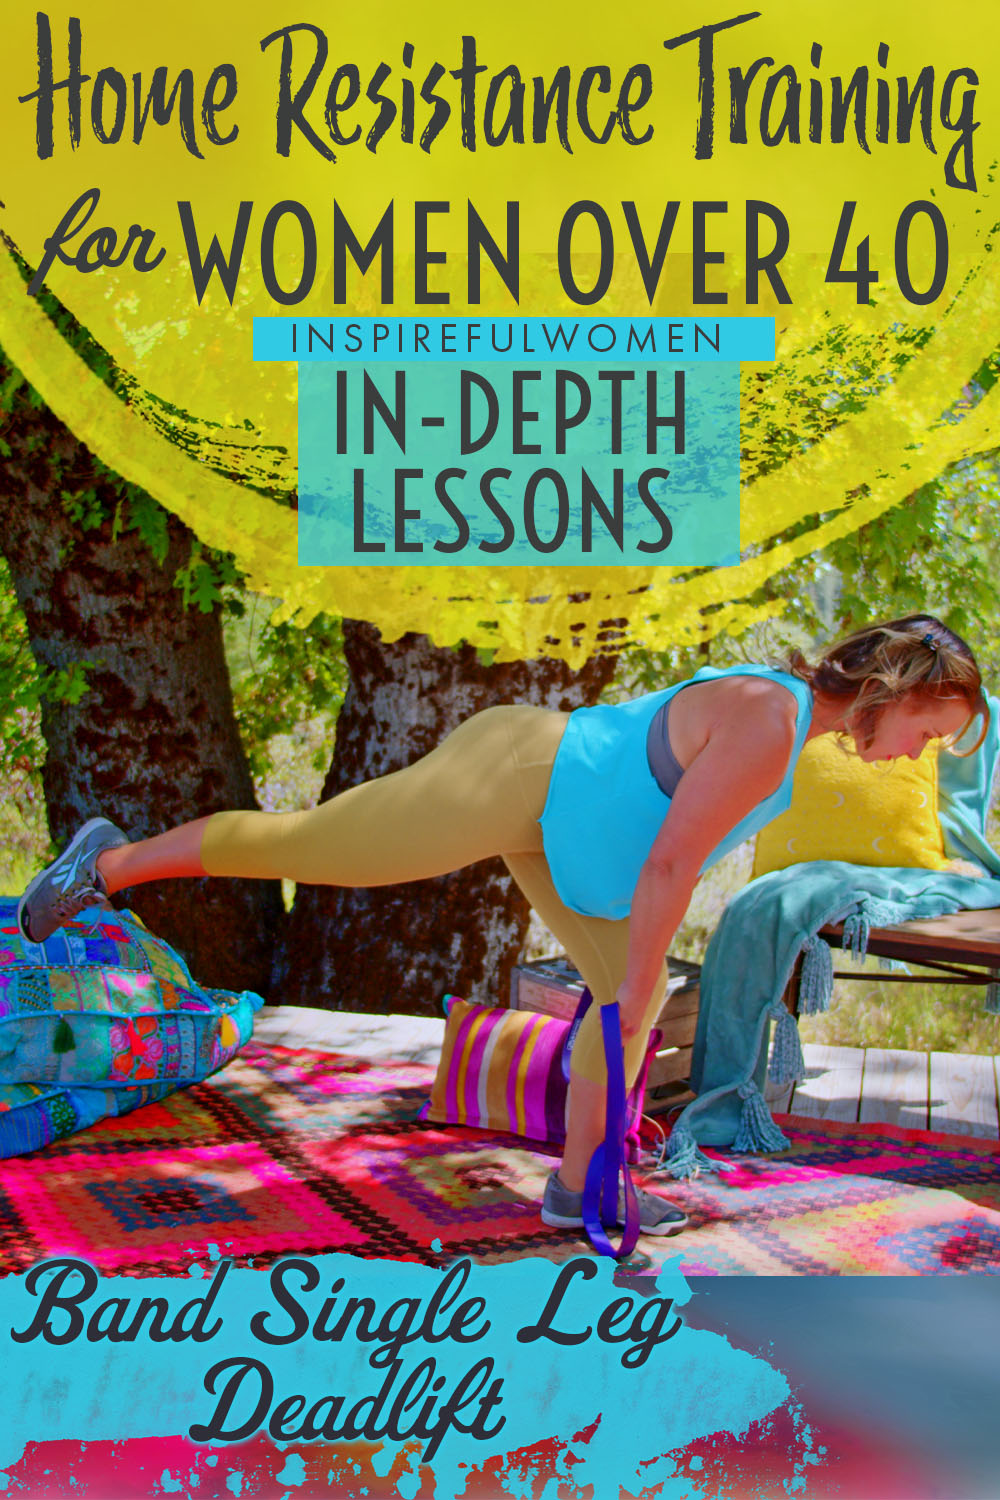
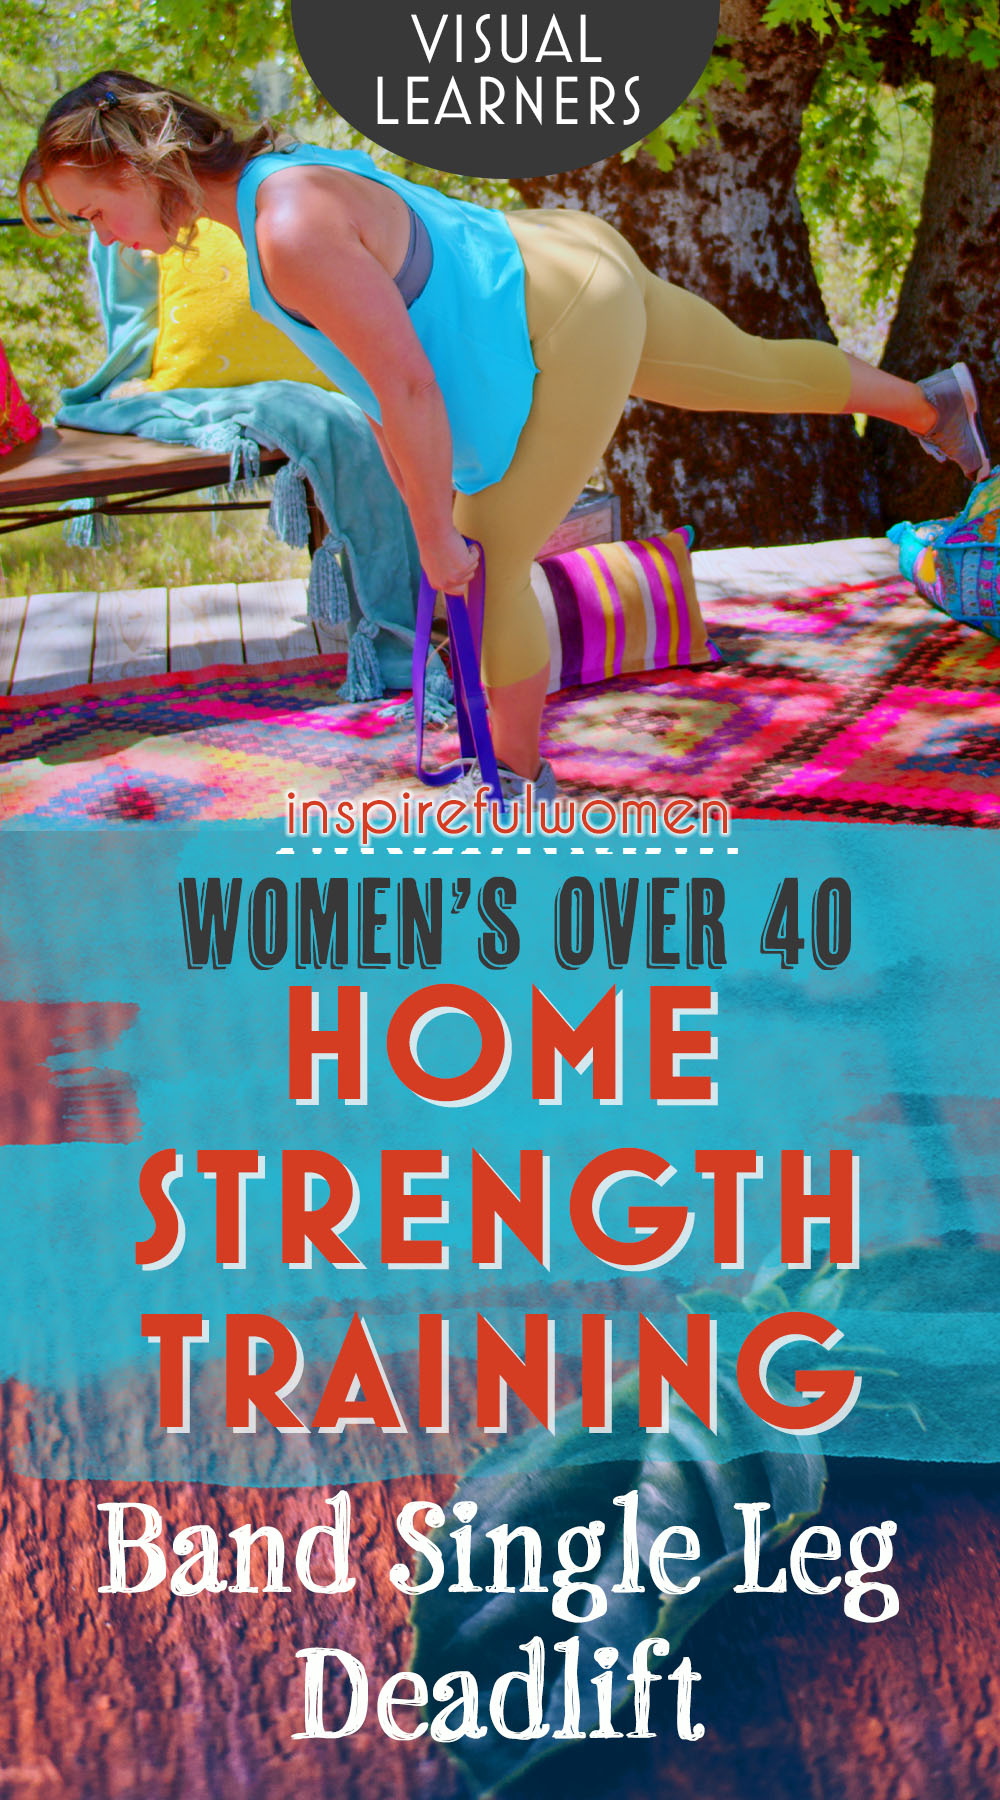
Single Leg Deadlift - Band
How to Do the Band Single Leg Deadlift - Glutes & Hamstrings Exercise at Home | In-Depth Guide [VISUAL LEARNERS] Intermediate
Proper Form, Common Mistakes, & Easier Variation | Home Resistance Training
WHAT DO YOU WANT TO SEE?
QUICK DEMO
QUICK DEMO
MUSCLES THIS WORKS
MUSCLES
MAIN MUSCLES WORKED IN the Single Leg Deadlift - Band
Gluteals (maximus, medius, minimis) & Hamstrings
OTHER MUSCLES WORKED:
- Transverse abdominis
- Erector spinae
- Obliques
- Quadratus lumborum.
- Tensor fascia lata
- Adductor magnus
- Piriformis
- Gemelli
- Obturator
- Quadriceps
- Gracilis
- Adductor brevis
- Longus
- Pectineus
- Gastroc
- Soleus
- Anterior and posterior tibialis
- Peroneals
- Extrinsic and intrinsic muscles of the foot
STARTING POINTERS
Starting Pointers
WHAT WE'RE DOING TODAY
The Single Leg Deadlift combines the benefits of single-leg exercises with strength training for the core, legs, and upper body. You should master the Single Leg Reach before progressing the movement by adding resistance.
The primary focus of this exercise is form, balance and stability, but if you would like to work your leg muscles more, the band is an option. Make sure the band is not too heavy. The heavier band can be hard on the hands. You may need to buy handles for the bands or if you are craftsy, make handles from a PVC tubing, or another item that is comfortable to grip and can be attached to the band.
The Single Leg Deadlift involves moving while standing on one leg and adding resistance to lift. You will be moving from a hip hinge position with a bent knee to upright standing against the resistance of the band. Your body will be hinged forward at an angle - you should still be able to draw a line through the ear-shoulder-nonworking hip- knee and ankle. Start with distinct reps then work on decreasing the time between reps so that the motion becomes more fluid. Try not to touch down with the non-working leg between reps.
You may need to play around with the length and resistance of the band you use. If the resistance of the band is so great that you cannot straighten all the way up then the band you are using is too heavy. There should not be any slack in the band when you are hinged forward, and you should be able to stand all the way up. Most likely there will not be much tension on the band when you bend and straighten the knee - that is ok, your leg muscles will still be working pretty hard.
HOW TO DO THE EXERCISE
LOOKS
HOW THE Single Leg Deadlift - Band SHAPE OUR BODY
Tones buttocks, thighs, calves and midsection.
PROPER FORM
PROPER FORM: Single Leg Deadlift - Band
EQUIPMENT, SETS & REPS
EQUIPMENT
Main set (3: Light/Med/Heavy)
X-Heavy Band (I recommend getting this too if you plan to use resistance bands frequently).
Barefoot makes it easier to stay tuned in with your feet.
SUGGESTED STARTING WEIGHT FOR WOMEN:
Moderate resistance band.
SETS & REPS:
2 sets of 8 reps.
PACE:
Slow and controlled.
BODY POSITION
BODY POSITION FOR THE Single Leg Deadlift - Band
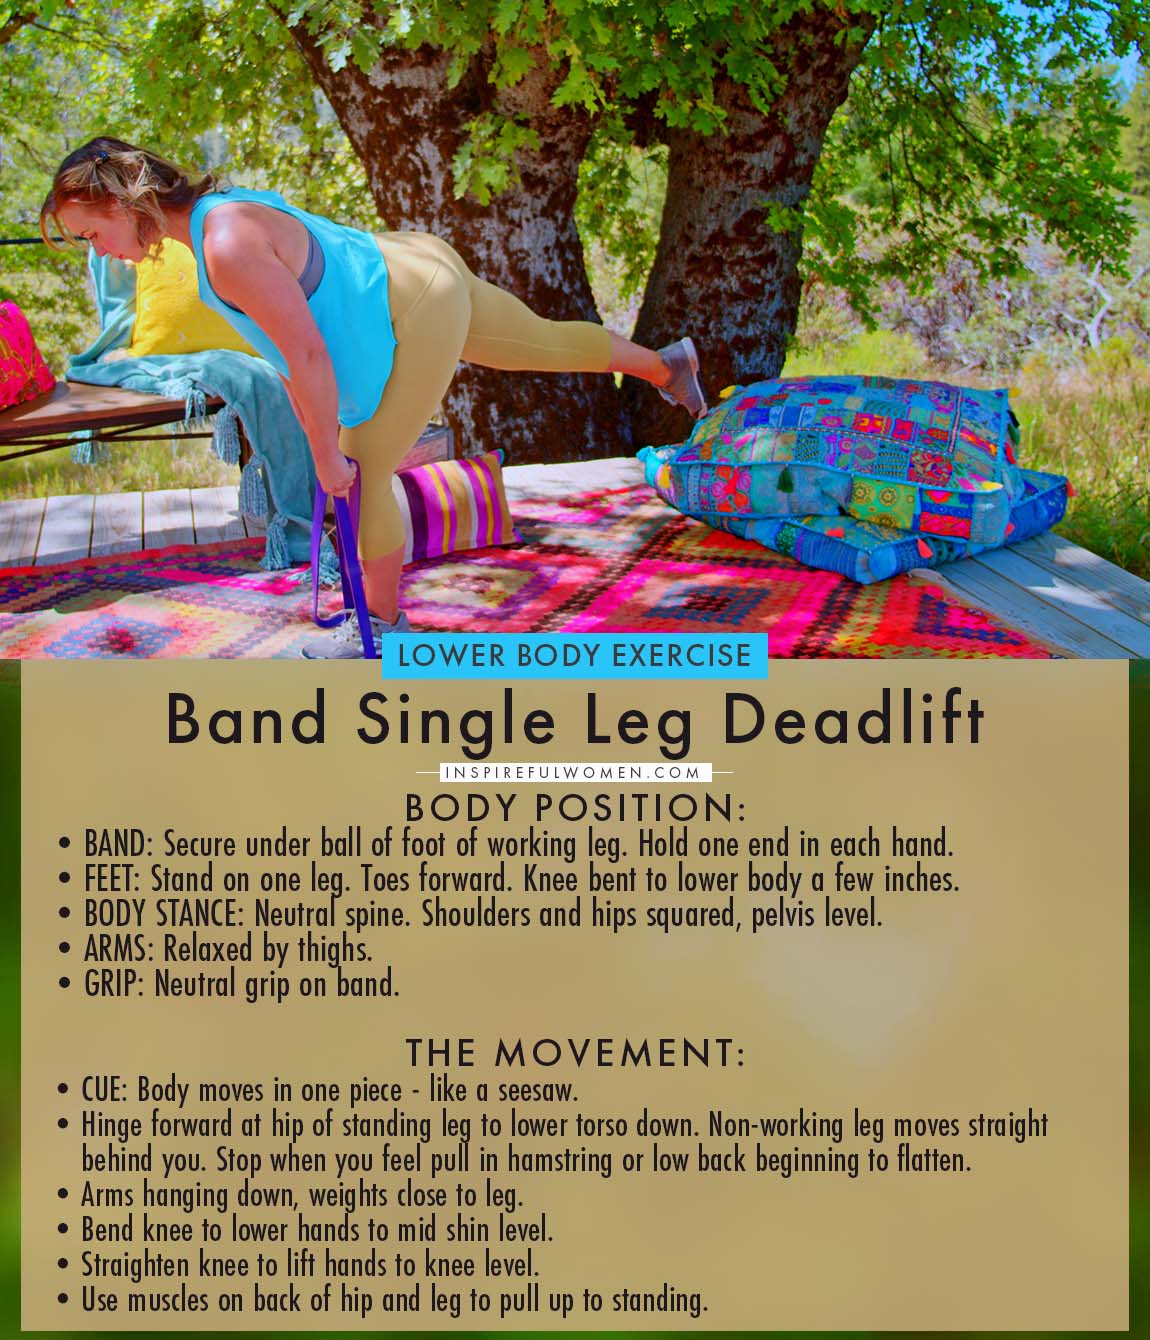
BAND: Secured under the ball of your standing (working leg) foot. Hold the one end of the band in each hand.
FEET: Standing on one leg, knee slightly bent (your body will be lowered by about 2 inches). Other leg held down in line with your standing leg, knee bent. Legs not touching.
Standing Foot: Flat on the floor - weight evenly distributed across the ball of your foot and your heel, toes spread.
HAND/GRIP: Neutral grip. Quite a bit of tension in the starting position - this is the position where the resistance of the band will be the greatest.
BODY STANCE: Neutral spine (includes neck) alignment throughout the exercise. Shoulders and hips squared, pelvis level. Lift sternum, move your shoulder blades down (this will help engage your lat muscles (latissimus dorsi) which helps support the lumbar spine) and inward (to protect the shoulder joints) and gently activate your core muscles to maintain a neutral spine throughout the exercise.
ARMS: At the sides of your thighs whichever is most comfortable. It is common for people to start with their arms at their sides and then let their arms move forward to the front of the thighs as they hinge forward, that is fine it should feel comfortable and natural. Keep your hands close to your legs. There should not be any slack in the band when you hinge forward (at the bottom of the movement).
HOW TO DO
HOW TO DO THE Single Leg Deadlift - Band
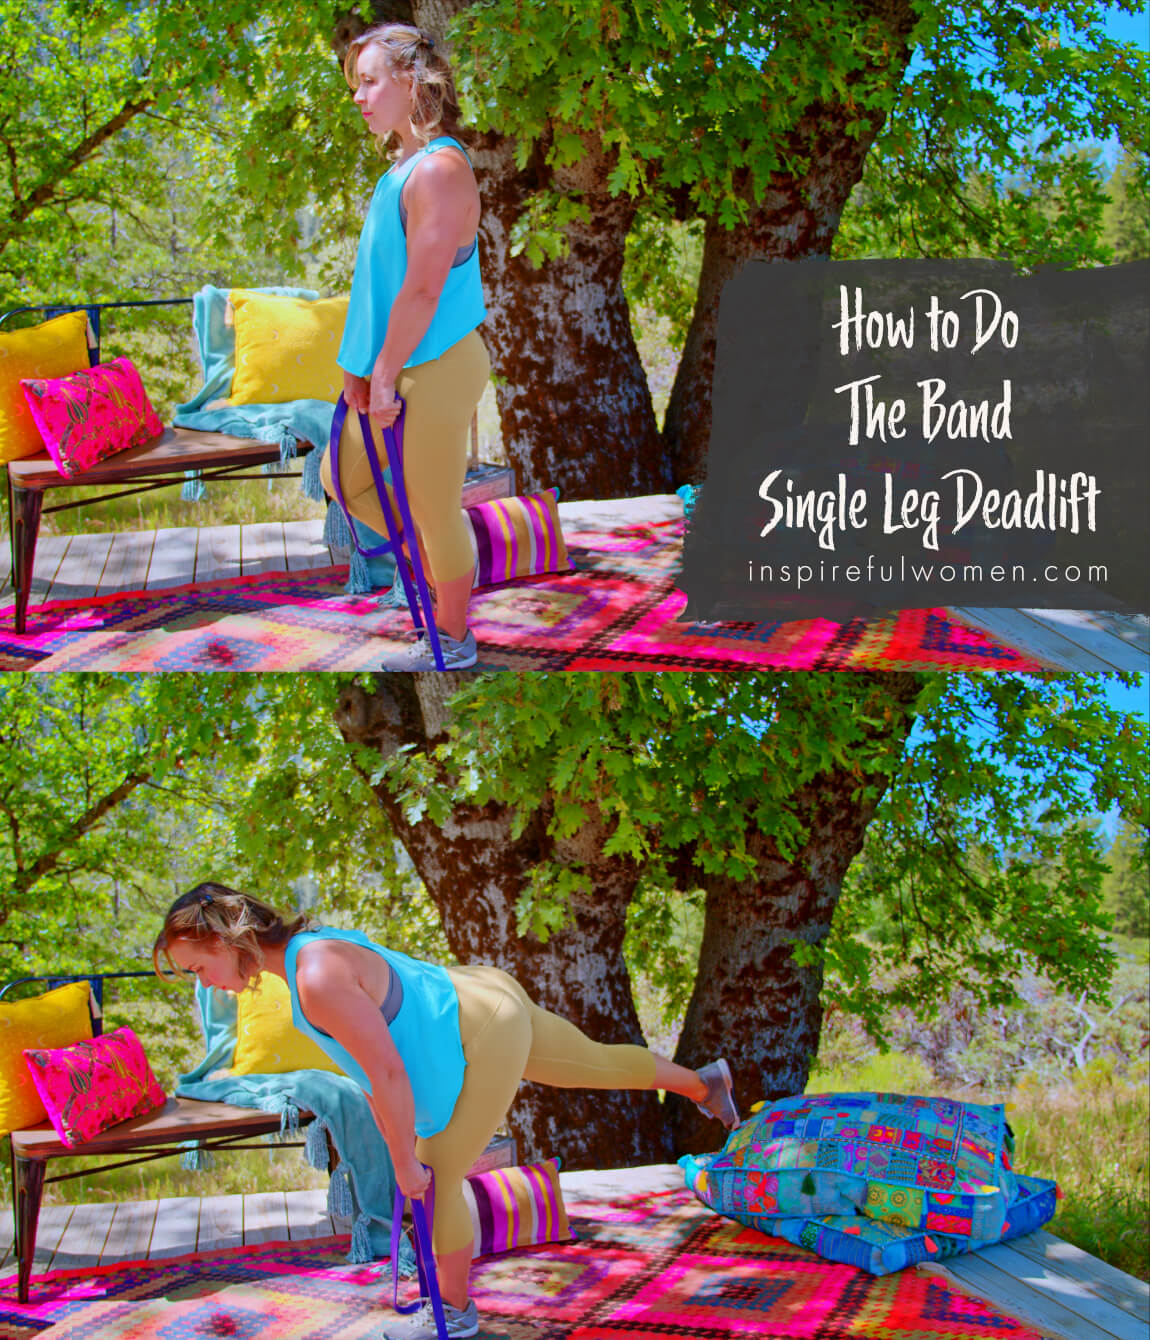
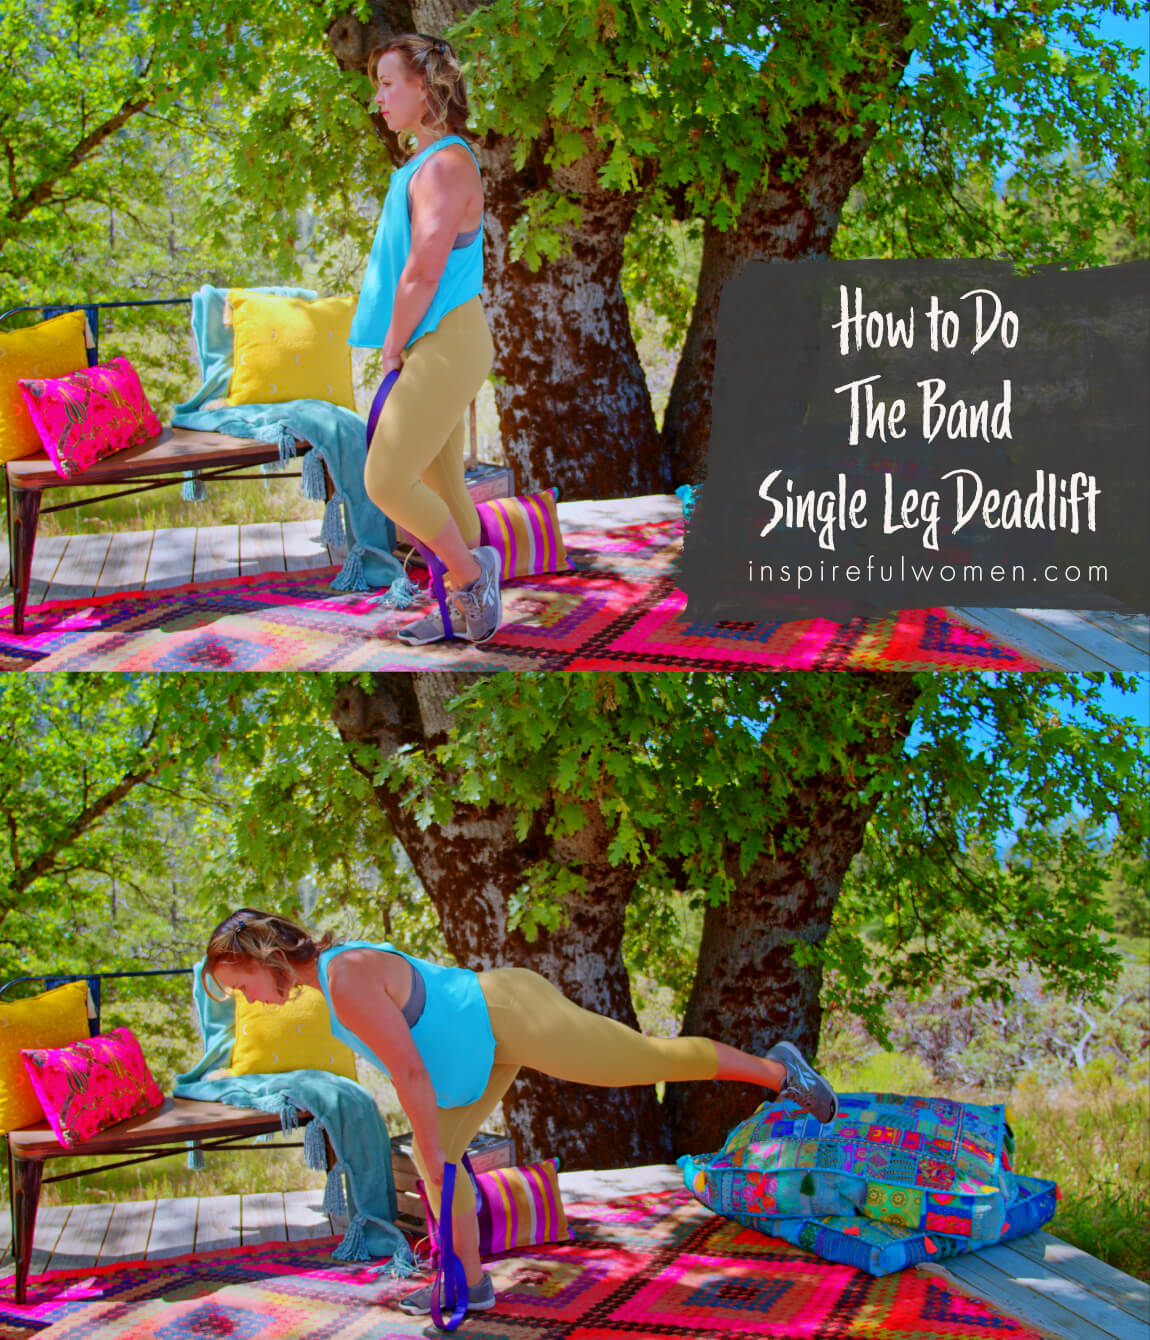
CUE: The movement is like a seesaw - as your torso moves down your lower body comes up. Stretch and energize your leg behind you - it will help you balance. Think of moving your body from head to toe in one piece as you hinge at hips. Your torso and hip on your non-working side should not bend.
Working leg: Hinge forward, keeping your shin vertical. Continue to hinge at your hip until you feel a pull or tightness in your hamstrings or you are unable to keep your spine in a neutral position (rounding of your lower back). Your non-working leg is straight behind you. You should be able to draw a line through your ear -shoulder-non working hip- knee and ankle.
Arms stay hanging straight down - your hands over or just in front of your foot. They should be close to your leg.
Bend your standing (working leg) knee to lower your hands to about mid-shin level, there will be no or minimal tension on the band. The next rep begins when you pull the band up as you straighten your knee.
Use your gluteus maximus and hamstrings to pull up to return to standing. Your non-working knee will bend as your leg comes back in.
HOW TO SAFELY GET OUT OF THE EXERCISE
With both feet on the floor, hinge at your hips until your hands are at your knee joint line, and release the band.
COMMON MISTAKES
COMMON MISTAKES
WHAT TO AVOID WITH THE Single Leg Deadlift - Band
KEY TIP:
Guess what? Good news! Many avoids are the same for most movements. Once you learn the basics, there's really only a few extra avoids for each individual movement.
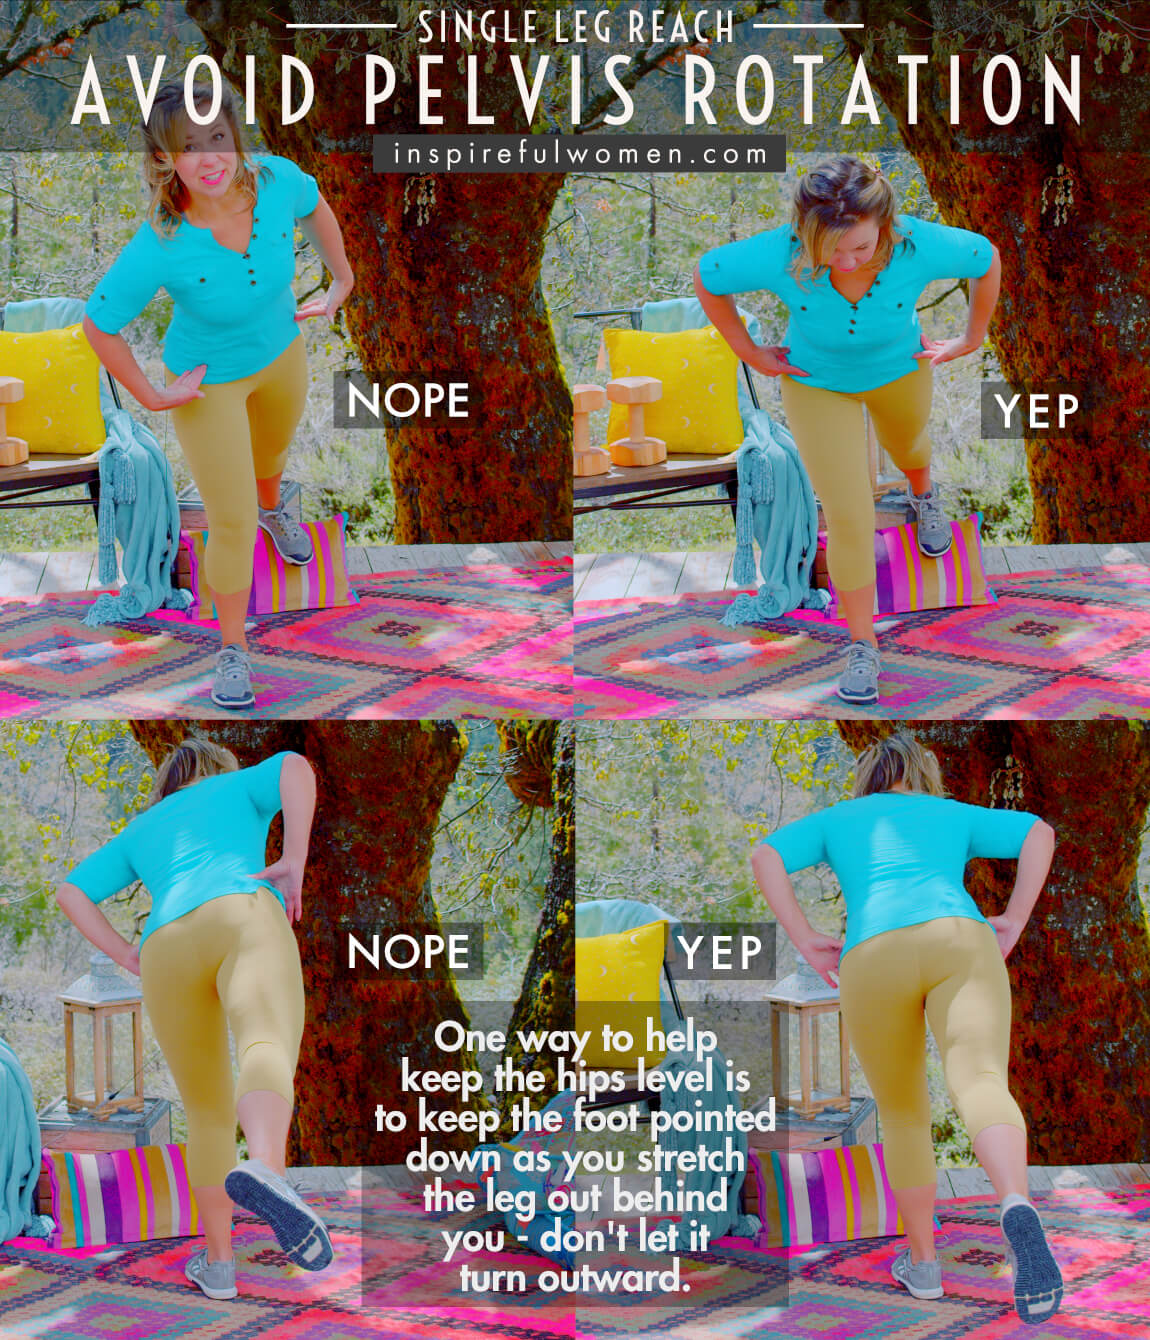
1. Avoid Rotating Pelvis
AVOID: Letting the pelvis rotate.
WHY NOT?
- It is common to want to lift the side of the pelvis that is not supported up.
- This happens when you are leaning the torso forward
- This will decrease the muscle activity of the working hip and back.
WHAT TO DO:
- It may help to think about keeping the toes of the foot that is lifted pointed straight down towards the floor.
- The back of your pelvis should be level.
2. Avoid Hip Sagging
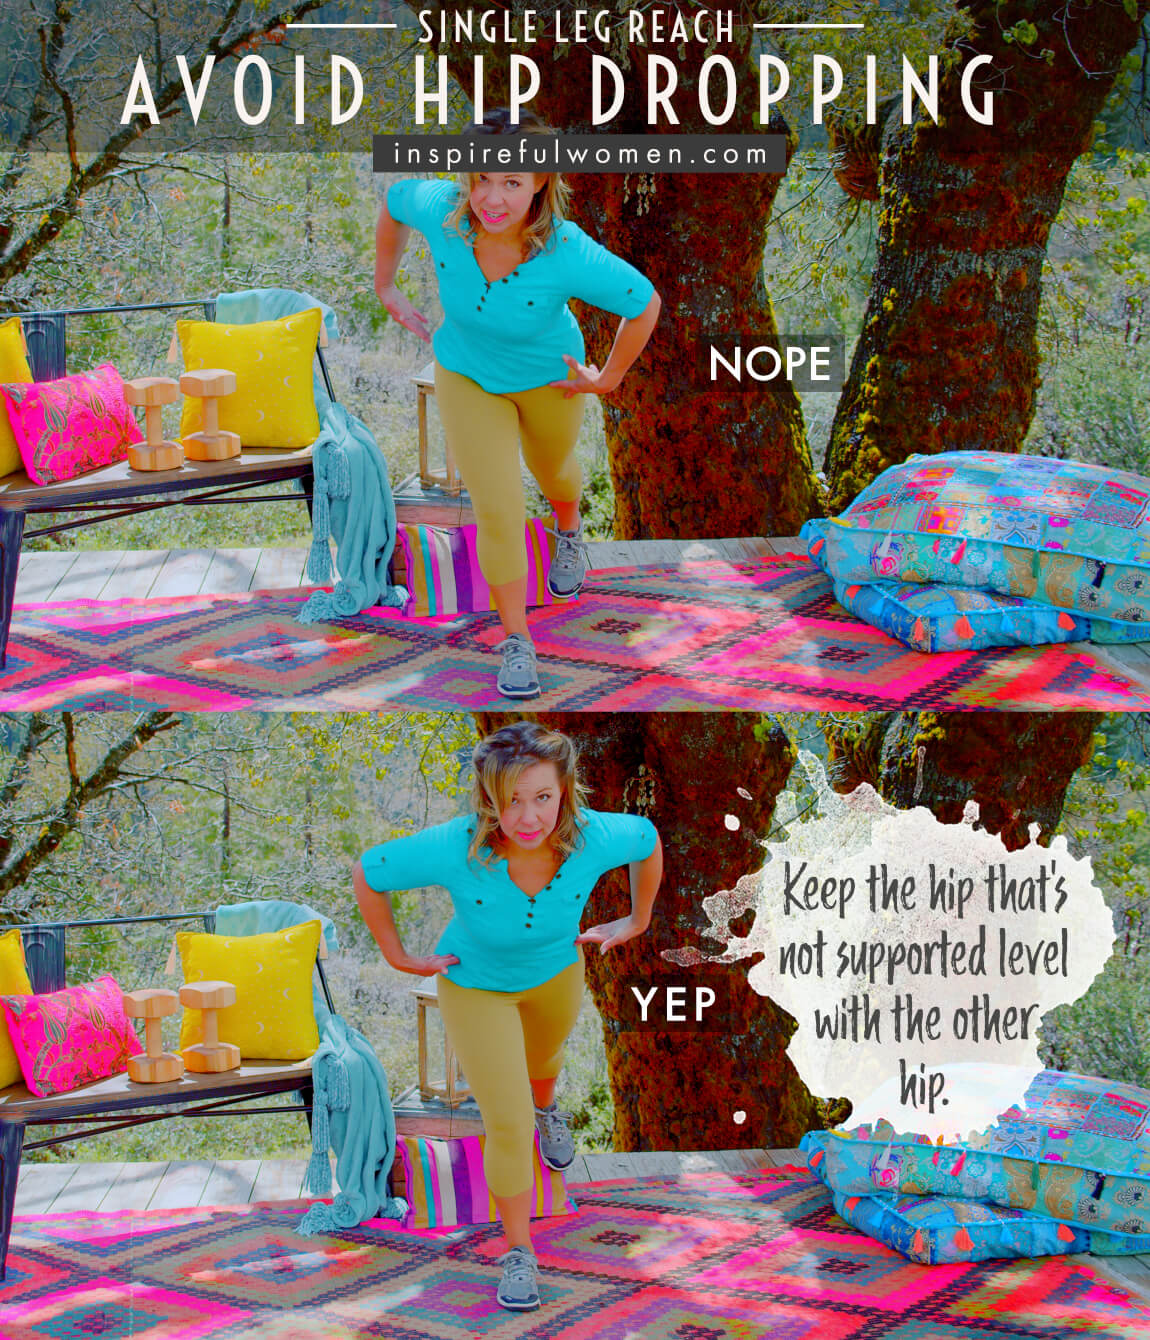
AVOID: Letting your the hip on side of the working leg sag or drop.
WHY NOT?
- Could irritate the SI joint (sacroiliac - joint between the sacrum and pelvis) or low back.
WHAT TO DO:
- Keep your pelvis level to work the hip abductors and core muscles to hold the spine and pelvis in neutral.
- If you are having difficulty knowing if you are tilting or rotating your pelvis, try putting your hands around your hips (if you hold your hand in a C shape with your fingertips on your front pelvic bones and your thumbs at the top of your glutes) you should be able to keep the front bones right in line as you move from vertical to horizontal.
- Using a mirror really helps with this.
3. Avoid Reaching Forward
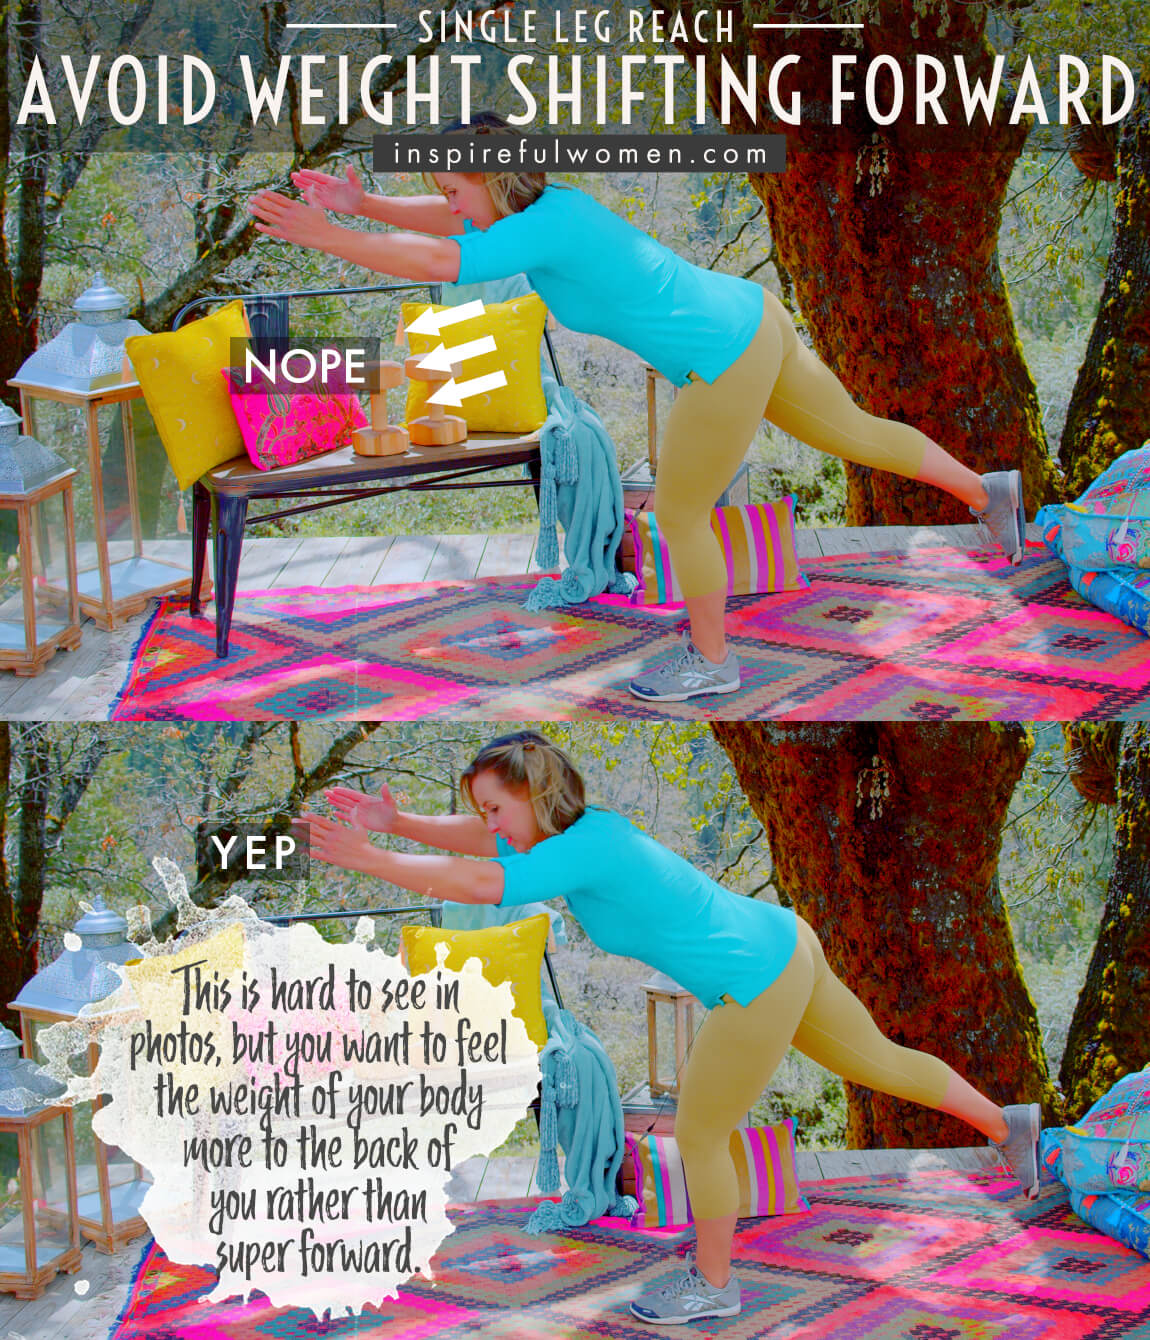
AVOID: Reaching forward.
WHY NOT?
- The goal here isn’t to reach forward as it is to send the hips BACK which causes the torso to move DOWN. If you find yourself reaching forward, the dumbbells moving further away from your torso, this will not achieve the right muscle activation & will also put unnecessary strain on your low back.
WHAT TO DO:
- Try to isolate the movement to the hip joint as you lower down and lift up, keeping the arms relaxed and hanging down.
4. Avoid Rounding Spine
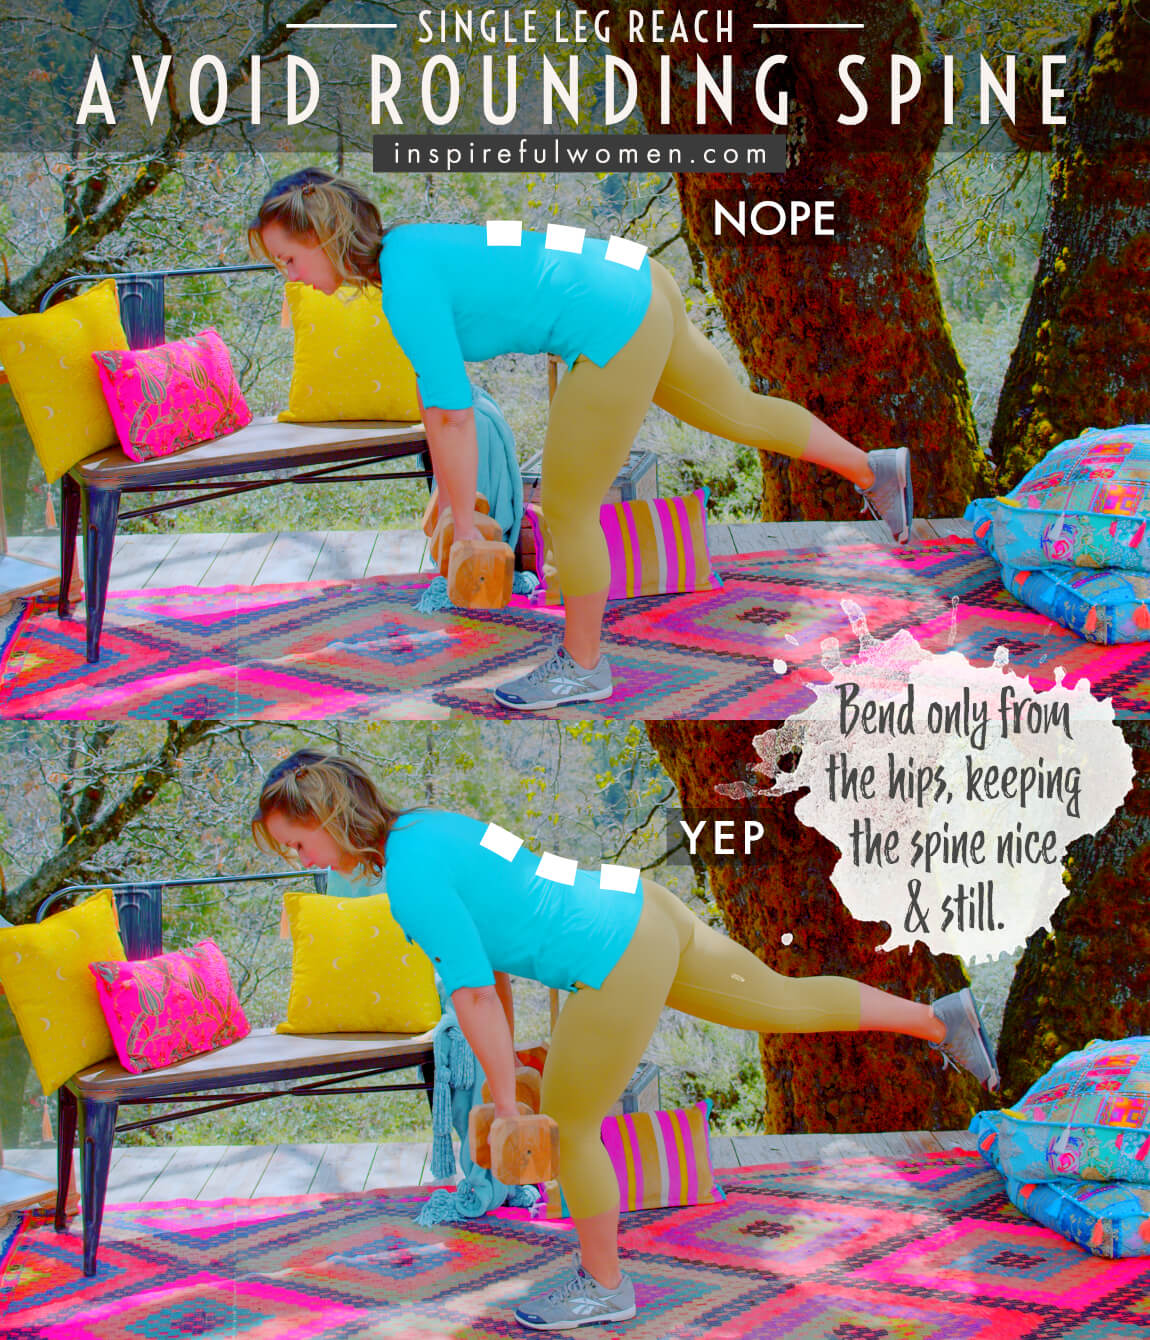
AVOID: Rounding the back.
WHY NOT?
- This is mostly just a habit developed from years of using your back to lift.
- This can also happen when you use too much weight.
WHAT TO DO:
- Begin with no weight or lighter weight and just practice your form, add weight slowly.
- Keep your sternum lifted and your abdominals engaged to help keep your spine in neutral.
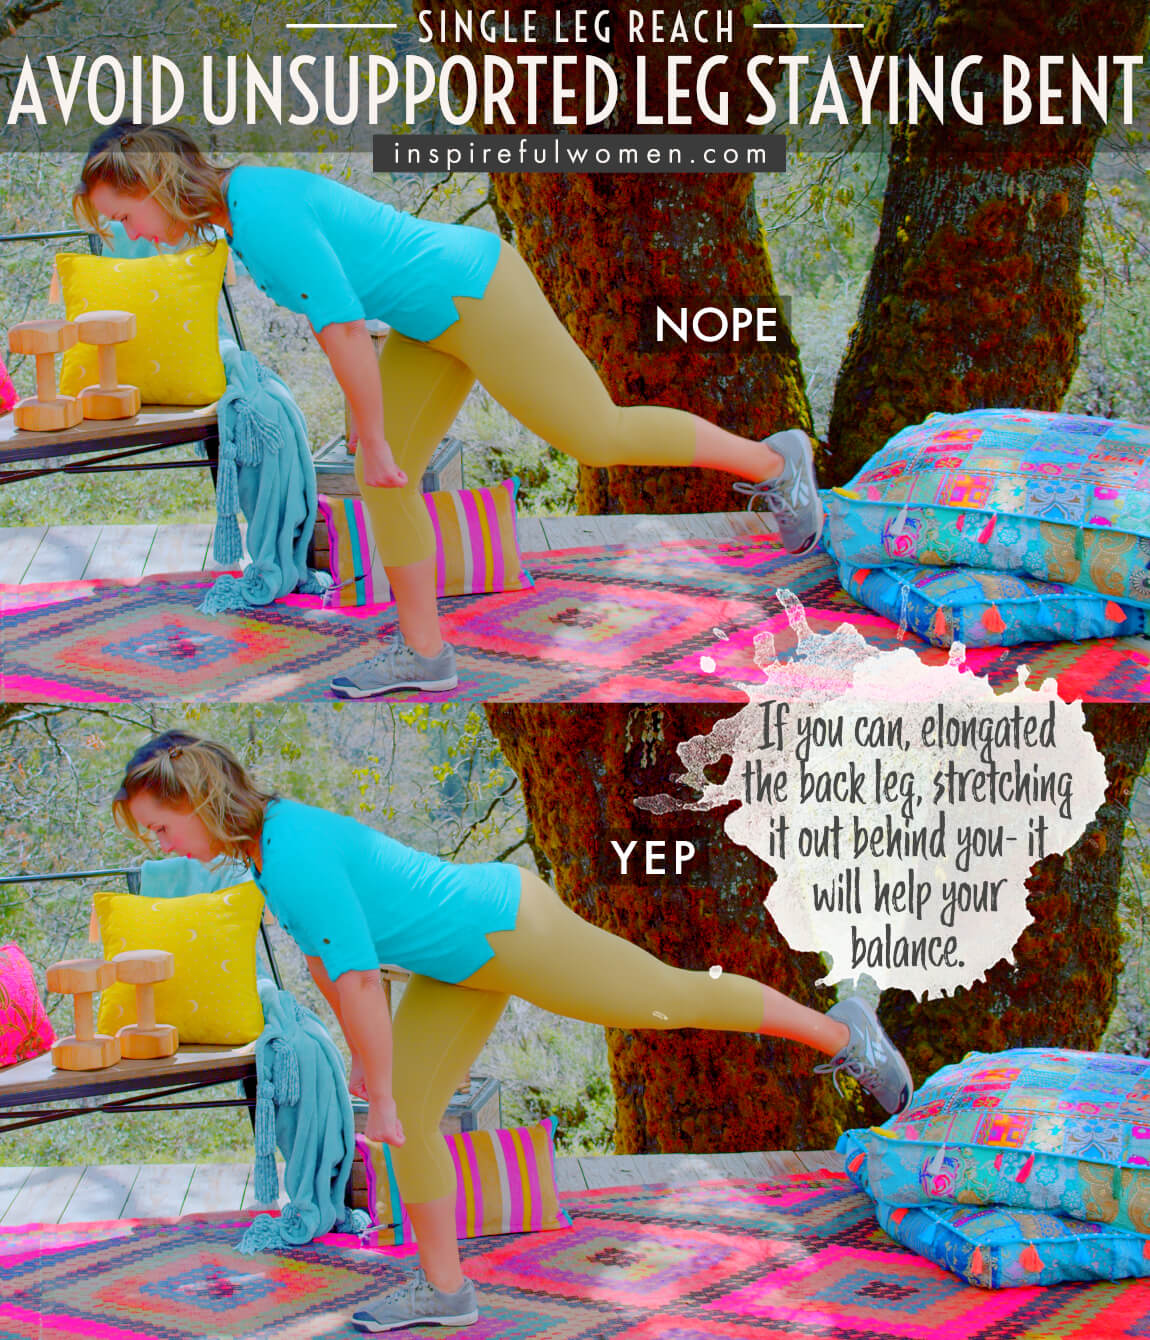
5. Avoid Unsupported Leg Staying Bent
AVOID: Keeping the free leg bent.
WHAT TO DO:
- Straightening the free leg behind you as you lower with the stance leg will actually activate the stance leg hamstrings and glute muscles MORE.
- Energizing the free leg as it reaches back will help with balance and stability.
- Also works the muscles of the free leg more: the quadriceps, hamstrings and gluteus maximus will be more active isometrically.
6. Avoid locking knees
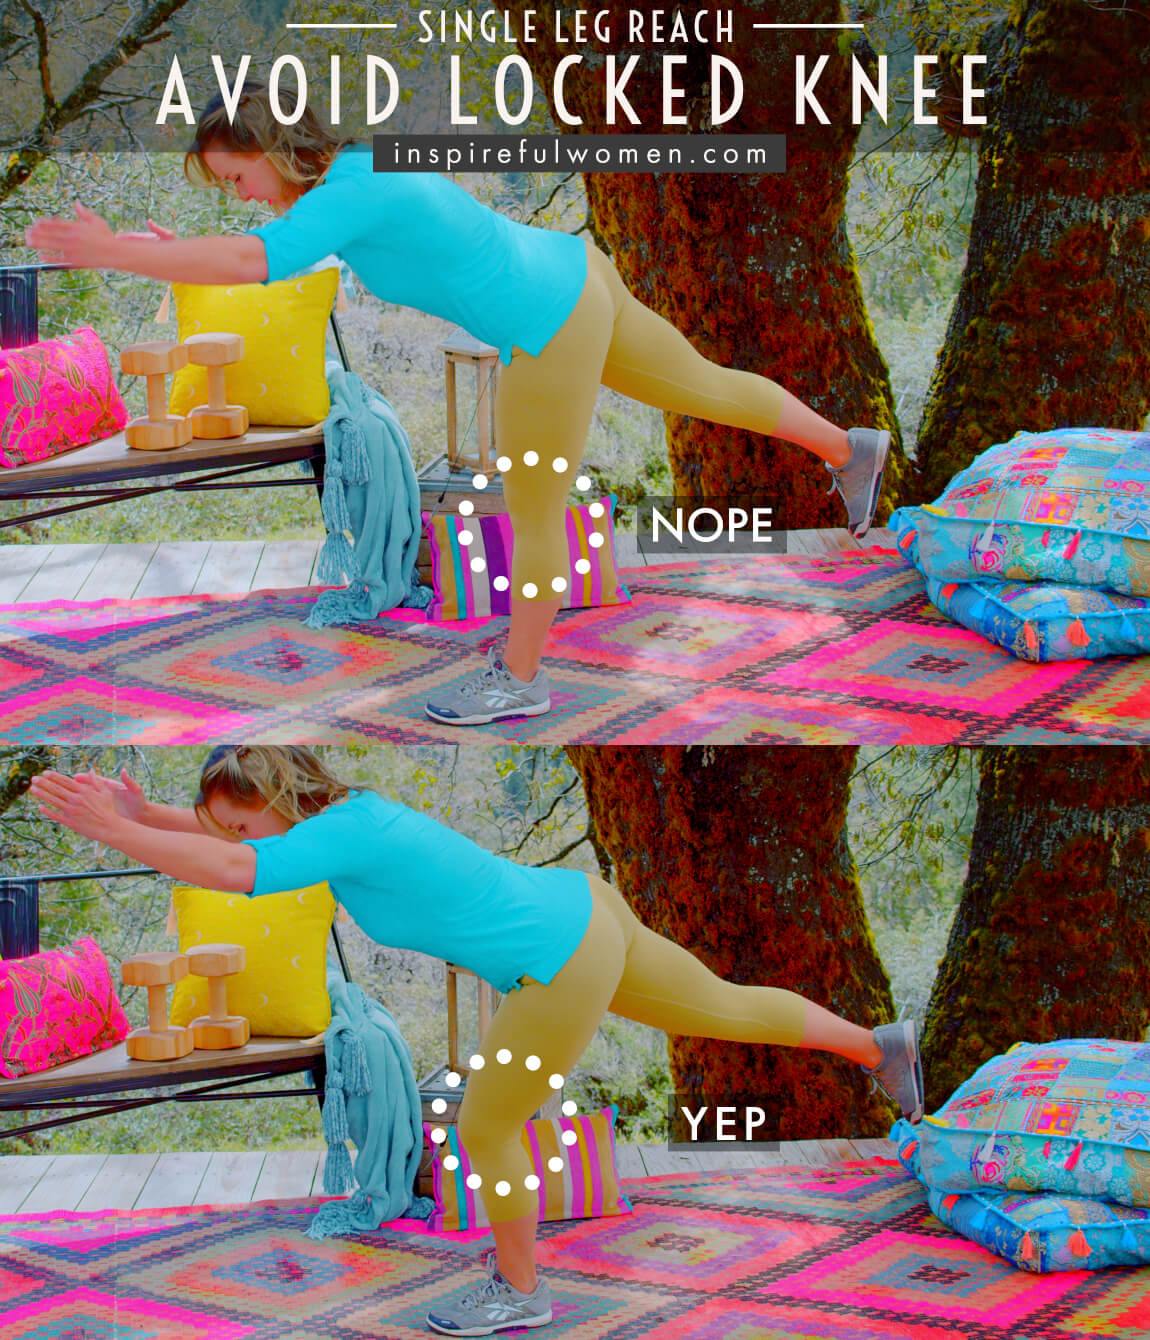
AVOID: Straightening or locking the knee of the working leg.
WHY NOT?
- Straightening the knee can make it difficult to maintain a neutral spine.
- Locking the knee increases the forces on the joint surfaces and allows the muscles to relax.
WHAT TO DO:
- Keep the knee soft to protect the knee joint and work the muscles.
7. Avoid Lifting back leg too high
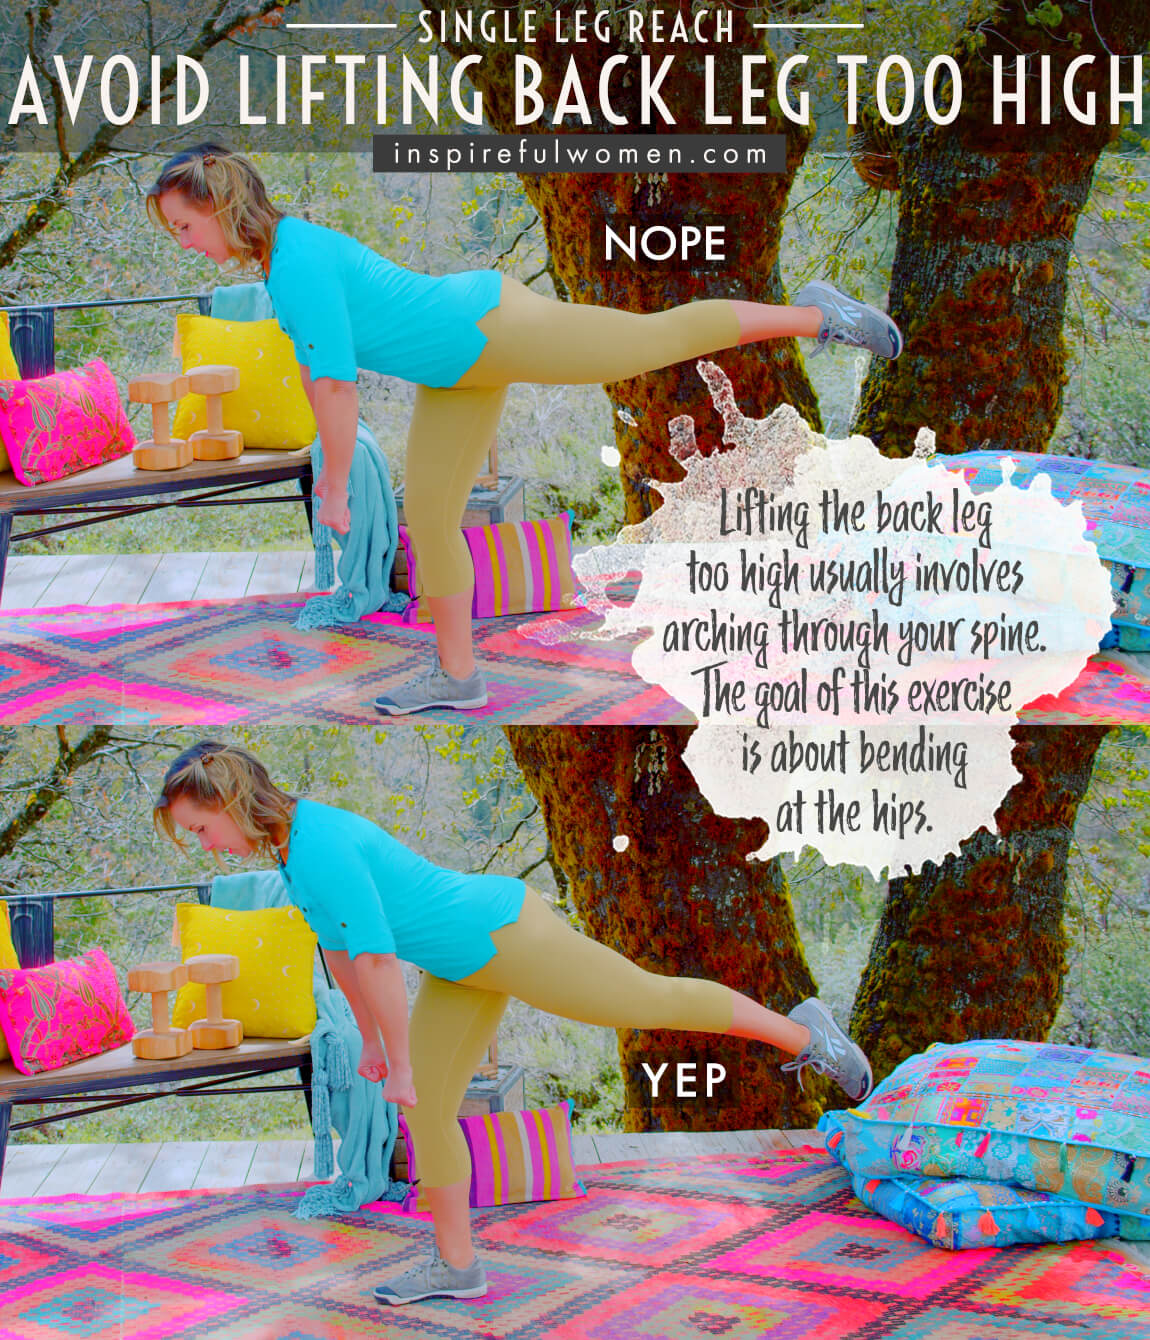
AVOID: Hinging or lifting the leg too far.
WHY NOT?
- When people lift their legs too far they are usually arching their backs to do so.
- This would defeat one of the goals of the exercise which is to strengthen the back muscles with the spine in neutral.
WHAT TO DO:
- The goal is to have the torso and leg in a straight line - you should be able to draw a line from the ear to the ankle in the end position.
8. Avoid Knees/Feet Caving In or Out
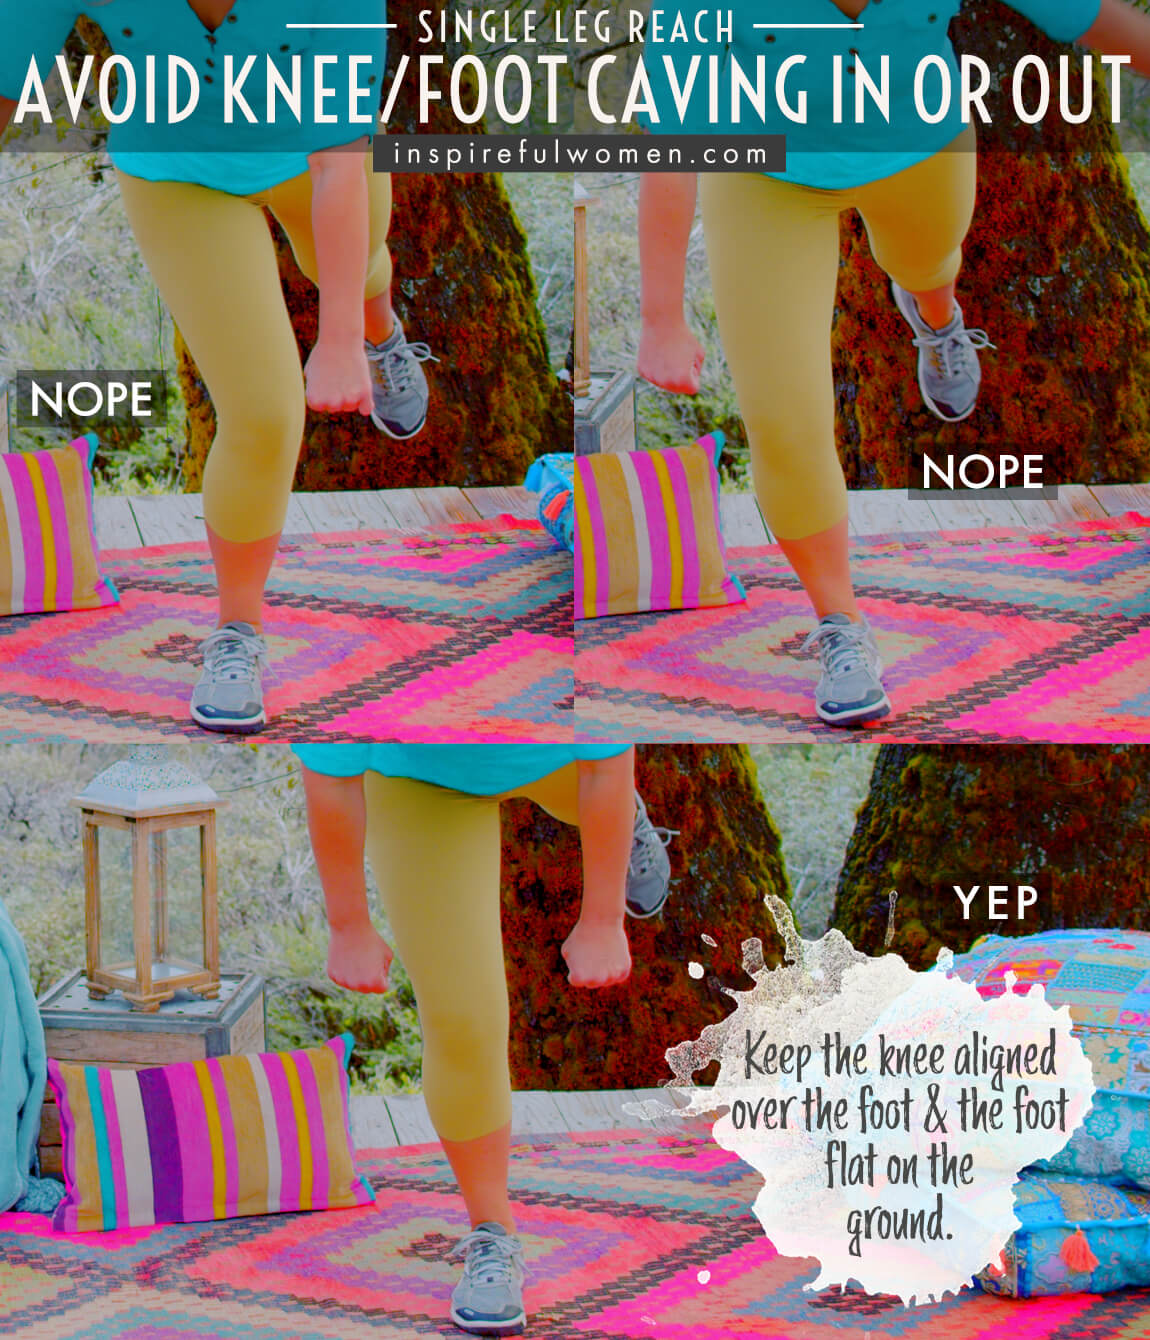
AVOID: Letting the feet or knees lean in or out.
WHAT TO DO:
- Keep the ankles and knees aligned during the exercise to avoid straining the ligaments on the sides of the knee.
- The knees should travel over the second and third toe as you lower down and lift the weight.
- If you struggle with this:
- No resistance - weights or bands should not be added until you can do this movement with proper form.
- If your knee tends to lean in try pushing your little toe down into the floor.
9. Avoid lifting chin
AVOID: Lifting your chin as you hinge.
WHY NOT?
- This can cause neck strain.
- Deadlifts do strengthen the neck muscles when you lean over.
WHAT TO DO:
- Remember that your neck is part of your spine.
- Keep the entire spine in neutral to strengthen the muscles in the healthiest position.
- Looking slightly down during the entire range of motion may help to keep the neck in neutral.
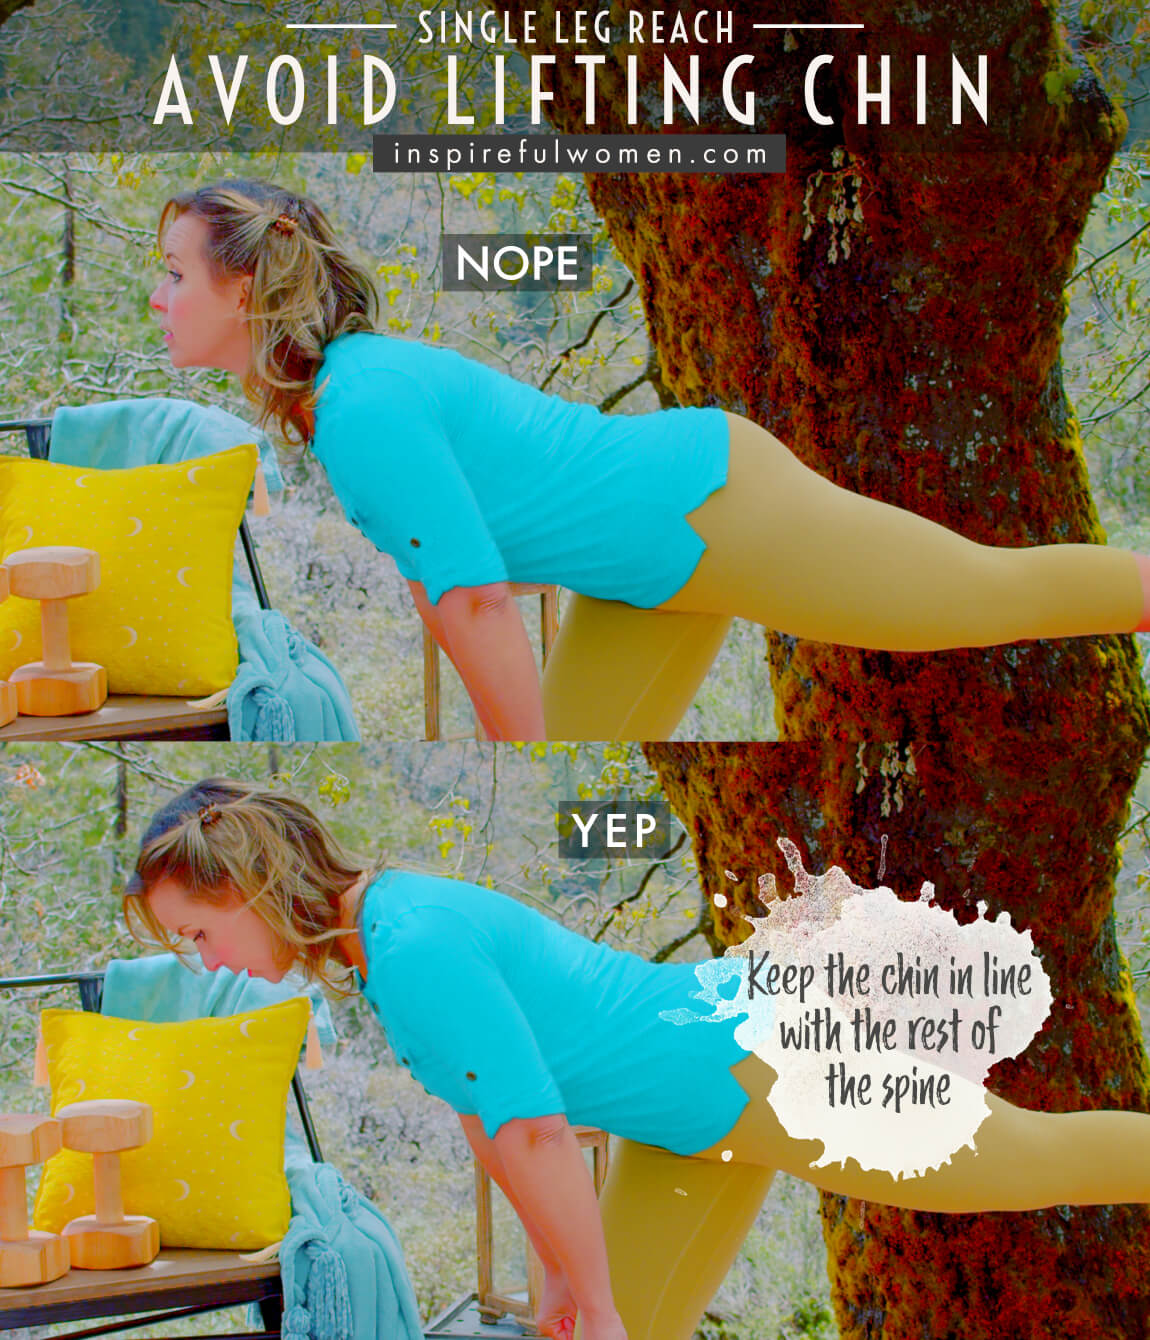
WHAT WE'RE DOING TODAY
WHAT & WHY
BENEFITS OF TRAINING THE Glute muscles
WHAT
3 AWESOME THINGS ABOUT SINGLE LEG DEADLIFTS:
- Single-leg lifts are full-body exercises. They work the muscles from foot to neck.
- They are great for balance and stability, and…
- they are very functional. Will discuss how in the “why” portion.
These exercises are all done standing on one leg. The spine is held in a neutral position - no bending forward, backward, sideways, or rotating of our spine- it stays perfectly still- we are leaning over only from the hip joint.
The exercise is done by leaning the body forward by moving at the hip and lifting the leg out to the back. If done correctly you should be able to feel the muscles of the feet, ankles, and lower leg all the way up to the neck muscles getting involved. As you lean forward gravity pulls the torso down and the leg and back muscles work to stabilize the body. To return to standing the gluteus muscle and hamstrings work to pull the torso back up.
The focus of the exercise is on balance and stability. These exercises are definitely a good workout for the legs but try to avoid the temptation to use more resistance if you cannot keep good form and maintain stability and balance. The exercise can be progressed by adding resistance, either by lifting a weight or using a resistance band to challenge the muscles in a variety of different ways.
WHY BOTHER DOING IT?
WHY
WHY DO WE EVEN CARE?
FUNCTIONAL
Single leg lifts are very functional exercises. They work the muscles of the legs, torso (even the neck) and depending on which version you are doing, they can help strengthen the arms.
IMPROVE LEG STRENGTH
One of the many great things about single leg exercises is that just by lifting one leg off of the floor you immediately double the load that the muscles have to move. Considering the “load” in this case is primarily the weight of everything from the hips up, that is pretty significant. To put it numbers - the upper body/head and arms make up approximately 70% of your body weight. A 160-pound person would be lifting about 112 pounds without any added resistance, each leg would be lifting about 56 pounds. In a single leg deadlift one leg would be lifting the entire 112 pounds! This is a really good way to overload the muscle without the need for large dumbbells. If you have a stronger leg, it is pretty common for that leg to try to do most of the work in double leg exercises. Working one leg at a time is a good way to make sure each leg is working.
TRAIN HEALTHY MOVEMENT PATTERNS
This movement teaches fundamental movement patterns that help keep the joints of the feet and legs healthy and protect the spine from injury. Single leg lifts are done by keeping the spine in a neutral position and moving through the large hip joint. This is the way the body is designed to work - the spine provides a stable base and the movement happens at the large joints that move a lot - like the shoulders and hips.
TRAIN MUSCLES TO STABILIZE JOINTS
Another big benefit of these exercises is that they train the muscles that surround the ankles, knees, and standing hip to stabilize the joint. When these joints move too much (sloppy, uncoordinated movement) the surface of the joints can become worn - this is what is commonly referred to as “wear and tear” on the joints. An important job of the muscles is to work together to stabilize the joint as it supports the weight of the body and as it moves, this is important to help absorb the impact on the joints and to keep them properly aligned so that they can move without damaging the soft tissues. Knee and ankle laxity (too much movement) can strain the ligaments of the joints. Many people with a history of ankle sprains may have been told that they have “weak” ankles. Including single-leg exercises is a great way to strengthen the muscles that stabilize the ankles.
STRENGTHEN FOOT MUSCLES!
All single-leg exercises help to strengthen the muscles of the feet. The feet are extremely important for maintaining balance and stability There are 29 muscles that participate in the movement of the foot - 10 of these originate on the lower leg (extrinsic muscles) and 19 of them are completely in the foot (intrinsic muscles). The foot has 26 bones and 30 joints in it, it is designed for movement - tiny, precise movement that absorbs impact when we walk and helps to control balance and stability. If you are doing single leg lifts with no weight or light weight it is beneficial to do the exercises barefoot. Shoes tend to support and stabilize the foot so that the muscles don’t have to work as much.
When you do single leg exercises all of your body’s weight is on one leg. I know that this is an obvious statement - but it always amazes me that my entire body weight is being supported on one foot. The muscles and joints of the foot and ankle need to be very healthy to hold that much weight. The increased weight bearing on one leg for a longer period of time (for the entire set), is a good way to build bone mass in the legs and hips.
WORK THE SMALLER GLUTE MUSCLES ON THE SIDES OF THE HIPS
Single-leg exercises also work the lesser-known gluteus medius and minimus muscles. You may be familiar with these muscles and their role in lifting the leg out to the side. But, their primary function is actually to keep the hip and pelvis aligned when you are standing up. Keeping the pelvis properly positioned is important for the health of your low back and keeping the hip correctly positioned in the socket is essential not only for the health of the hip joint but also the knee, ankle and foot. Misalignment of the pelvis and hip can affect the joints above and below the area. It is not uncommon for knee, ankle, or foot pain to be caused by poor hip joint function.
IMPROVE BALANCE
With age, our ability to balance naturally decreases. Including exercises to work on balance helps to slow or prevent this decline. It is important for people of all ages to include some balance training - this can be done every day, but at a minimum should be done 3-5 times a week. All balance exercises help to train proprioception - this is the brain’s awareness of where the body is in space.
EVERYDAY LIFE
EVERYDAY LIFE &
MUSCLE FUNCTION
HOW WE USE OUR GluteS Max & hamstrings IN EVERYDAY LIFE
Gluteus Maximus & Hamstrings:
1. STRAIGHTENING (EXTENSION) THE HIPS AND KNEES
- Standing from a sitting position
- Walking up stairs
- Lifting an item off of the floor
- Climbing a ladder
- Walking uphill
- Getting up from the floor
Gluteus Medius, Knee, and Ankle Stabilizers:
1. STABILIZING THE PELVIS, HIPS, KNEES AND ANKLES
- Standing
- Walking
- Up and down stairs
- Running
- Keeping us balanced during all standing and moving
2. MAINTAINING HEALTHY ALIGNMENT OF THE PELVIS, HIP, KNEE, ANKLE AND FOOT
- All static (no movement) and movement
SCIENCY STUFF
SCIENCY STUFF
SPIFFILICIOUS FACTS ABOUT MUSCLES & MOVES
One of the great benefits of single-leg training is that they work all of the small muscles of the ankle and foot. This is a commonly overlooked muscle group that is critical to address. Weak muscles of the ankle and foot can lead to ankle sprains, plantar fasciitis, Achilles tendinopathies, bone spurs, bunions, etc. This is especially the case when the individual trains the larger muscles of the legs - they create an imbalance between the capability of the leg and that of the ankle and foot.
The stability of the knee is very dependent on the ligaments, cartilage, meniscus, and iliotibial band. When these tissues have been strained, torn, or worn (as in the case of osteoarthritis) the muscles that cross the knee joint are called in to help. The same is true for the ankle. When people have feet that tend to pronate (roll in) or supinate (roll out) it stresses the ligaments of the ankle and will affect the alignment of the ankle, knee, and hips. Over time this can result in damage to the joints, and changes in muscle function (because the muscles are not properly aligned so they are not able to move like they are supposed to. A good example of this is the Achilles tendon. Poor alignment of the foot or ankle can cause tightness in the Achilles tendon.
These single-leg exercises challenge the hip extensors and abductors by working them in the sagittal and frontal planes. The movement trains the abductors of the hip to stabilize while the extensors move the weight of the trunk from 90 degrees of flexion to a neutral position. This exercise works on the hip range of motion and movement while stabilizing the lumbar spine.
ALLLL MUSCLES & WHEN
ALL MUSCLES WORKING & WHEN DURING THE Single Leg Deadlift - Band
The hand and arm muscles become more active as the resistance from the band increases.
The gastrocnemius, soleus, peroneals, tibialis anterior and posterior, extensor digitorum longus, extensor hallucis longus, flexor digitorum longus, and flexor hallucis longus, and foot intrinsics work to hold the ankle and foot stable, aligned and to adjust to maintain balance The gastrocnemius, popliteus, hamstring, gracilis, sartorius, and quadriceps work to hold the knee stable and in good alignment. The core muscles work to hold the spine and pelvis in neutral as the torso leans forward.
The back muscles (erector spinae, multifici, quadratus lumborum, rhomboids, traps) will hold the torso parallel to the floor against the downward pull of gravity.
When standing on one leg, gravity will be pulling down on the unsupported side of the pelvis and the non-working leg. The gluteals, piriformis, obturators, gemelli, and quadratus femoris of the supporting leg will work to hold the pelvis level (a combination of isometric/eccentric/concentric working to stabilize).
The non-working leg extends out to the back - this is mostly the concentric activation of quadriceps muscles extending the knee and the gluteus maximus extending the hip, the gastroc/soleus point the toe (this activation is minimal because there is no load, not against gravity). The muscles of the arms and hands are working to hold the band. The quadratus lumborum on the side opposite of the standing leg will be more active in holding the pelvis level.
The quadriceps and gastrocnemius work eccentrically to control the pull of the band and the weight of the body as the knee and ankle bend to lower the body down toward the floor. The same muscles work concentrically to straighten the knee and ankle back up.
As the trunk moves from vertical to horizontal the hamstrings are lengthened over the back of the leg. Once the hamstrings are at their limit, the gluteus maximus and hamstrings quickly contract concentrically to pull the hips back into a neutral position against the pull of the band. The resistance will increase closer to standing - working the back and hip extensors more.
PIN IT FOR LATER!
