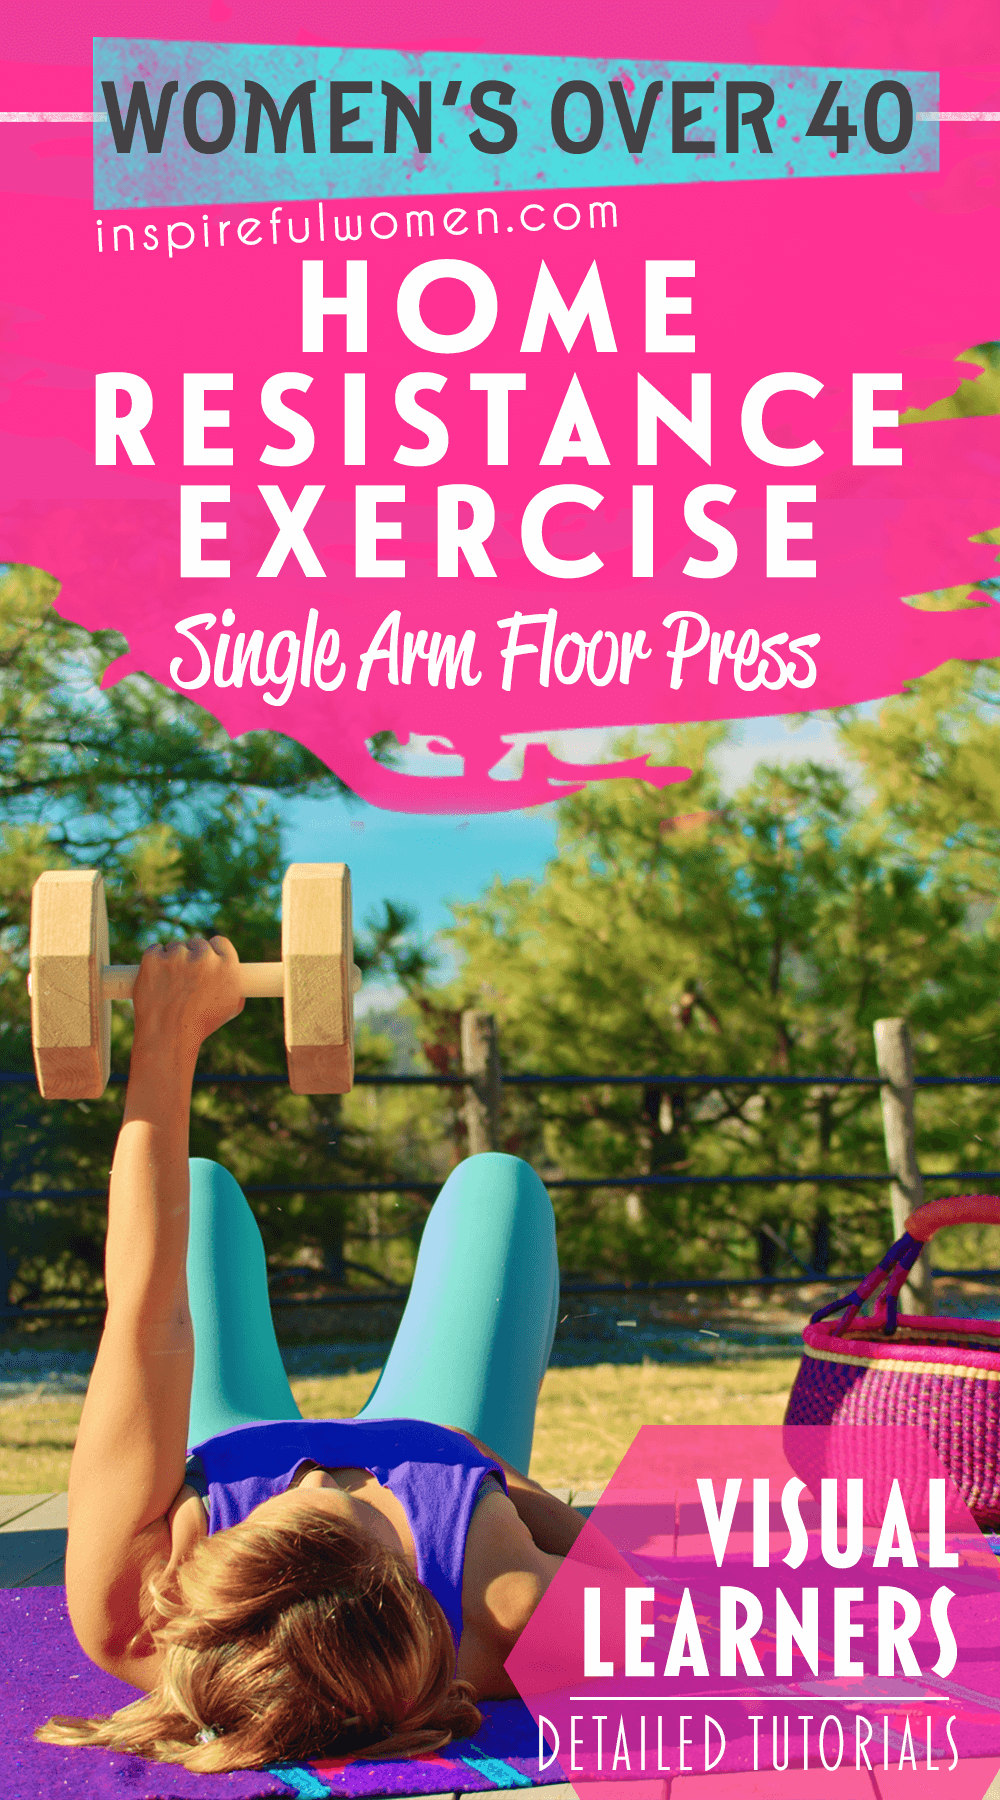
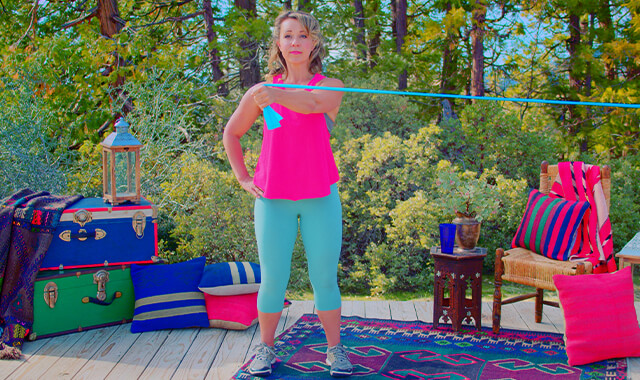
Single Arm Floor Press
How to Do the One-Arm Dumbbell Floor Lying Chest Press | In-Depth Guide [VISUAL LEARNERS] Beginner
Proper Form, Common Mistakes, & Variations | Home Resistance Training
WHAT DO YOU WANT TO SEE?
QUICK DEMO
QUICK DEMO
MUSCLES THIS WORKS
MUSCLES
MAIN MUSCLES WORKED IN the Single Arm Floor Chest Press
Pectoralis Major & Triceps
OTHER MUSCLES WORKED:
- Anterior deltoid (front of shoulder muscle)
- Coracobrachialis (small muscle near biceps)
- Biceps
- Anconeus (small muscle at back of elbow)
STARTING POINTERS
Starting Pointers
WHAT WE'RE DOING TODAY
ALL WE'RE DOING:
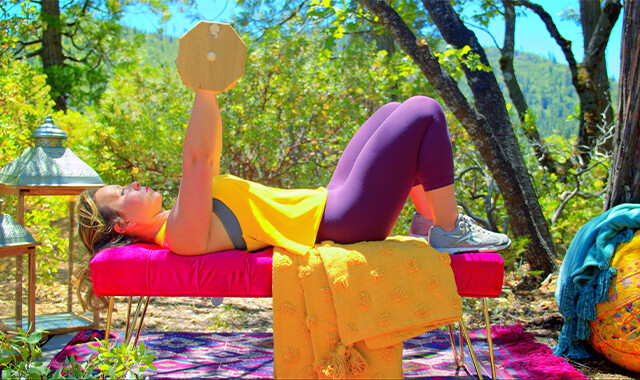
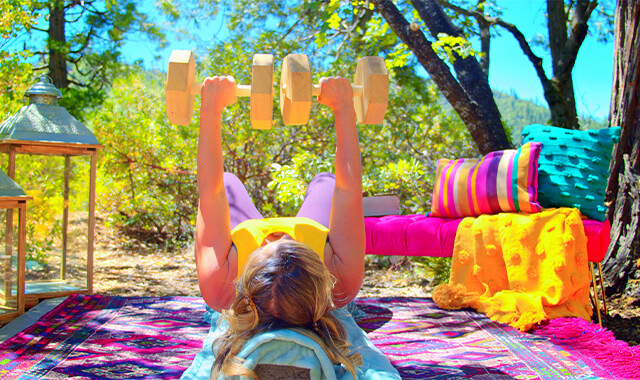
Lay on the ground and press your arms up, that's it!
Chest exercises are an essential part of any strength training routine, and the Single Arm Dumbbell Floor Chest Press is an excellent exercise for women looking to build their chest muscles. Working the arms individually does take more time, but there are many benefits.
It is always good to be able to focus on one side at a time. This will often make you aware of the differences between your two sides - you may find one stronger or more stable, you may also notice a difference in between the sides of your torso. Once you are aware of these differences you can work to correct them.
Using one arm at a time will allow you to focus on your form. It also makes it easier to keep the chest open and the shoulders pushed back into the floor. When you are only using one arm at a time, you don't have to work to hold the shoulder of the non working arm down, because the arm is not pushing upward. Loading one side at a time will challenge the muscles of the torso differently - muscles more to the sides of your core will work harder - your quadratus lumborum and obliques will be more active to stabilize against the uneven loading. When you are only using one arm you are usually able to lift more weight because your torso does not need to work as hard to stay stable.
HOW TO FEEL WHAT MUSCLE IS WORKING
How to Feel What Muscle is Working
Pectoralis Major: Place your right hand over your left chest. Straighten your left arm and pull it in across your body. You should feel your pectoralis major muscle under your hand. Try pulling the arm across and up - you should feel the muscle activation close to your collarbone. Pull across and down and you should feel the lower part of the muscle contract.
Triceps: Place one hand on the underside of the opposite upper arm. Bend your elbow. Place your hand on the edge of a table or on the wall. Press into the surface as if you were trying to straighten your elbow. You will feel the triceps muscle activate.
HOW TO DO THE EXERCISE
LOOKS
HOW THE Single arm dumbbell FLOOR Chest PRESS SHAPES OUR BODY
Defined chest and upper arm (back of arm).
PROPER FORM
PROPER FORM: Single Arm Floor Chest Press
EQUIPMENT, SETS & REPS
EQUIPMENT
SUGGESTED STARTING WEIGHT FOR WOMEN:
8-12 lbs
SETS & REPS:
2 sets of 8-10 must fatigue the muscle
PACE:
Moderate pace up and slower down
BODY POSITION
BODY POSITION FOR THE Single Arm Floor Chest Press
There are three options for getting into the position: face-up on the floor holding the dumbbells. When the weight is heavier, option #3 may be the safest choice:
- Sit on the floor with one dumbbell placed to the side of your hip (on the side of the working arm). Pick the dumbbell up and place it at the front of your hip crease. Roll back to lie on the floor. Bring the weight up to mid-chest level.
- Sit on the floor with one dumbbell beside the hip (side of the working arm). Bend your knees with the feet flat on the floor. Roll down so you are lying face up, reach out to the side and lift the weight up to the hip crease, then bring the weight up to mid-chest level.
- Place the dumbbell on the floor. Lie down so you are on your side facing the dumbbell. Pull the dumbbell close to your chest. Hug the weight into the chest and roll on to your back.
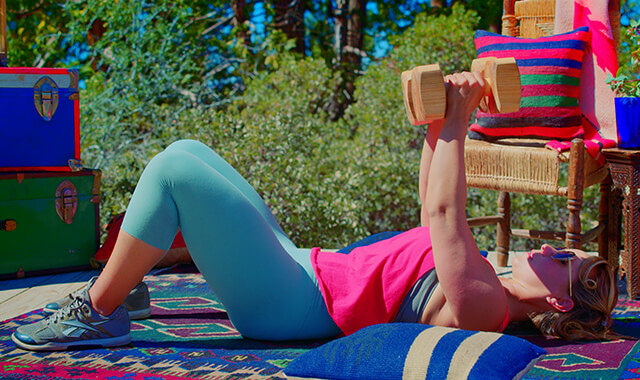
BODY STANCE: Lie faceup on the floor. Knees bent. Stabilize your upper body by pulling your shoulder blades inward and down your back. This provides a good stable base to work off of. This movement should not feel gripping or tight, just stable. This becomes more important as the weight you are using increases, the intent is to have the weight on the shoulder blades as opposed to the more flexible - and smaller bones of the rib cage. Your shoulders should be pressed back in contact with the floor - the chest open.
Neutral spine - you should be able to slide a hand between your low back and the floor.
FEET: Feet flat on floor.
HAND/GRIP: Pronated grip (palm facing forward) - this should feel comfortable, it can be angled in.
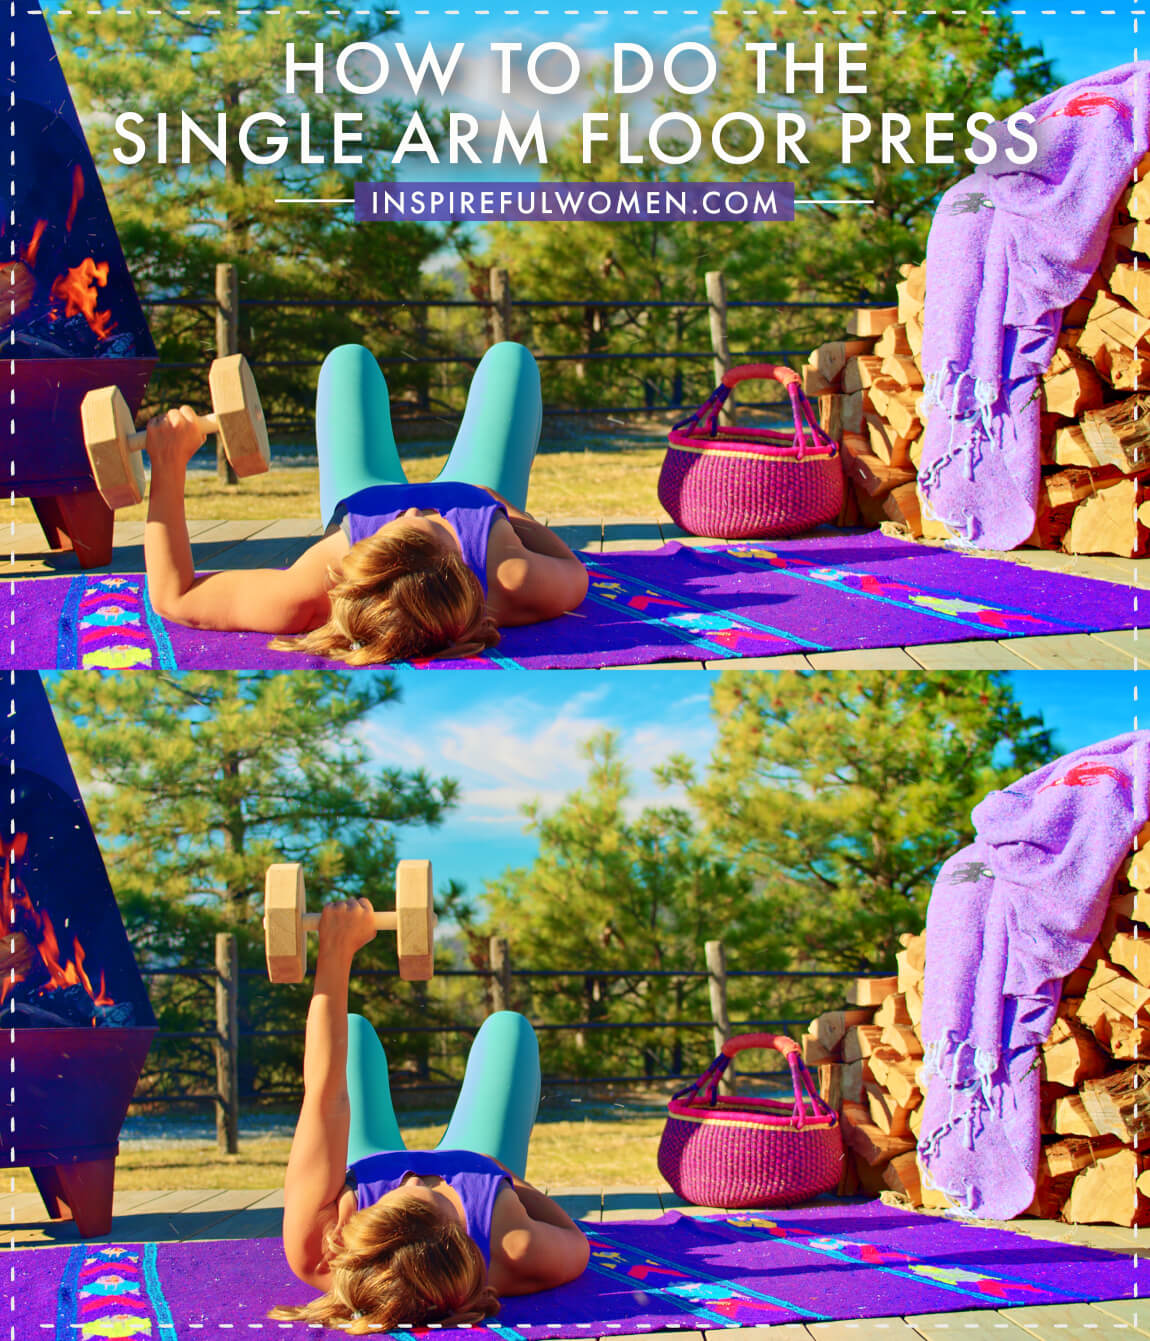
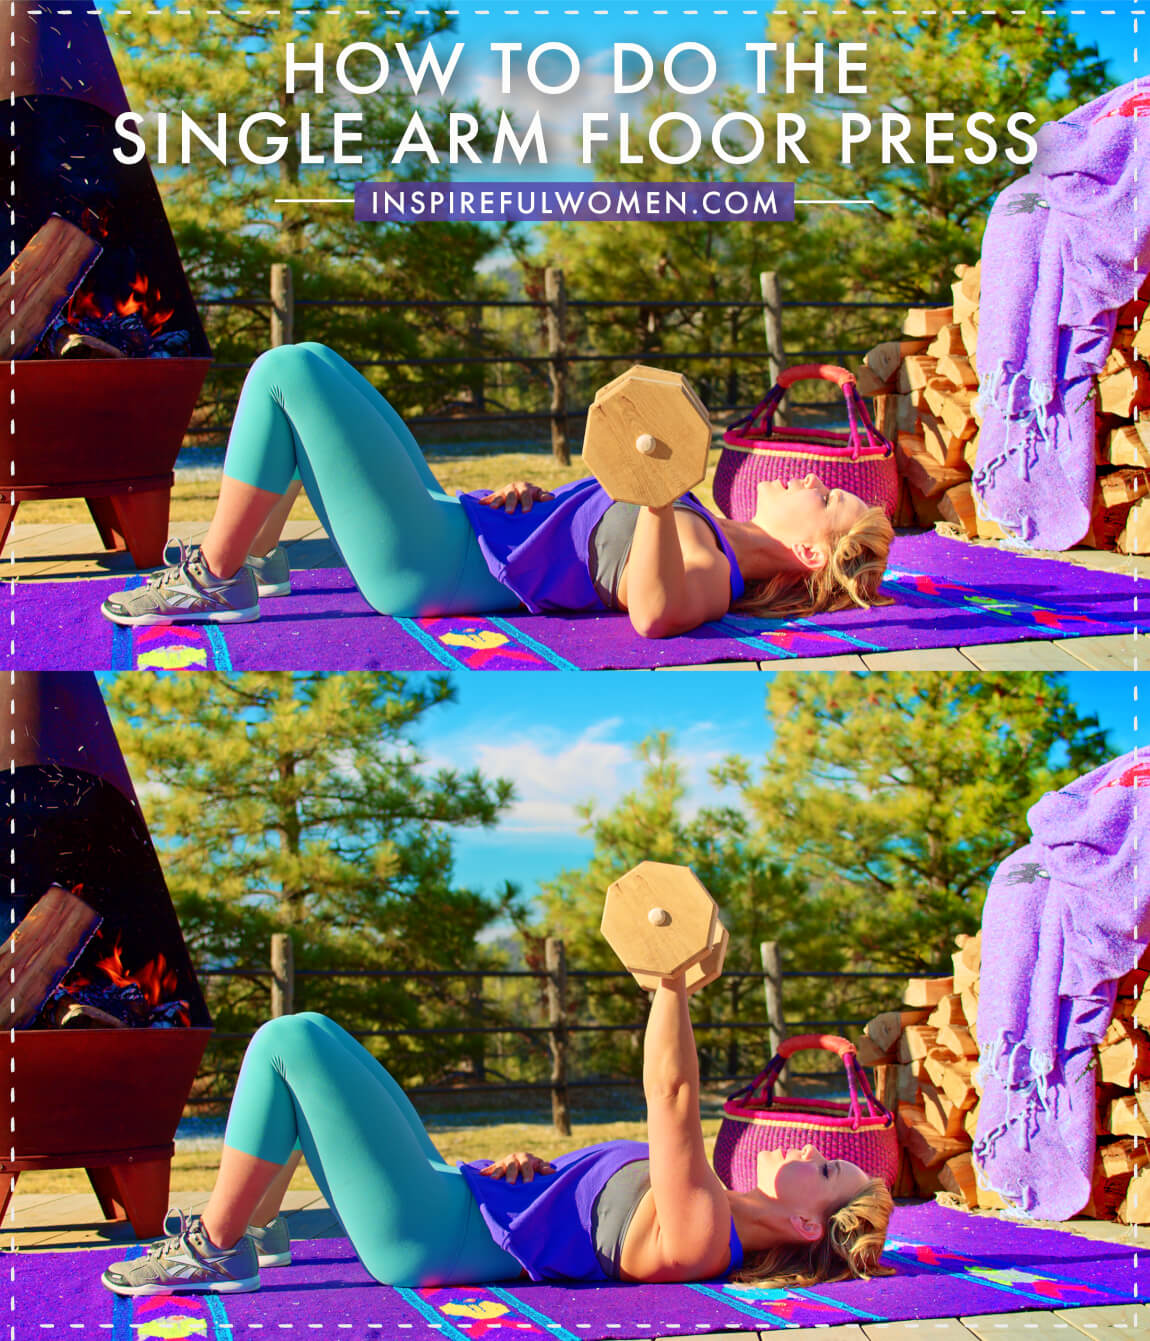
ARM: Your upper arm should be about 60 -70 degrees from your side, elbows bent, weight at mid-chest. The forearm of the nonworking arm can rest on the torso.
NECK: Neutral and relaxed throughout the exercise.
HOW TO DO
HOW TO DO sINGLE aRM Floor Presses
CUE: The arms should be very controlled, not wavering.
Bring the weight up to mid-chest level.
Lift the weight off your chest by moving your hand out so that it is almost over your elbow.
Your hand should be in line with your upper arm as you press up - not in front of your elbow or behind your elbow.
Keeping the back of your shoulders in contact with the floor, press the dumbbell straight towards the ceiling.
Your upper arm moves inward so that it ends up in line with the front of your shoulder or in a bit further so your hand is lined up with the middle of your collar bone.
As your arm moves in, your elbow straightens.
Squeeze your pec at the end of the movement.
Slowly return to the starting position by bending your elbows and moving your arms back out to the side.
Repeat to complete the reps.
HOW TO SAFELY GET OUT OF THE EXERCISE
Care must be taken when setting the weight down, this is more crucial the heavier the weight.
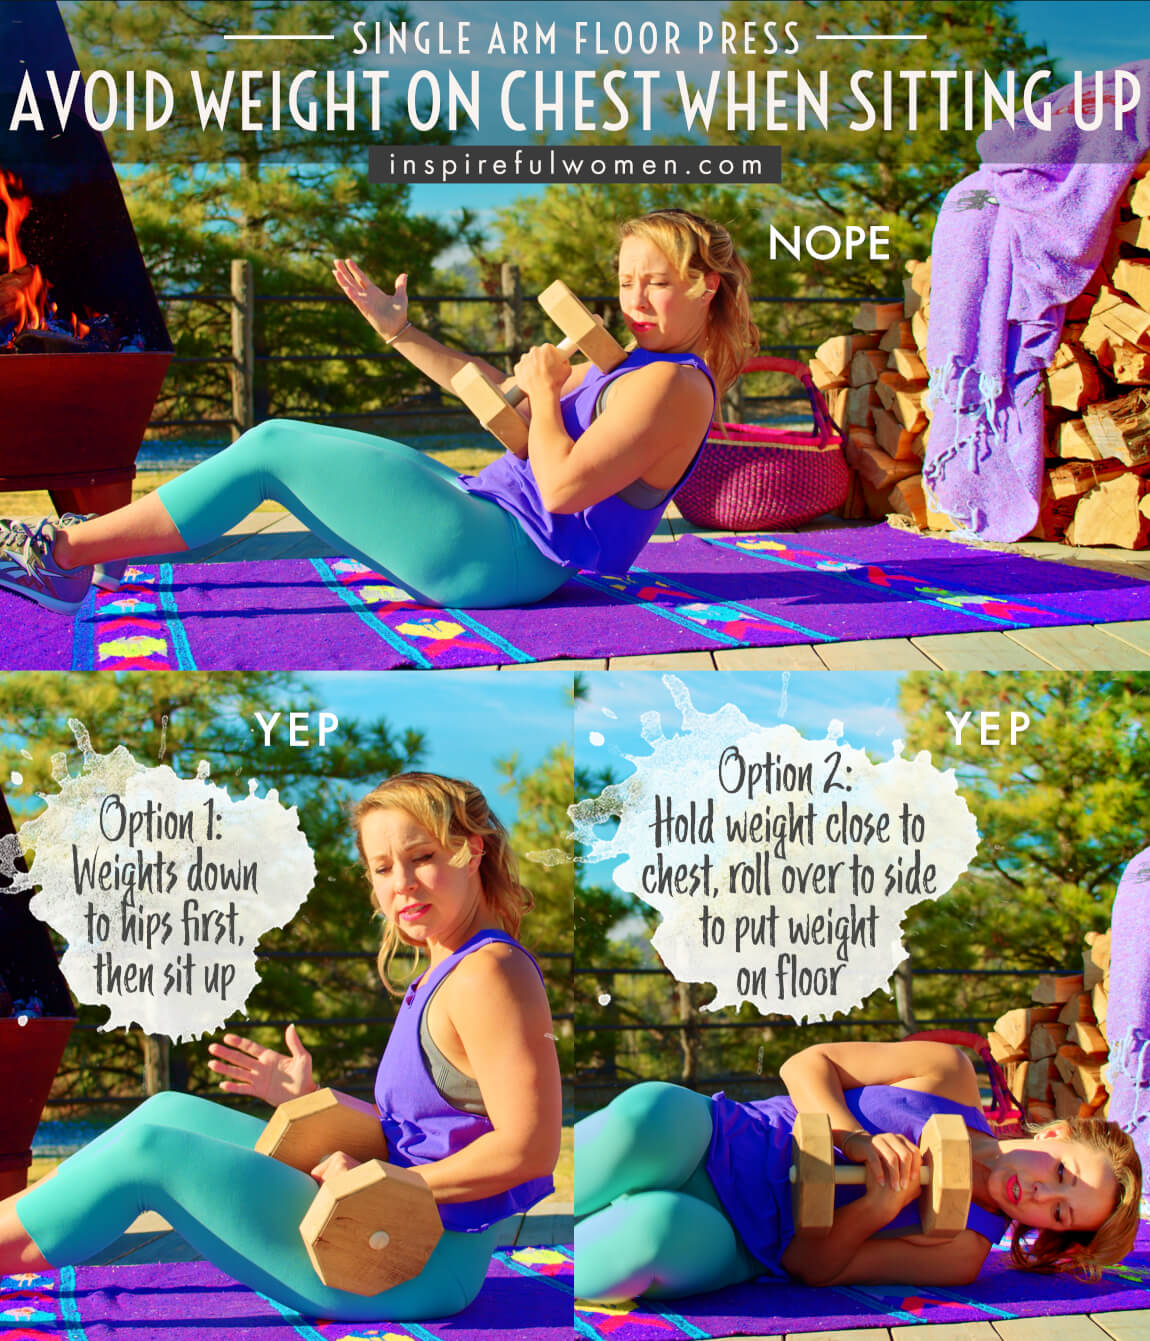
Bend your elbow and rest the weights on the chest, move them down to the crease of your hip and off to the side to the floor.
Or keep the weight on your chest and roll to your side and set the weight on the floor.
COMMON MISTAKES
COMMON MISTAKES
WHAT TO AVOID WITH THE sINGLE aRM Floor Press
KEY TIP:
Guess what? Good news! Many avoids are the same for most movements. Once you learn the basics, there's really only a few extra avoids for each individual movement.
1. Avoid sitting up with the weights on your chest
AVOID: Avoid sitting straight up with the weights on your chest at the end of the sets.
WHY NOT?
- This can result in straining or injuring the low back.
WHAT TO DO:
- Move the weights down to the hip creases and then lower to the floor, or hug the weights into your chest and roll on to your side to set the weights down.
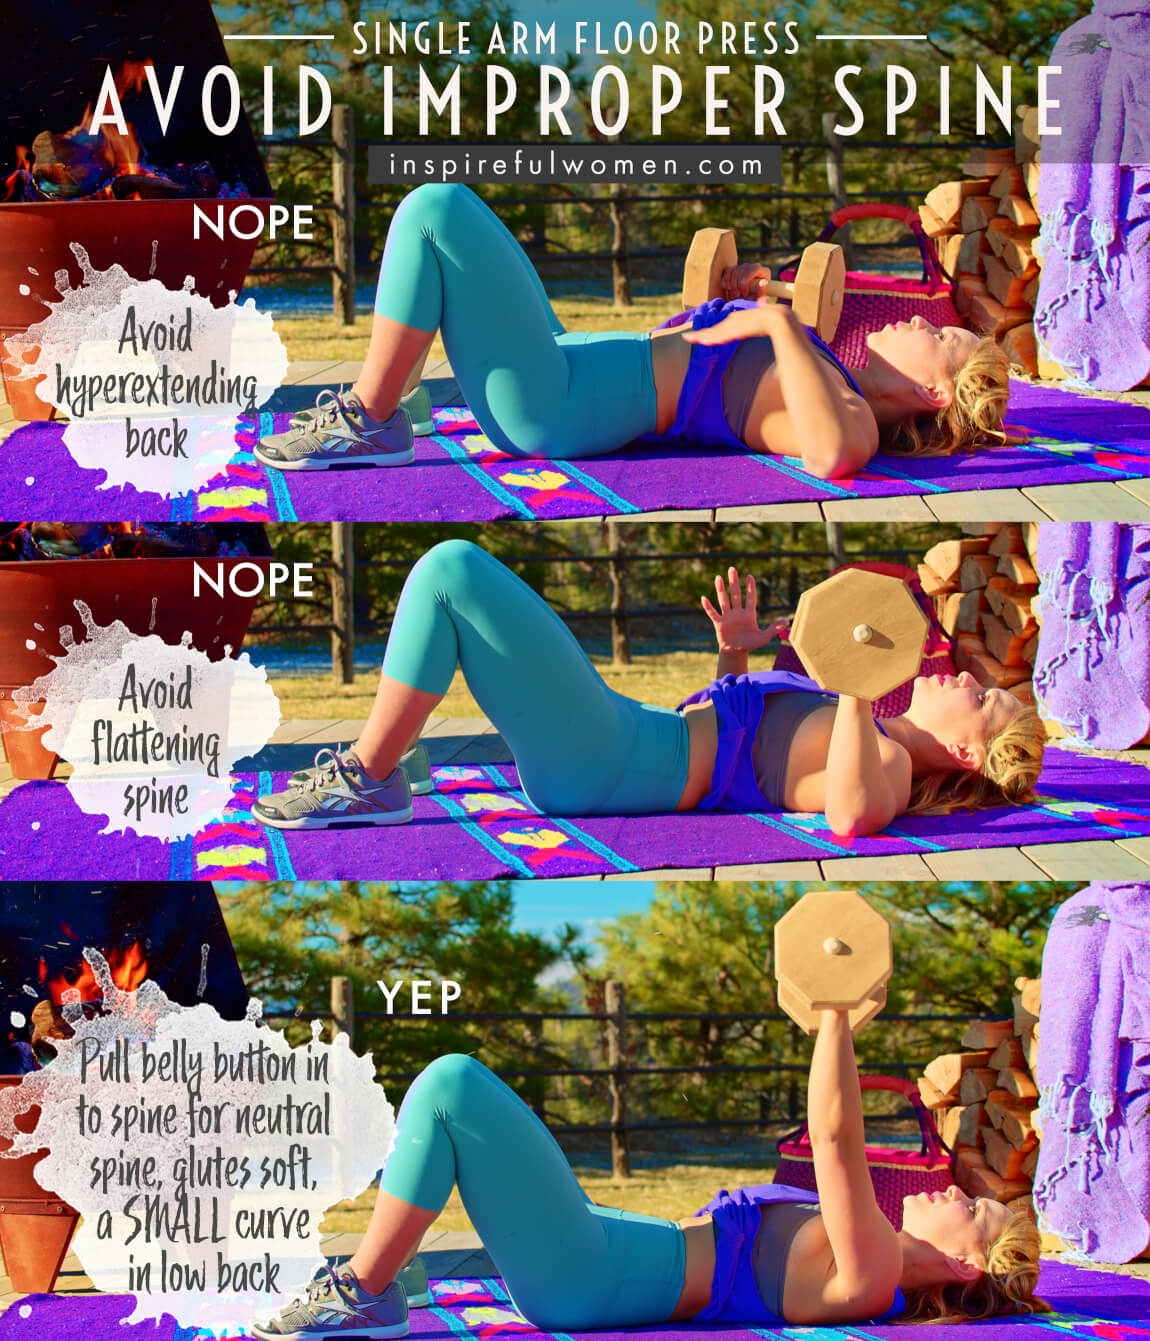
2. Avoid improper Spine Position
AVOID: Avoid arching or flattening your back
WHY NOT?
- This can cause low back joint injury, muscle strain or damage over time.
WHAT TO DO:
- Maintain a neutral spine position.
- If your ribs lower ribs flare upwards or your belly is lifted up - this indicates you are arching your low back. Your pubic bone and front hip bones should be in one plane - can check by placing finger tips on pubic bone and set base of palm on hip bones - your hand should be flat.
- To prevent arching - avoid taking the arms up too far overhead: move arms down
- You should not be able to feel your low back pressed on to the floor, you should be able to slip your hand between the floor and your low back.
Try:- Lower your tailbone to the floor and lengthen the front of your torso, activate the core muscles gently to hold this position.
- Press the back of your shoulders into the floor.
Relax the muscles of the lower body (especially the gluteus maximus) concentrate on the core and upper body.
3. Avoid bending at your wrists
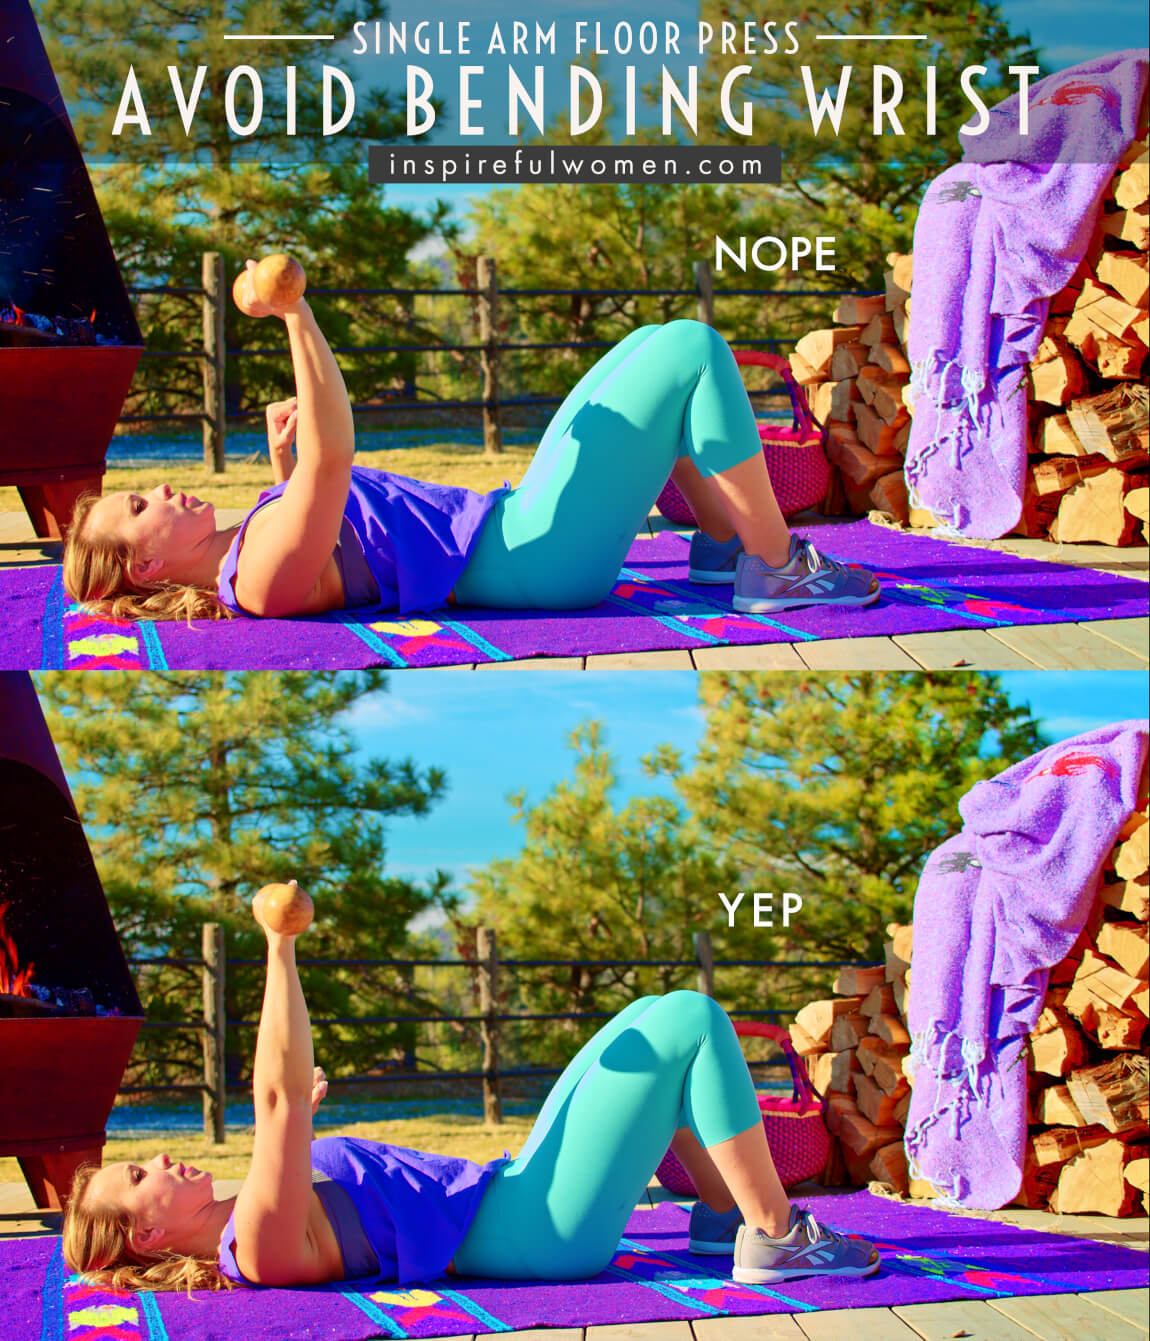
AVOID: Avoid bending at your wrists.
WHY NOT?
- Poor alignment (bent forward or backward) or repetitive movement through the wrist can lead to joint and/or soft tissue irritation or injury over time.
WHAT TO DO:
- Your wrists should be in line with your forearm and should be still throughout the exercise.
4. Avoid pushing Feet Into Floor
AVOID: Avoid pushing down into the floor with the feet.
WHY NOT?
- This is an attempt to use your legs to stabilize the body, you want to try to limit the muscle activity to the arms.
WHAT TO DO:
- If you feel you are pressing into your feet when you press the weight up
- Activate your core muscles, anchor your shoulder blades into the floor
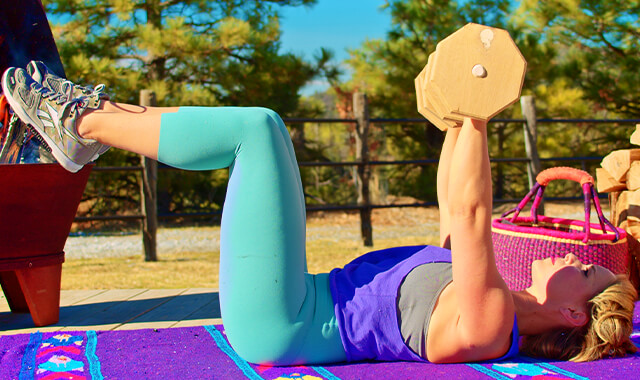
- Lift your legs up to the table top (hips and knees at 90 degrees, feet off of floor) position
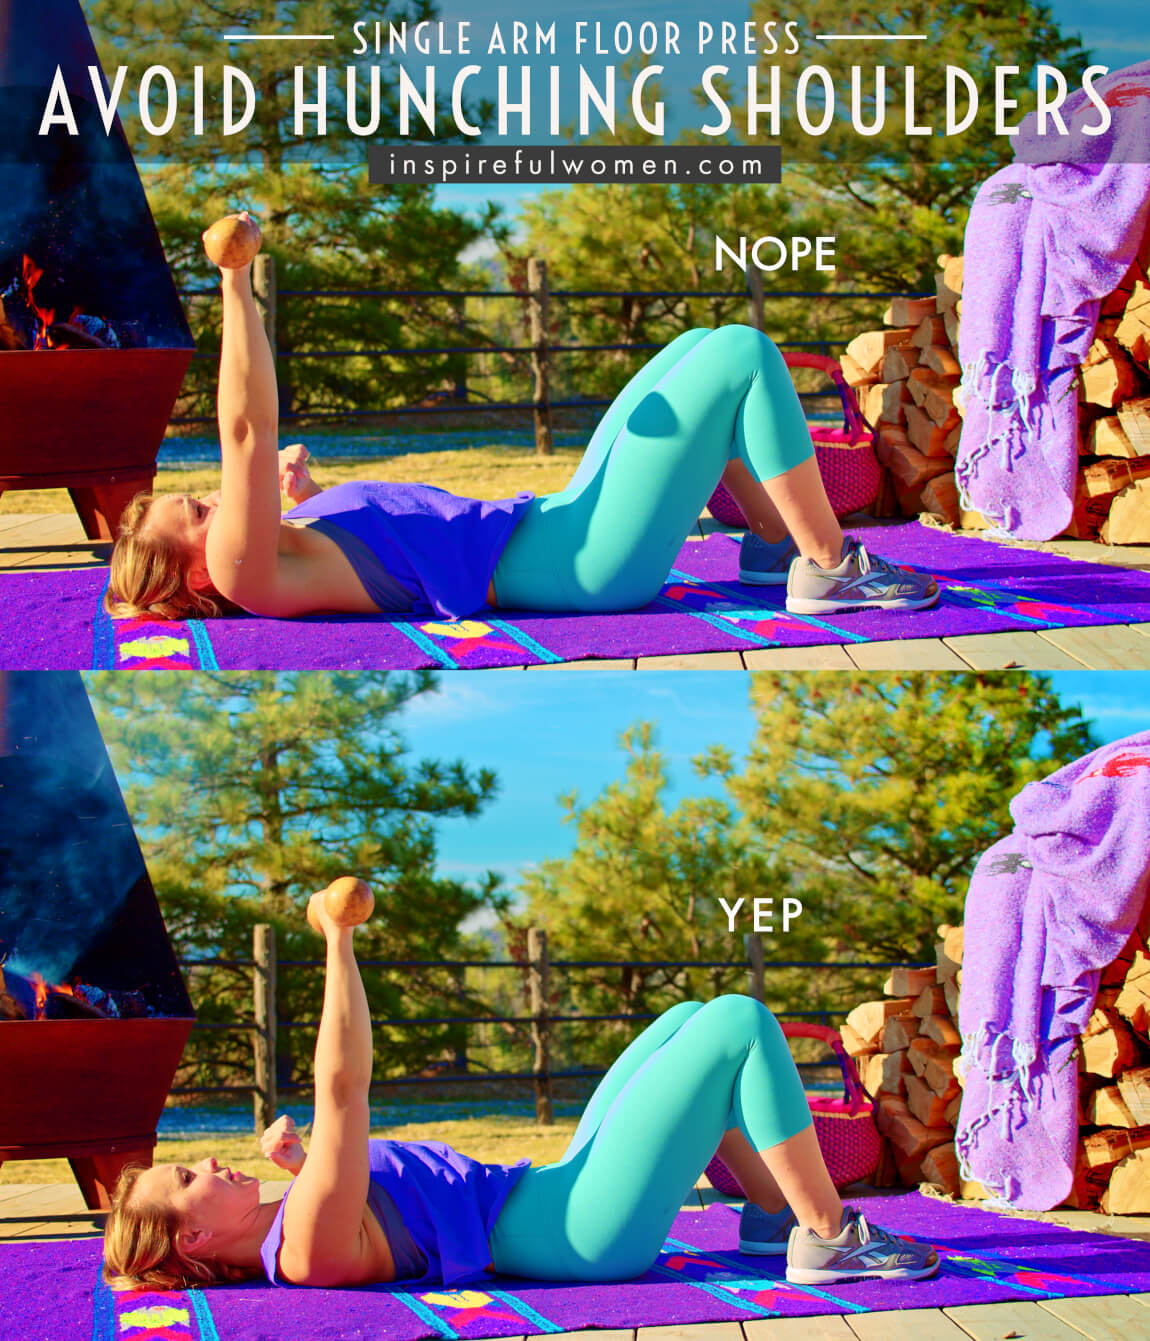
5. Avoid hunching shoulders
AVOID: Avoid hunching the shoulders up towards the ears. Decreased space between the shoulders and earlobes.
WHAT TO DO:
- Pull the shoulders down to keep the space between the ear and the shoulder during the entire rep - this opens up the shoulder to avoid tendon irritation and decreases the activity of the upper traps.
6. Avoid rounding of shoulders
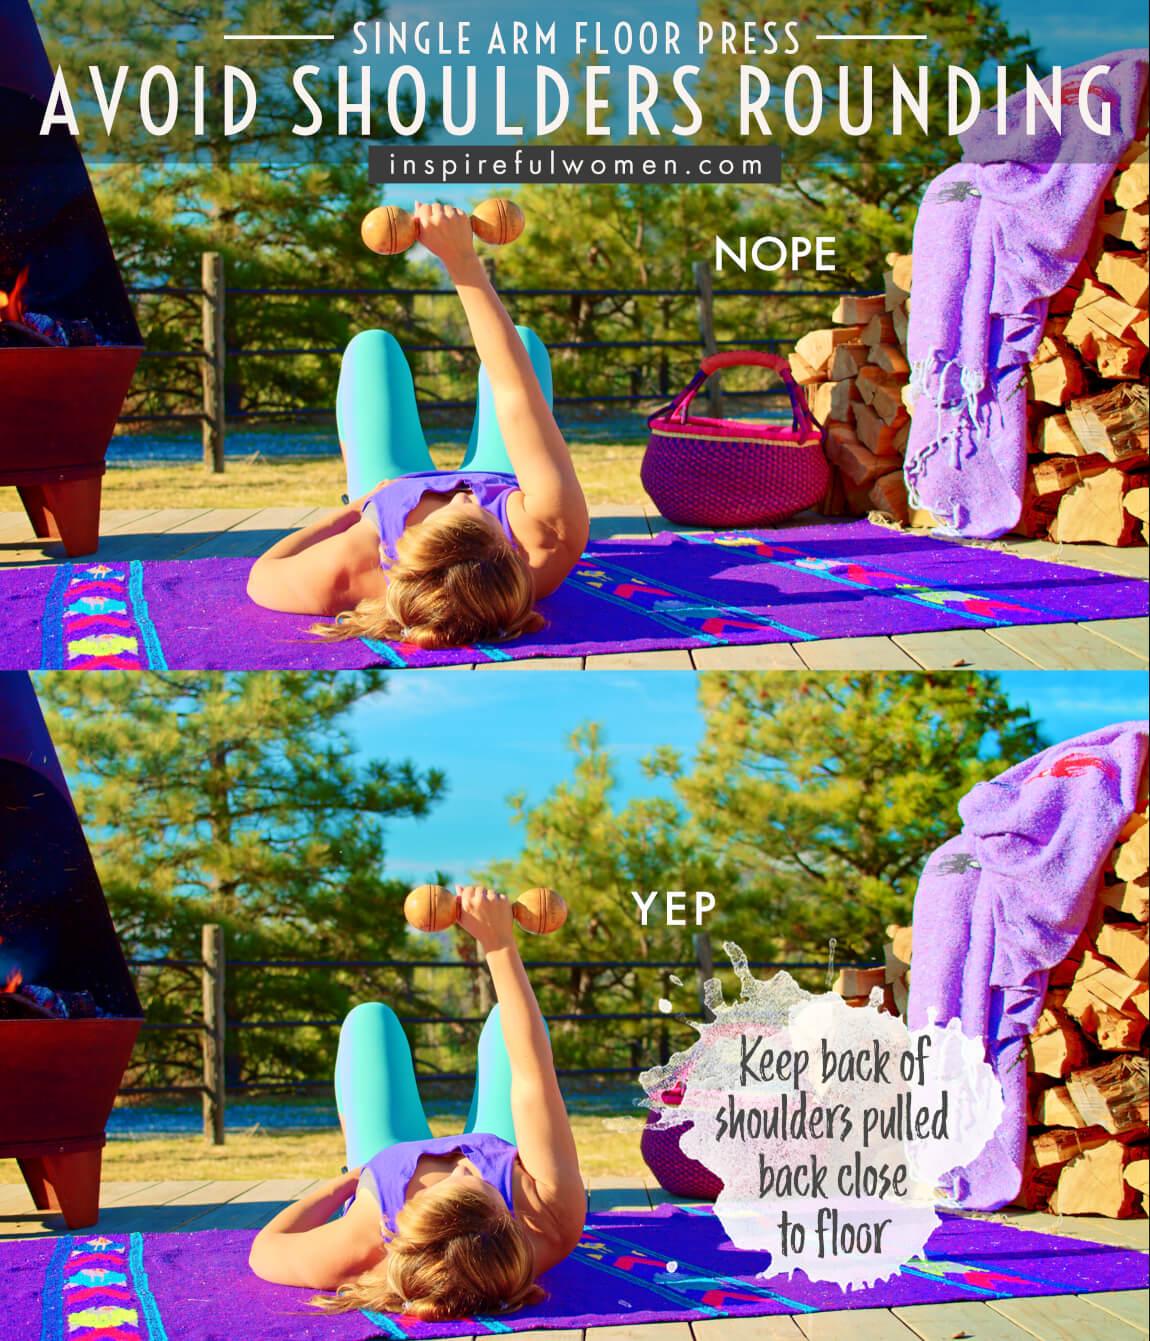
AVOID: Avoid lifting your shoulders off of the floor
WHY NOT?
- Rounding the shoulders (shoulder blade protraction, upper arm internal rotation, humerus- upper arm bone, glides forward) closes down on the space in the shoulder joints and can result in irritation of the tendons.
WHAT TO DO:
- You should be able to feel the back of the shoulders should be firmly planted on the floor.
- Potential causes
- Chest muscles are too tight - unable to get shoulders to the floor: stretch pec muscles and try again. If you cannot maintain the correct position, switch to a chest press position and add pec stretches and exercises for scapular retraction to your program.
7. Avoid arm wobbling
AVOID: Avoid letting your arm wobble during the movement.
WHY NOT?
- This is a sign of poor stability of either: the shoulder blade, the shoulder joint, the elbow joint, or the wrist. It is important to be able to control the movement in order to avoid straining/irritating the ligaments, tendons, and joint surfaces.
WHAT TO DO:
- Gripping the arm muscles in an attempt to stabilize the shoulders: activate your abdominal and scapular stabilizers to provide a stable base. The muscles of the arm will be working but they should not be tight and gripping.
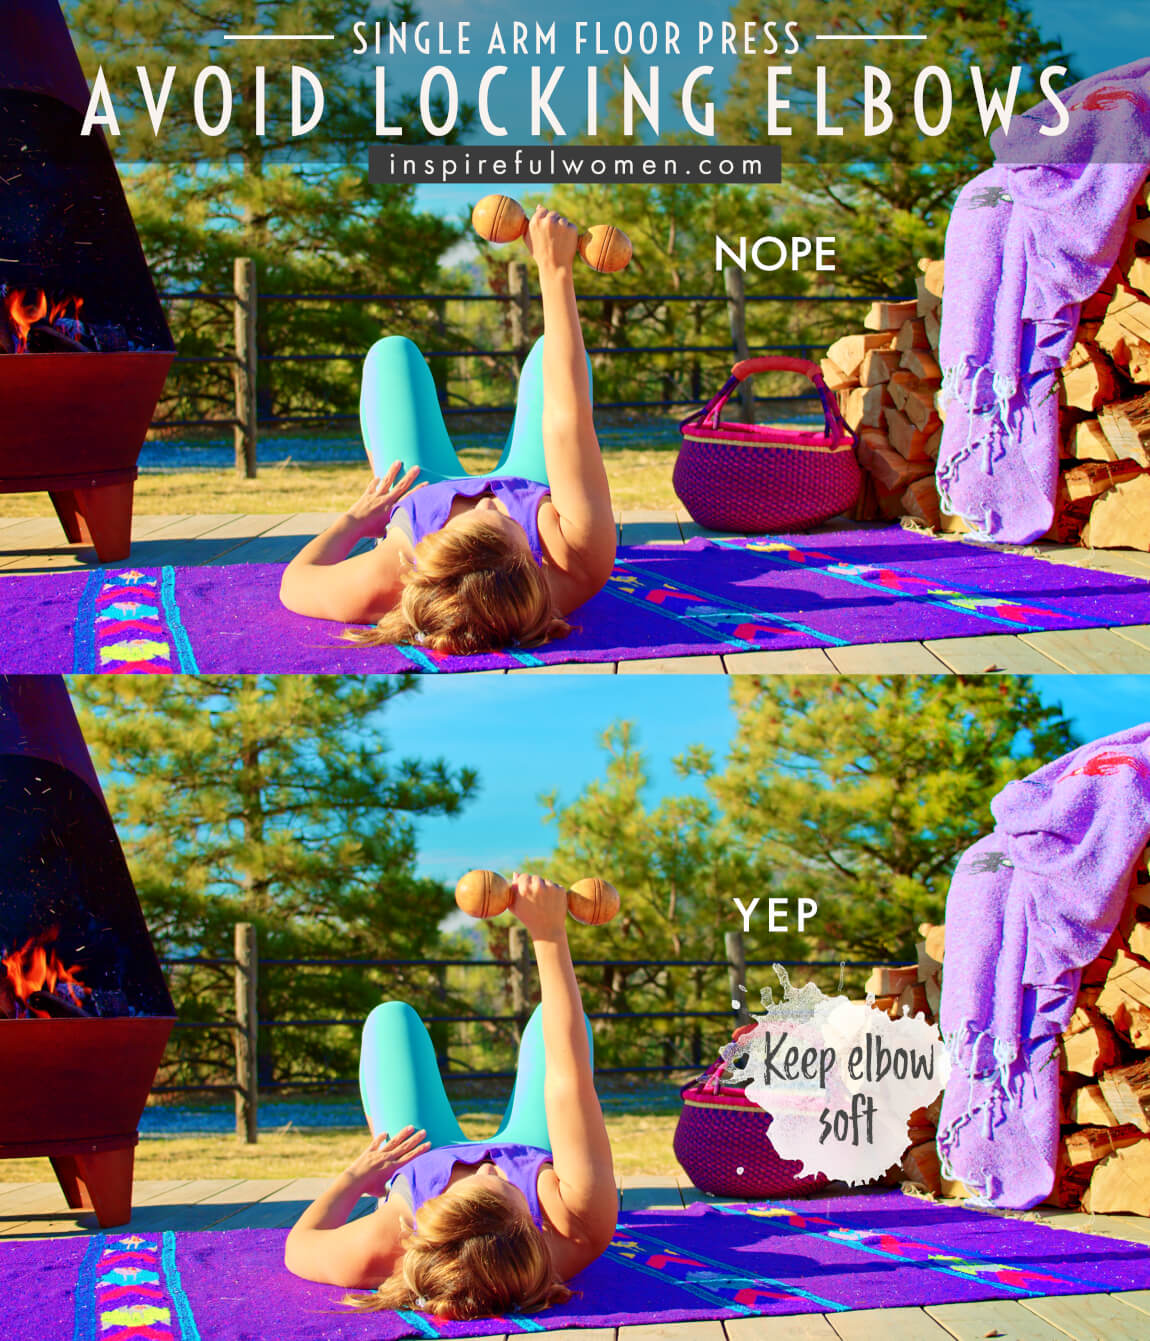
8. Avoid locking elbows
AVOID: Avoid locking the elbows when the arms are out straight.
WHY NOT?
- This puts too much force through the joint and may result in long term damage over time.
WHAT TO DO:
- Keep the elbows slightly bent, even at the end of the movement.
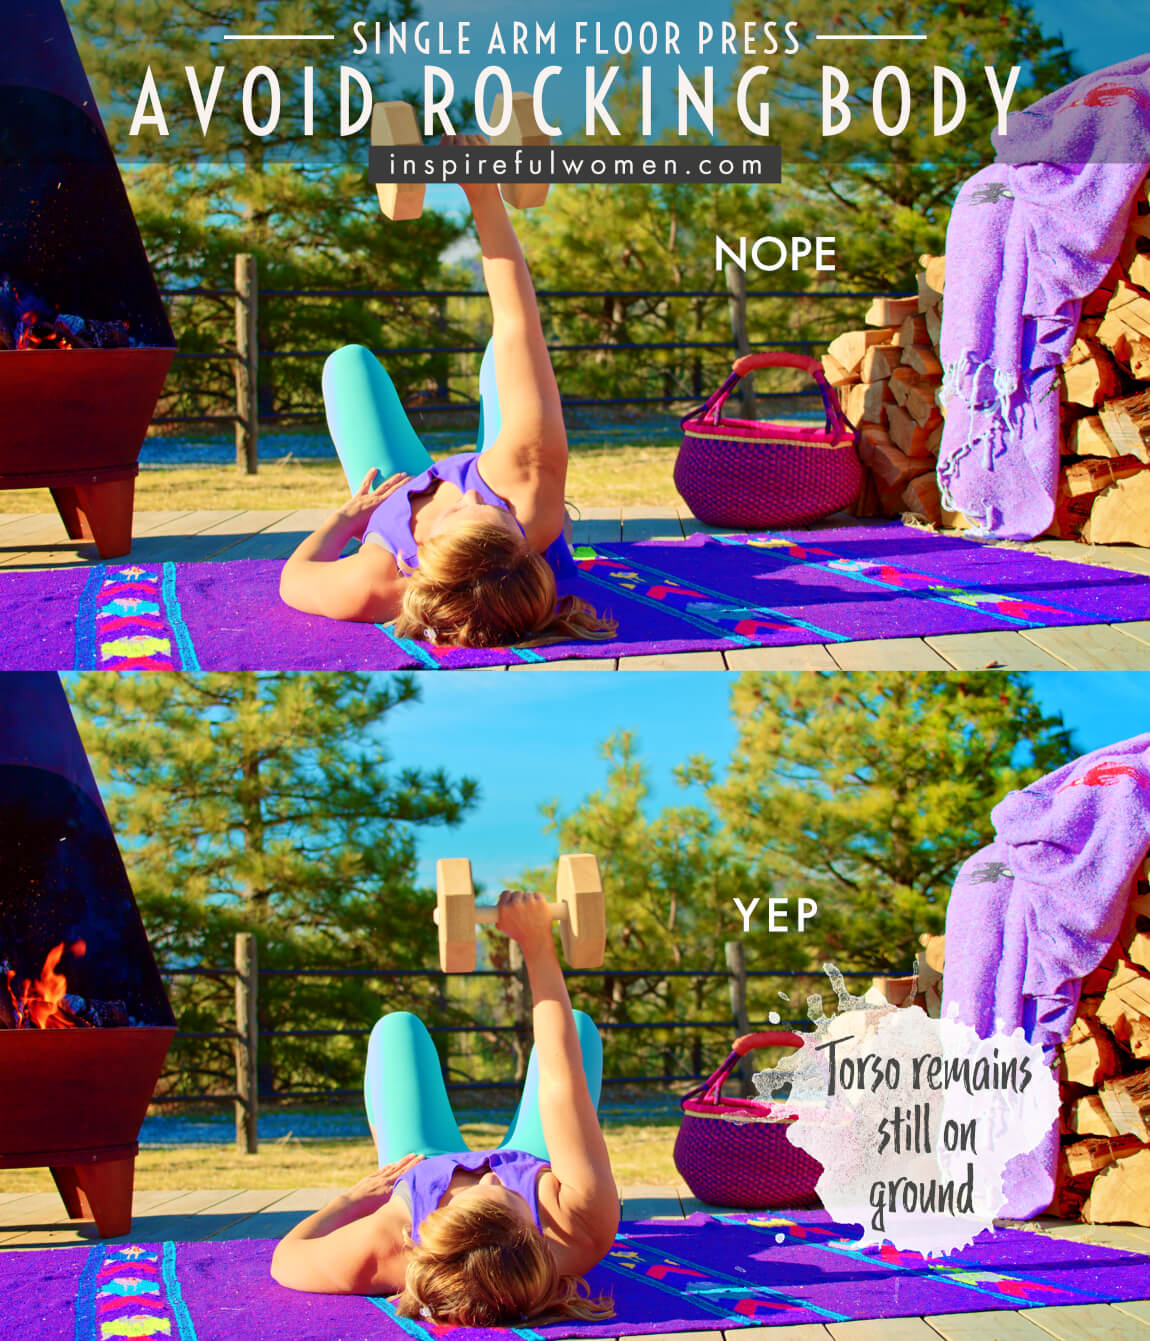
9. Avoid Rocking Body
AVOID: Avoid rocking the body.
WHY NOT?
- Rocking the body will decrease the work that the pec muscles are doing.
WHAT TO DO:
- Lifting the upper back from the floor, lifting one side of the pelvis from the floor, or unequal weight bearing through the feet are all cues that you are rocking the body to help lift the weight.
VARIATIONS
VARIATIONS
VARIATIONS OF the Single Arm Floor Chest Press
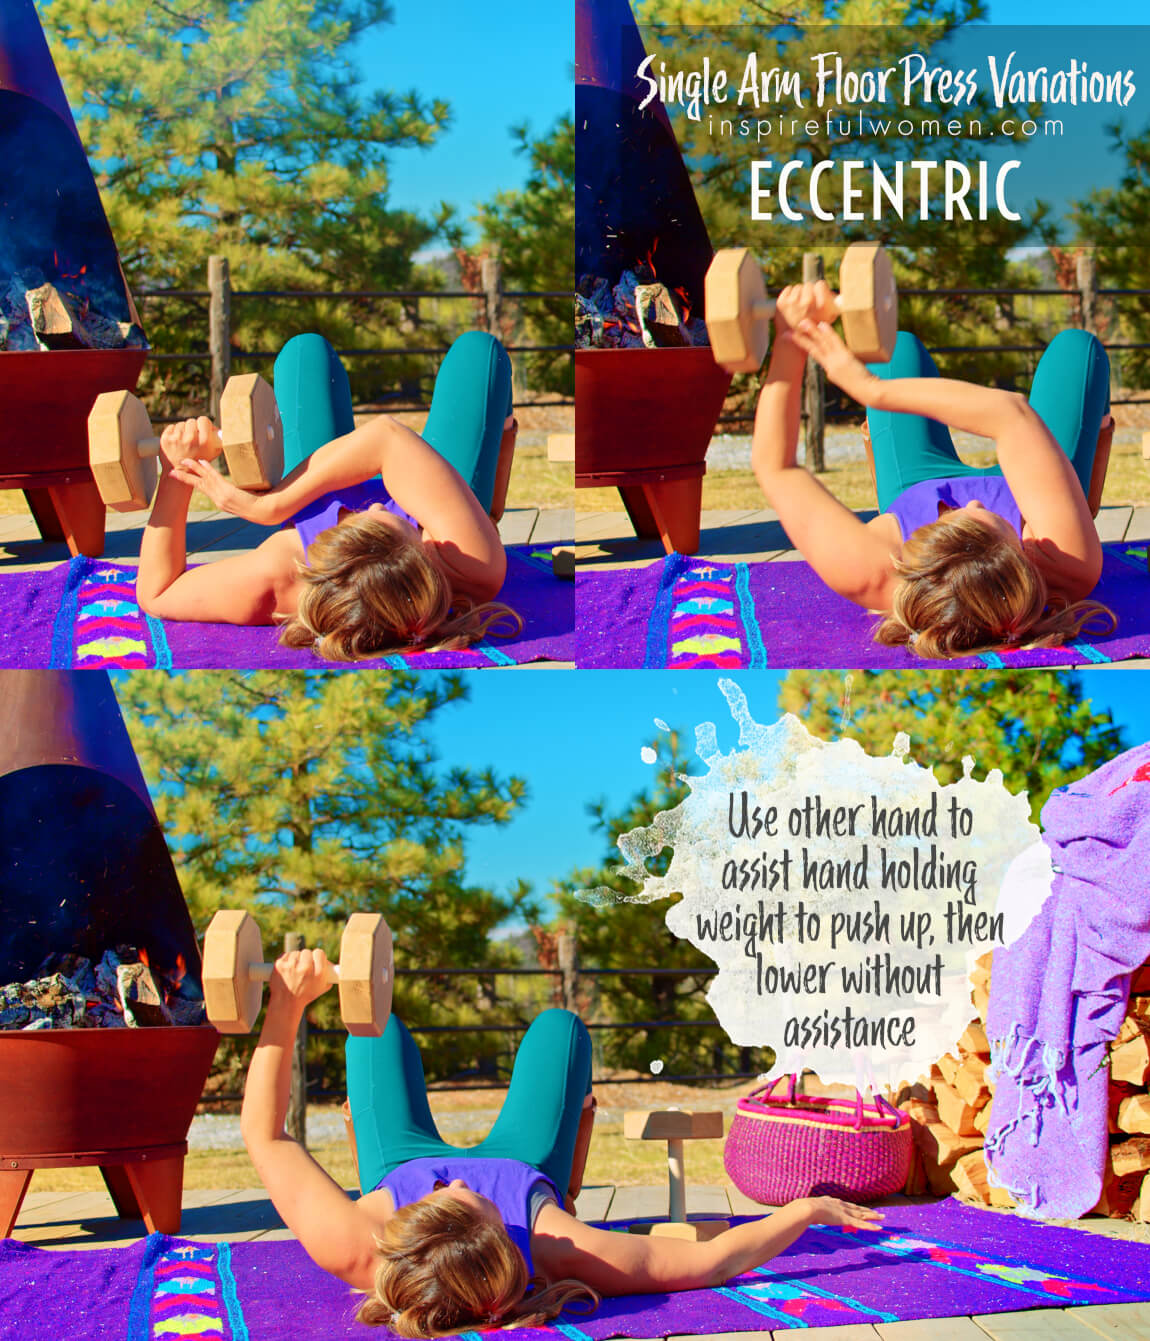
Single-Arm Eccentric
Single Arm Assisted Concentric Slow Eccentric
this involves using a heavier weight than usual by using your other arm to help push the weight up. Hold the dumbbell in the hand of the working arm.
Use the "non-working" arm to help the working arm press the weight up.
At the top of the movement, remove the non-working arm from helping, and let the one working arm slowly lower the weight back down to the starting position by itself.
This variation allows you to overload (using more weight than you are able to push) the muscles and train them eccentrically. This is a good way to strengthen the muscles and to protect them from injury.
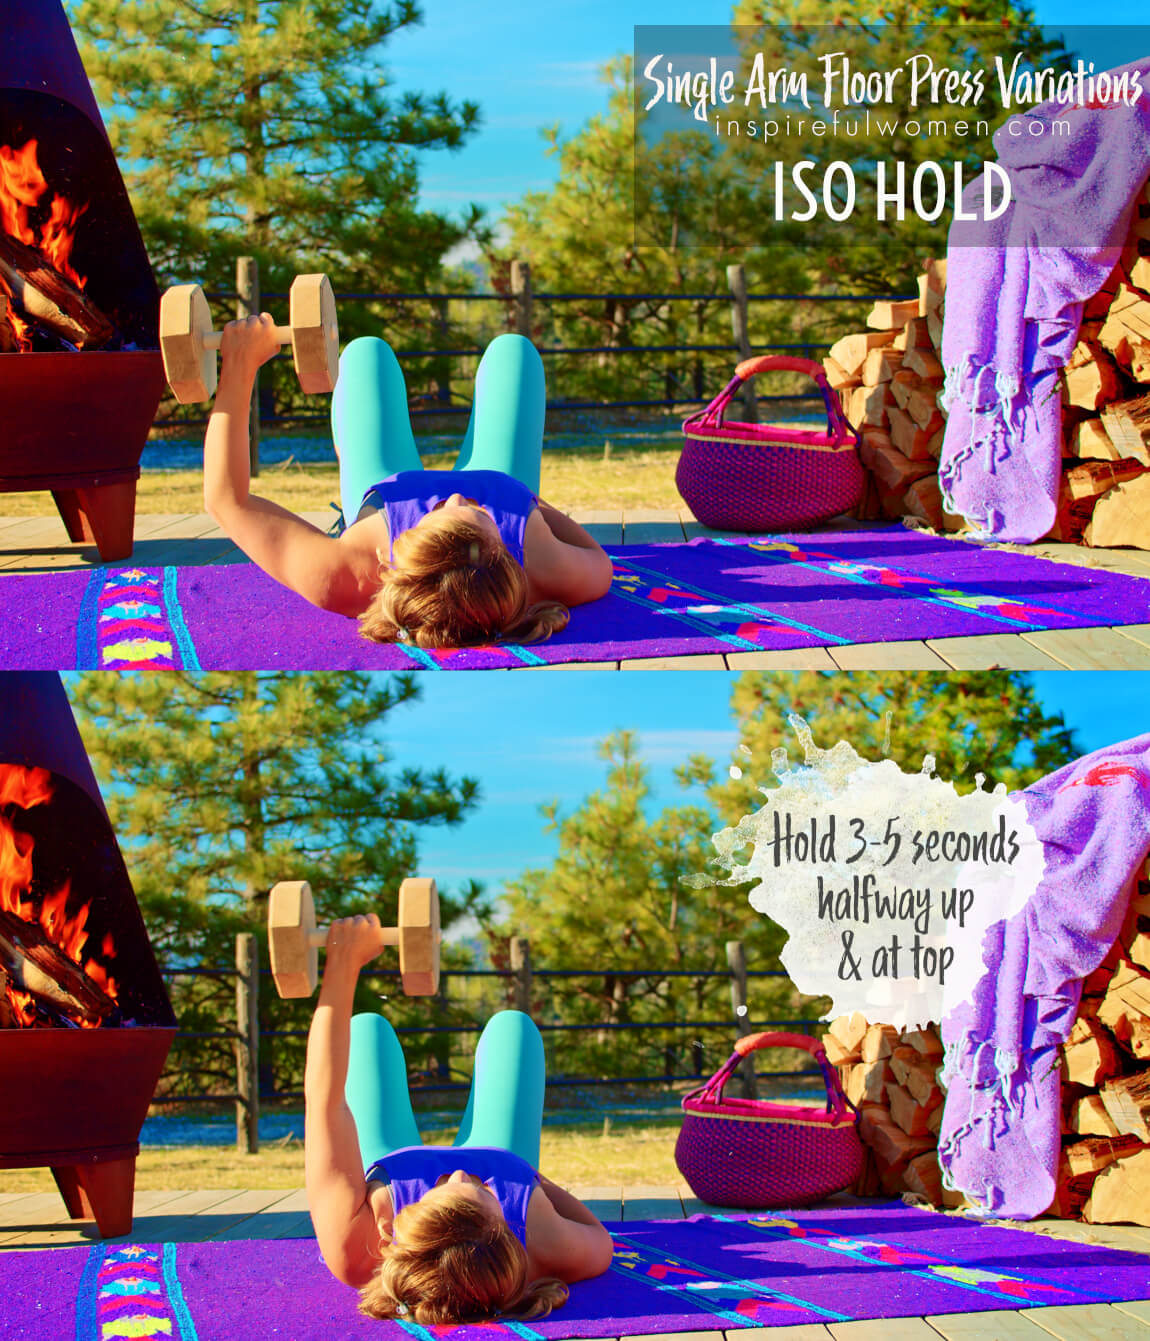
IsoMETRIC Hold
Iso Hold Single Arm Floor Press
Hold at the top of the movement for 3-5 seconds (when the arms are straight overhead), and hold gain midway (when the elbows are bent halfway)3-5 seconds.
Partial Range Pulses
Partial Range Pulses Single Arm Floor Press
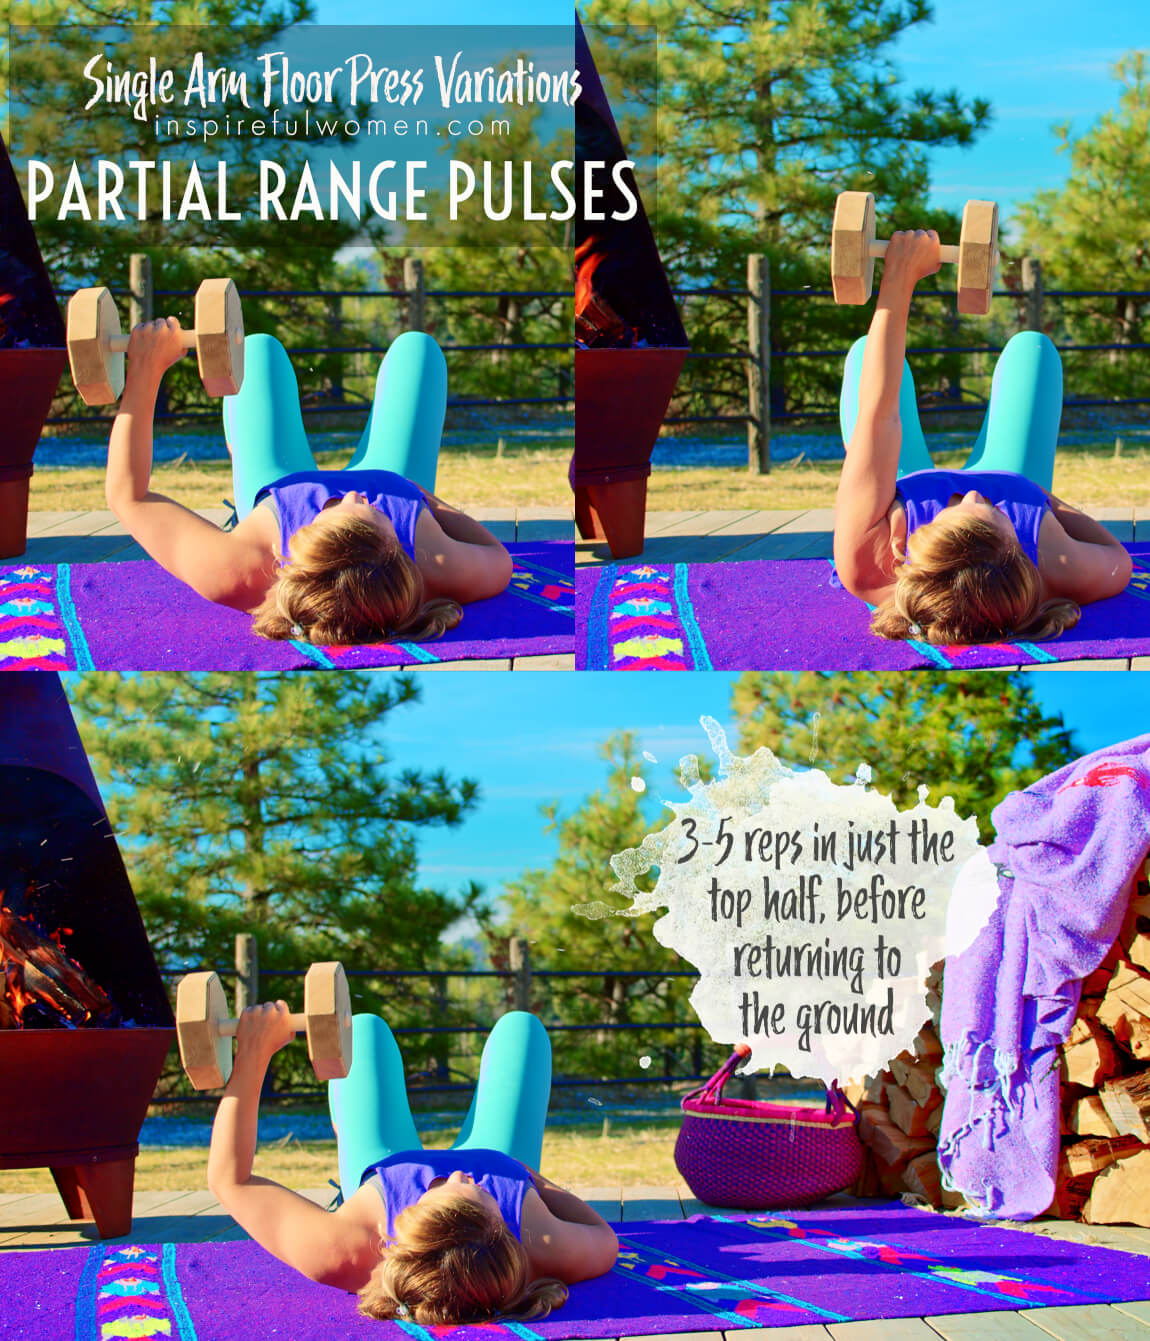
Push all the way up, lower to half way down, do 5 pulses from mid-range to top. Lower down for next rep.
Quick press up and slow lowering down - increases the speed of the concentric contraction (increased power) and slows down the eccentric phase.
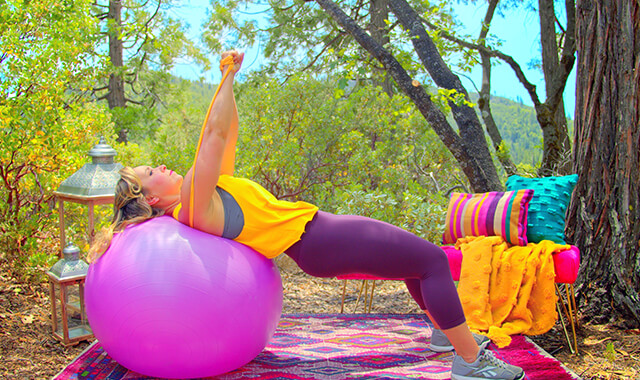
Dumbbell with Resistance Band
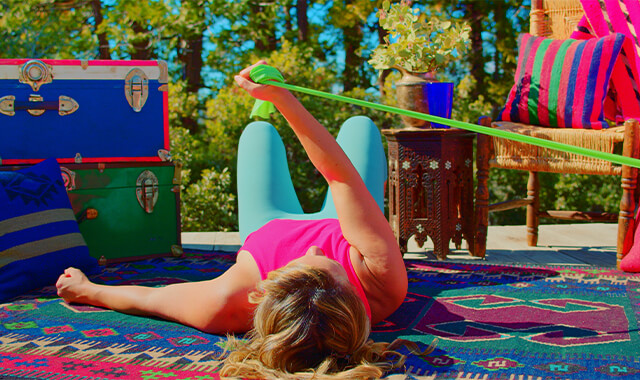
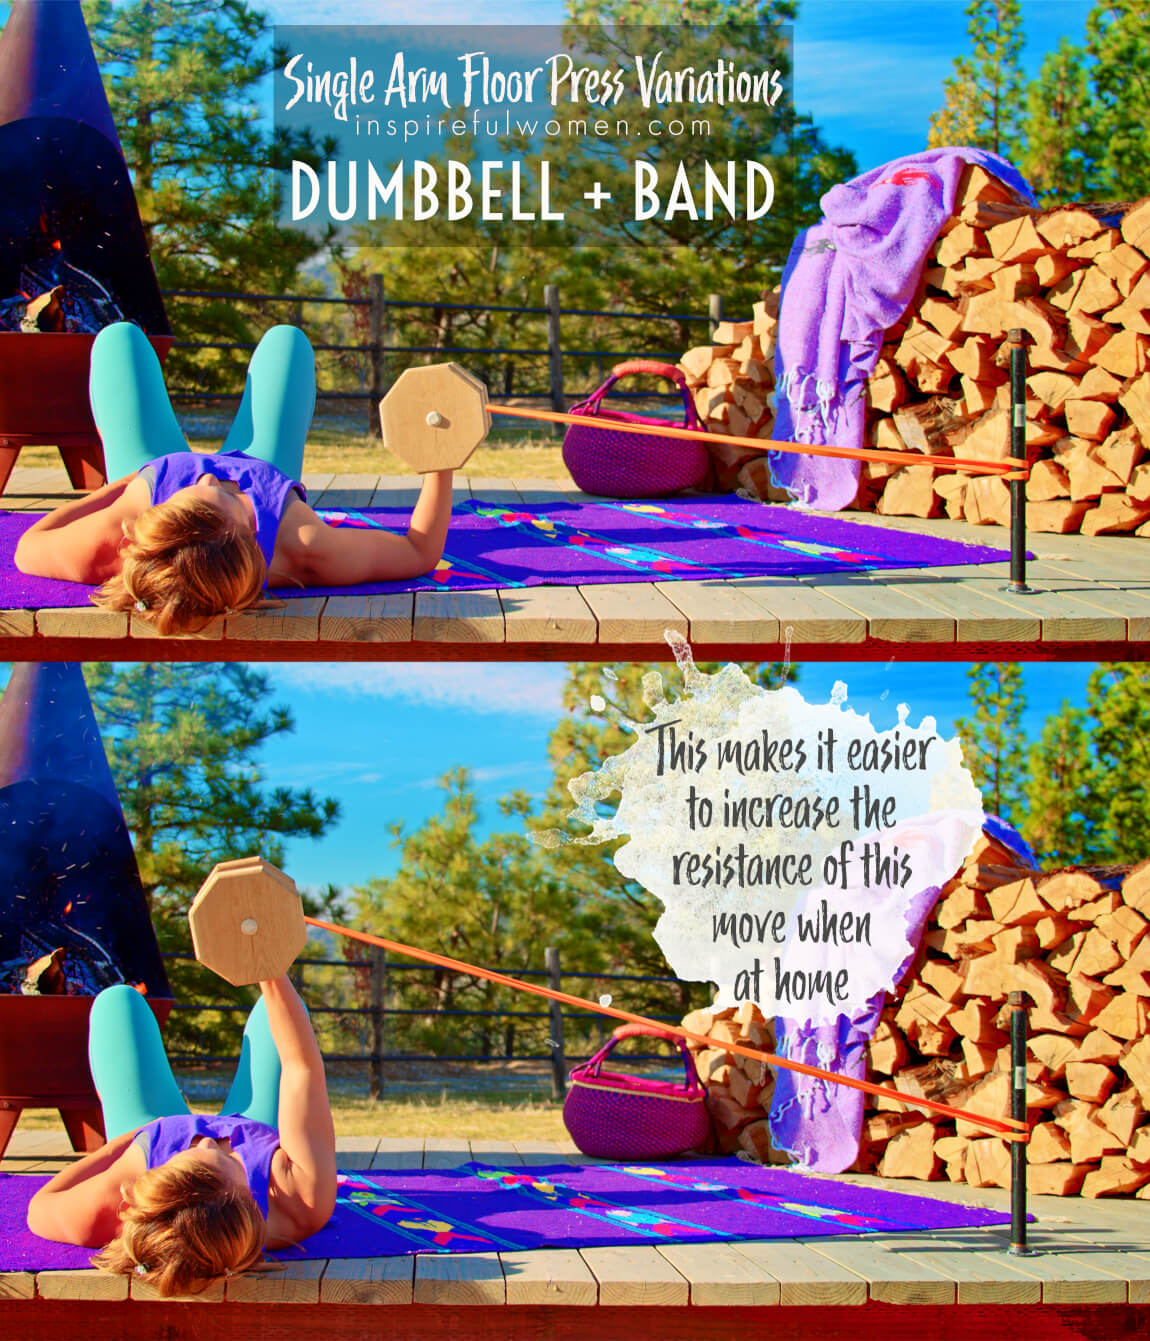
Dumbbell + Band Together Single Arm Floor Press
I LOVE this one. This is a way to really make this exercise feel truly challenging enough to fatigue the muscle once you are more seasoned/experienced exercises.
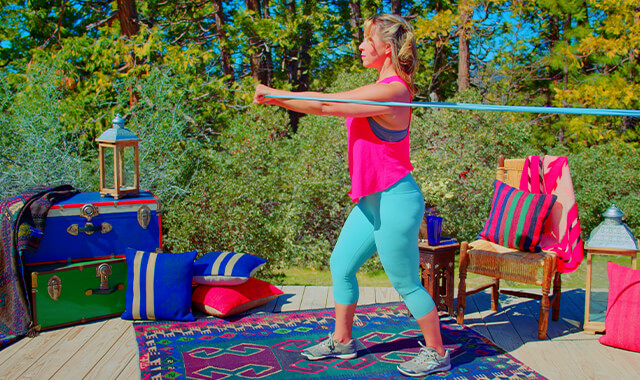
This is a fun variation that increases the resistance at the top of the movement - where there is essentially no resistance from the dumbbell because the weight is right on top of the shoulder joint (no lever arm). Anchor a loop resistance band low - about 6-8 inches from the floor, out to the side of your working arm, and the other end around the handle of the dumbbell. The band will be pulling your arm at an angle diagonally out and down (directly against horizontal adduction.
There should be quite a bit of tension on the band in the starting position. Press up with concentration on keeping your hand over your chest. This variation will increase the effort of the pectoralis muscle throughout the press.
WHAT WE'RE DOING TODAY
WHAT & WHY
BENEFITS OF TRAINING THE Pectoralis Major And Triceps
WHAT
THE FLOOR PRESS WORKS MULTIPLE MUSCLES & JOINTS AT ONCE
The floor press exercise works the pectoralis major (the largest chest muscle) and your triceps muscles.
This exercise is a compound movement - meaning that it works more than one joint (shoulder & elbows joints) and multiple muscle groups. In the floor press, the upper arm moves in towards the middle of the chest and the elbow will straighten. Compound movements are time efficient and more functional. Functional exercises involve movements that we use in our daily lives, movements that require coordinating the movement of many muscles and more than one joint at a time.
The floor press is done lying face up with the knees bent. This stable position makes it easy to use heavier weights for training the large chest muscle. In this position the focus is on the muscles of the arms, the muscles of the core and legs are relatively still and don’t help very much. The upper arm movement is limited by the floor, this makes the exercise safer for the shoulder joints.
Other exercises that work the pectoralis muscles may involve letting the arm move back behind the torso, this can strain the soft tissues on the front of the joint, especially when heavier resistance is used. In the floor press, the upper arm rests on the floor between each rep. This takes out any momentum that may be used to help the muscles as the next rep begins, which basically means this is a built-in way to make sure we don't subconciously cheat the move - our muscles will HAVE to do the work.
The pectoralis major muscle is a large fan-shaped muscle on the chest. It attaches to the collarbone, sternum (breast bone), the cartilage of the first 6 ribs, and the upper arm. The angle of the arms can be easily adjusted during the floor press to target different portions of the pectoralis major.
WHY BOTHER DOING IT?
WHY
WHY DO WE EVEN CARE?
TRAINS OUR CHEST & TRICEPS TO DO THEIR MAIN JOBS IN LIFE
The floor press is a very functional exercise. The exercise trains the chest (pectoralis major muscle) and triceps to do two of their main jobs - moving the arms and stabilizing the joints.
The Floor Press uses the pectoralis major as a prime mover to pull the arm in towards the body, and as a stabilizer of the shoulder joint and shoulder blade (held in depression) as the weight is pressed up, and it uses the triceps as a prime mover to extend the arm (straighten the elbow) and as a stabilizer for the elbow joint.
STRENGTHENS ABILITY TO KEEP SHOULDER STABLE WHILE DOING STUFF WITH HANDS
The primary functions of the pectoralis major are to move the arm and to stabilize the shoulder. The shoulder is the least stable joint in the whole body, and your hand depends on it to hold the arm still when you use your hand. Imagine trying to write if your shoulder was moving. The other problem with the poor stability of the shoulder joint is that it can lead to more wear and tear on the joint surfaces.
BALANCES OUT BICEP STRENGTH FOR BETTER MUSCLE COORDINATION
The triceps lies along the backside of the upper arm and balance out the biceps brachii muscle which lies along the front of the arm. Even though these two muscles move the elbow in opposite ways, the biceps bends the elbow and the triceps straighten the elbow, they coordinate their activity to control the movement and stabilization of the elbow joint.
If one muscle is a lot stronger than the other muscle, it can interfere with the position and movement of the joint, and can possibly cause damage or an injury to the muscle or the joint. Many people put more time and energy into exercising their biceps than they do their triceps.
It is important to work the muscles that do opposite movements equally in order to prevent imbalances that may lead to injury. In order to keep the joints and muscles of the arms healthy, it is important to include exercises for both the biceps and the triceps in your exercise program.
EVERYDAY LIFE
EVERYDAY LIFE &
MUSCLE FUNCTION
HOW WE USE OUR SIDE CHEST & TRICEPS IN EVERYDAY LIFE
PECTORALIS MAJOR - CHEST MUSCLE
1. BRINGING YOUR ARM ACROSS YOUR BODY, TOWARDS THE MIDLINE (HORIZONTAL ADDUCTION)
- Reaching across to fasten a seat belt
- Putting a belt into pants (reaching across to the opposite side in front of the body)
- Lifting objects in front of the body
- Carrying heavy objects in front: grocery bag, child
- Picking up your pet chicken
2. BRING YOUR ARM UP AND ACROSS (upper fibers of the pectoralis)
- Touching the opposite ear - putting on an earring
- Using blow dryer on opposite side of the head as hand
- LOWER FIBERS BRING THE ARM DOWN AND ACROSS
- Reaching the opposite hip
3. MEDIAL (INTERNAL) ROTATION OF THE ARM (ROTATING THE UPPER ARM INWARDS)
- Rotating arm down to empty a can
4. CAN ASSIST IN DEPRESSION (MOVE DOWN THE SPINE), DOWNWARD ROTATION, AND PROTRACTION (MOVING FORWARD AROUND THE RIBCAGE, AND STABILIZATION OF THE SHOULDER BLADE AND STABILIZATION OF THE SHOULDER JOINT
- Control during all arm and hand activities that require strength and/or precision - writing, knitting, using a screwdriver
TRICEPS
1. THE TRICEPS MUSCLE’S PRIMARY FUNCTION IS TO STRAIGHTEN THE ELBOW (ALL THREE HEADS)
- Washing windows - straightening the elbow
2. THE LONG HEAD ACTS TO PULL THE ARM DOWN FROM A FLEXED (THE ARM IS REACHING OVERHEAD OR OUT IN FRONT OF THE BODY), AND MOVES IT BEHIND THE BODY (THIS ACTION IS NOT USED IN THE FLOOR PRESS EXERCISE)
- Pulling a cord down to open the curtains
- Pulling yourself up when climbing a ladder
3. ALL THREE HEADS HELP TO STABILIZE THE ELBOW JOINT
- Control during all hand activities that require strength and/or precision - writing, knitting, using a screwdriver.
4. THE LONG HEAD HELPS TO STABILIZE THE SHOULDER JOINT
- Control during all hand activities that require strength and/or precision - writing, knitting, using a screwdriver
The pectoralis and triceps work together for shoulder adduction, internal rotation, elbow extension, and stabilization of the shoulder blade, shoulder joint and elbow joint in activities like pushing a stroller or lawnmower, pushing a door open.
SCIENCY STUFF
SCIENCY STUFF
SPIFFILICIOUS FACTS ABOUT MUSCLES & MOVES
The main functions of the pectoralis muscle are to move and stabilize the upper arm. The pectoralis major muscle helps to move the arm into horizontal adduction (bringing the arm towards the midline of the body). The upper fibers of the pectoralis major help to lift the arms up and the lower fibers of the muscle help to pull the arms down. The pectoralis muscle also helps to stabilize the shoulder joint and contributes to scapular (shoulder blade) depression and stabilization.
The triceps muscle is made up of three portions, the lateral, medial, and long heads. All three heads of the triceps cross the elbow joint. The long head of the triceps also crosses the shoulder joint. This muscle makes up 2/3rds of the muscle bulk of the upper arm. The triceps lies along the backside of the upper arm and balance out the biceps brachii muscle which lies along the front of the arm.
ALLLL MUSCLES & WHEN
ALL MUSCLES WORKING & WHEN DURING THE Single Arm Floor Chest Press
The scapular retractors and depressors (mid and lower traps, rhomboids, lats, pecs (minor and major), subclavius, serratus anterior) become active during set up for the exercise. The muscles of the torso (transversus abdominis, rectus abdominis, erector spinae, obliques, quadratus lumborum work to maintain a neutral spine position - how much they work will depend on how much resistance is used). The muscles of arms (upper - biceps, triceps, coracobrachialis, pecs, lats, teres major, rotator cuff, and forearm - [triceps and biceps], anconeus, radiobrachialis, brachialis, extensor, and flexor radial and carpal ulnaris, flexor and extensor digitorum profundus and superficialis, pronator teres, supinator - possibly others, but their contribution is minimal) work to stabilize the wrist, elbow and shoulder joints. The pectoralis major is the prime mover, acting concentrically to pull the upper arm inward towards midline. The anterior deltoid and coracobrachialis can contribute to this movement - how much they contribute is affected by how much resistance is being used. As the arm is pressed up, the obliques and quadratus lumborum will become more active to help stabilize the torso against the uneven load. The triceps and anconeus work to straighten the elbow as the hand pushes upwards towards the ceiling.
The triceps, pectoralis major work eccentrically to control the return to the starting position.
PIN IT FOR LATER!
